
Crochet Stitches and Techniques Used
In this collection of crochet mushroom patterns, you will encounter several basic crochet stitches and techniques. Familiarity with these stitches will help you create beautiful and whimsical mushrooms. Below are the key stitches and techniques you will use throughout the patterns.
Single Crochet
The single crochet (sc) stitch is fundamental in creating the body of the mushrooms. It provides a tight and sturdy fabric, which is perfect for amigurumi projects like these mushrooms. To make a single crochet stitch, follow these steps:
- Insert your hook into the stitch where you want to work.
- Yarn over and pull up a loop (you will have two loops on your hook).
- Yarn over again and pull through both loops on the hook.
Repeat this process for the desired number of stitches. Remember to keep your tension consistent for an even finish.
IMAGE: A close-up of a single crochet stitch, demonstrating the stitch structure clearly.
ALT: A close-up view of the single crochet stitch used in crochet mushroom patterns.
Magic Ring
The magic ring technique is essential for starting many of the mushroom patterns, especially those that are worked in the round. This method allows you to create a tight center, preventing gaps in your work. Here’s how to make a magic ring:
- Hold the yarn in your hand, forming a loop with the working yarn over the tail end.
- Insert your hook through the loop and yarn over to pull up a loop.
- Chain 1 to secure the ring.
- Work your first round of stitches into the ring, making sure to crochet over the tail end to secure it.
Once you have completed the desired number of stitches, pull the tail to tighten the ring. This technique is particularly useful for creating a neat and tidy start to your mushroom projects.
Introduction / About This 20 Cute Crochet Mushroom Patterns You’ll Want to Make
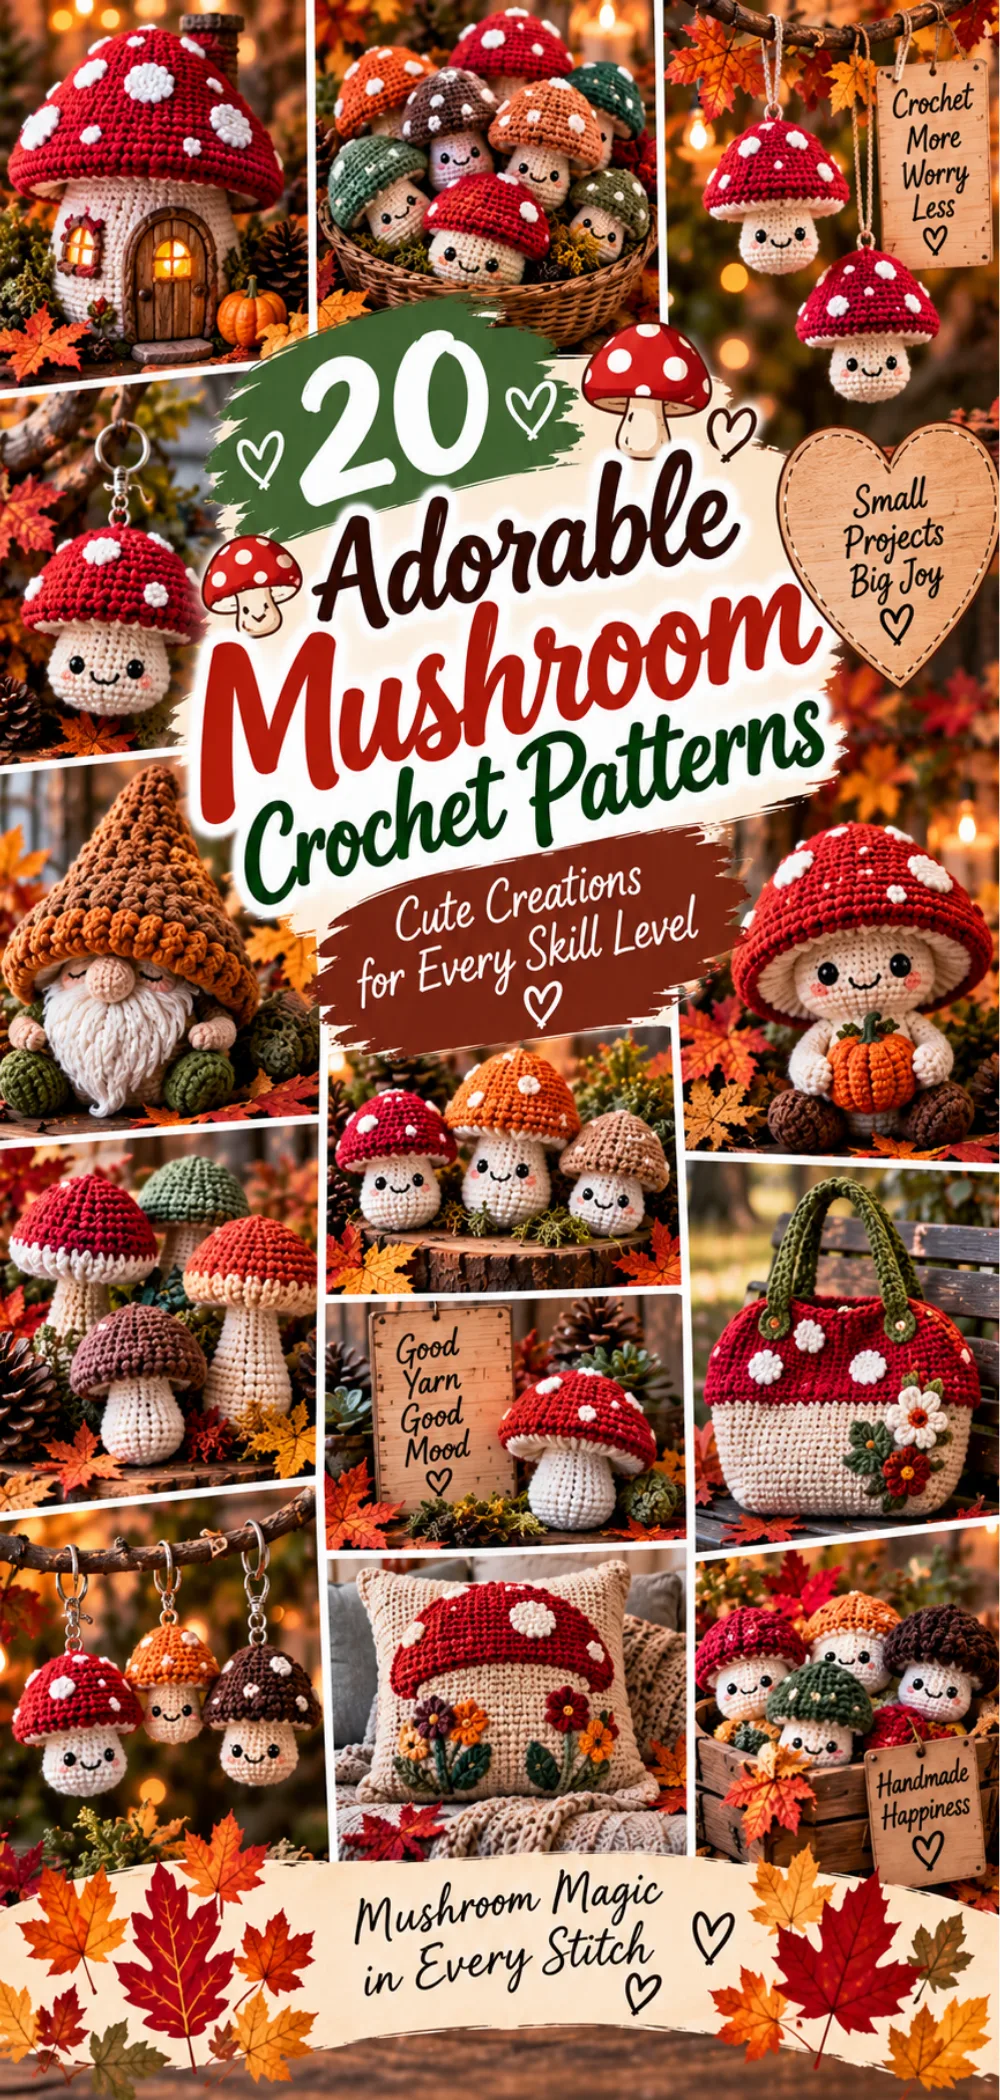
Welcome to the whimsical world of crochet mushrooms! These delightful projects are not only fun to make but also add a touch of charm to any space. Whether you’re a beginner or an intermediate crocheter, this collection features 20 unique patterns that cater to all skill levels. Each pattern is designed to be easy to follow, ensuring that you can create your own adorable mushrooms with confidence.
Crochet mushrooms are incredibly versatile. They can serve as playful decorations for your home, charming toys for children, or thoughtful gifts for friends and family. The possibilities are endless! As you dive into these patterns, don’t hesitate to explore your creativity. Experiment with different yarn colors and embellishments to make each mushroom truly your own.
IMAGE: A vibrant display of various finished crochet mushrooms in different colors and sizes, arranged on a wooden table with a soft, natural background.
ALT: A collection of 20 cute crochet mushroom patterns displayed in various colors and sizes.
Crochet Pattern Quick Overview
| Detail | Information |
| Skill Level | Beginner to Intermediate |
| Crochet Terminology | US Terms |
| Yarn Weight | Worsted or DK |
| Crochet Hook Size | 4.0 mm (G) or as needed |
| Approximate Finished Size | Varies by pattern |
| Approximate Working Time | 1-3 hours per mushroom |
| Construction Method | Worked in rounds |
| Crochet Technique | Amigurumi, basic stitches |
| Pattern Type | Free crochet patterns |
About This 20 Cute Crochet Mushroom Patterns You’ll Want to Make
Each of the 20 crochet mushroom patterns in this collection is designed with simplicity in mind, making them accessible for both beginners and intermediate crocheters. The majority of these patterns are constructed using basic crochet techniques, primarily worked in rounds. This method not only helps in creating a seamless look but also allows for easy shaping of the mushrooms.
As you work through the patterns, you may encounter some that require joining pieces or adding embellishments, such as spots or decorative elements. These additional steps will enhance your skills and give your mushrooms a unique flair. Don’t worry if you’re new to these techniques; clear instructions will guide you through each step.
Throughout this crochet journey, you will practice essential skills such as increasing and decreasing stitches, which are crucial for shaping your mushrooms. Additionally, working in the round will become second nature as you create these adorable projects. Embrace the learning process, and enjoy the satisfaction of watching your crochet mushrooms come to life!
Materials and Supplies
To create your adorable crochet mushrooms, you will need a few essential materials. The choice of yarn is particularly important, as it affects both the texture and appearance of your finished mushrooms. Here’s a list of the specific materials you will need:
- Yarn in various colors
- Crochet hook (size appropriate for yarn)
- Scissors
- Tapestry needle
- Stuffing (optional)
Using different yarn types and colors can significantly enhance the whimsical nature of your mushrooms. For instance, vibrant colors can make your mushrooms pop, while softer hues can create a more subtle look. Don’t hesitate to mix and match yarns to achieve unique designs!
IMAGE: A neatly arranged collection of yarn, crochet hook, scissors, and tapestry needle, all essential for making crochet mushrooms.
ALT: Materials needed for crochet mushroom patterns including yarn, crochet hook, and tools.
Best Yarn for 20 Cute Crochet Mushroom Patterns
For these crochet mushroom patterns, I recommend using yarn types such as cotton or acrylic. Cotton yarn is durable and has a nice drape, making it perfect for amigurumi projects. Acrylic yarn is also a great choice due to its affordability and wide range of colors. Both types are easy to work with and hold their shape well.
When selecting colors, consider the whimsical nature of mushrooms. Bright reds, yellows, and greens can create a playful look, while pastel shades can give a more delicate appearance. Each mushroom can be customized to fit your personal style, so feel free to experiment!
As for yardage, most mushroom patterns will require approximately 20-50 yards of yarn, depending on the size and complexity of the design. Always check the specific pattern for exact yardage requirements.
Suitable Yarn Substitutions
If you don’t have cotton or acrylic yarn on hand, there are several suitable yarn substitutions you can consider. For example, bamboo yarn can provide a lovely sheen and softness, while wool can add warmth and texture. Just remember to check the gauge and yardage to ensure your mushrooms turn out as intended.
Different fibers can affect the final look and feel of your mushrooms. For instance, using a fuzzy yarn can create a soft, whimsical appearance, while a smooth yarn can give a more polished finish. Always keep in mind how the yarn will behave when crocheted, as this can influence your overall design.
Crochet Hook and Additional Tools
For these crochet mushroom patterns, a 4.0 mm (G) crochet hook is recommended, but you may adjust the size based on your yarn choice and personal tension. A smaller hook will create tighter stitches, which is often desirable for amigurumi projects.
In addition to your crochet hook, having a few extra tools can make your crocheting experience smoother. Consider using stitch markers to help keep track of your rounds, especially in patterns that require increases or decreases. A yarn needle will also be essential for weaving in loose ends and assembling your mushrooms.
Crochet Stitches and Techniques Used
In this collection of crochet mushroom patterns, you will encounter several basic crochet stitches and techniques. Familiarity with these stitches will help you create beautiful and whimsical mushrooms. Below are the key stitches and techniques you will use throughout the patterns.
Single Crochet
The single crochet (sc) stitch is fundamental in creating the body of the mushrooms. It provides a tight and sturdy fabric, which is perfect for amigurumi projects like these mushrooms. To make a single crochet stitch, follow these steps:
- Insert your hook into the stitch where you want to work.
- Yarn over and pull up a loop (you will have two loops on your hook).
- Yarn over again and pull through both loops on the hook.
Repeat this process for the desired number of stitches. Remember to keep your tension consistent for an even finish.
IMAGE: A close-up of a single crochet stitch, demonstrating the stitch structure clearly.
ALT: A close-up view of the single crochet stitch used in crochet mushroom patterns.
Magic Ring
The magic ring technique is essential for starting many of the mushroom patterns, especially those that are worked in the round. This method allows you to create a tight center, preventing gaps in your work. Here’s how to make a magic ring:
- Hold the yarn in your hand, forming a loop with the working yarn over the tail end.
- Insert your hook through the loop and yarn over to pull up a loop.
- Chain 1 to secure the ring.
- Work your first round of stitches into the ring, making sure to crochet over the tail end to secure it.
Once you have completed the desired number of stitches, pull the tail to tighten the ring. This technique is particularly useful for creating a neat and tidy start to your mushroom projects.
Crochet Abbreviations
| Abbreviation | Meaning |
| ch | Chain |
| sc | Single Crochet |
| dc | Double Crochet |
| hdc | Half Double Crochet |
| sl st | Slip Stitch |
| rnd | Round |
| st(s) | Stitch(es) |
| inc | Increase |
| dec | Decrease |
Gauge
Gauge is a crucial aspect of crochet that can significantly affect the size and fit of your finished project. It refers to the number of stitches and rows per inch in your crochet work. For projects where size matters, such as garments or items that need to fit together, achieving the correct gauge is essential. If your gauge is off, your finished mushrooms may turn out larger or smaller than intended, which can impact their overall appearance and functionality.
To ensure you achieve the correct gauge for your crochet mushroom patterns, it’s a good idea to create a gauge swatch before starting your project. Here’s how to make a sample gauge swatch:
- Using the yarn and hook you plan to use for your mushroom, chain 20 stitches.
- Work in the stitch pattern specified in your chosen mushroom pattern for about 4 inches (10 cm).
- Once you have completed the swatch, measure the number of stitches and rows within a 4-inch square.
For example, if your swatch measures 4 inches wide and you have 12 stitches across, your gauge is 12 stitches per 4 inches. If your pattern specifies a gauge of 10 stitches per 4 inches, you may need to adjust your hook size. Using a larger hook will create a looser fabric, while a smaller hook will create a tighter fabric.
Always remember to check your gauge before starting your project, especially if you are using a different yarn or hook size than recommended. This simple step can save you time and ensure your crochet mushrooms turn out just as you envision!
Step-by-Step Instructions for Each Mushroom Pattern
In this section, you will find detailed, step-by-step instructions for each of the 20 crochet mushroom patterns. Each pattern is designed to be easy to follow, with clear instructions and helpful tips to guide you through the process. Let’s get started!
Pattern 1: Classic Red Mushroom
This classic red mushroom features a bright red cap with white spots, making it a charming addition to your crochet collection.
Materials Needed:
- Red yarn for the cap
- White yarn for the spots
- Green yarn for the stem
- 4.0 mm (G) crochet hook
- Scissors
- Tapestry needle
Instructions:
Cap:
- Start with a magic ring.
- Round 1: Work 6 sc into the magic ring. (6 stitches)
- Round 2: Inc in each stitch around. (12 stitches)
- Round 3: *Sc in the next stitch, inc in the next stitch; repeat from * around. (18 stitches)
- Round 4: *Sc in the next 2 stitches, inc in the next stitch; repeat from * around. (24 stitches)
- Round 5: Sc in each stitch around for 3 rounds. (24 stitches)
- Round 8: *Sc in the next 2 stitches, dec; repeat from * around. (18 stitches)
- Round 9: *Sc in the next stitch, dec; repeat from * around. (12 stitches)
- Round 10: Dec around. (6 stitches)
- Fasten off and leave a long tail for sewing.
Spots:
- With white yarn, make a magic ring.
- Round 1: Work 4 sc into the magic ring. (4 stitches)
- Round 2: Inc in each stitch around. (8 stitches)
- Fasten off, leaving a long tail for sewing.
Assembly:
- Sew the white spots onto the red cap.
- Attach the cap to the green stem (see below).
Stem:
- Ch 6.
- Row 1: Sc in the 2nd ch from the hook and in each ch across. (5 stitches)
- Row 2: Ch 1, turn; sc in each stitch across for 5 rows.
- Fasten off and sew the stem to the bottom of the cap.
Your classic red mushroom is now complete!
Pattern 2: Rainbow Mushroom
This colorful rainbow mushroom is sure to brighten up any space with its vibrant colors.
Materials Needed:
- Yarn in red, orange, yellow, green, blue, and purple
- 4.0 mm (G) crochet hook
- Scissors
- Tapestry needle
Instructions:
Cap:
- Start with a magic ring.
- Round 1: Work 6 sc into the magic ring. (6 stitches)
- Round 2: Inc in each stitch around. (12 stitches)
- Round 3: *Sc in the next stitch, inc in the next stitch; repeat from * around. (18 stitches)
- Round 4: Change to orange yarn; *Sc in the next 2 stitches, inc in the next stitch; repeat from * around. (24 stitches)
- Round 5: Change to yellow yarn; sc in each stitch around for 1 round. (24 stitches)
- Round 6: Change to green yarn; *Sc in the next 2 stitches, inc in the next stitch; repeat from * around. (30 stitches)
- Round 7: Change to blue yarn; sc in each stitch around for 1 round. (30 stitches)
- Round 8: Change to purple yarn; *Sc in the next 3 stitches, inc in the next stitch; repeat from * around. (36 stitches)
- Round 9: Sc in each stitch around for 2 rounds. (36 stitches)
- Round 11: *Sc in the next 3 stitches, dec; repeat from * around. (30 stitches)
- Round 12: *Sc in the next 2 stitches, dec; repeat from * around. (24 stitches)
- Round 13: Dec around. (12 stitches)
- Fasten off and leave a long tail for sewing.
Stem:
- Ch 6.
- Row 1: Sc in the 2nd ch from the hook and in each ch across. (5 stitches)
- Row 2: Ch 1, turn; sc in each stitch across for 5 rows.
- Fasten off and sew the stem to the bottom of the cap.
Your rainbow mushroom is now complete!
Pattern 3: Tiny Toadstool
This tiny toadstool is perfect for embellishing other projects or creating a miniature garden scene.
Materials Needed:
- Red yarn for the cap
- White yarn for the spots
- Green yarn for the stem
- 4.0 mm (G) crochet hook
- Scissors
- Tapestry needle
Instructions:
Cap:
- Start with a magic ring.
- Round 1: Work 4 sc into the magic ring. (4 stitches)
- Round 2: Inc in each stitch around. (8 stitches)
- Round 3: *Sc in the next stitch, inc in the next stitch; repeat from * around. (12 stitches)
- Round 4: *Sc in the next 2 stitches, inc in the next stitch; repeat from * around. (16 stitches)
- Round 5: Sc in each stitch around for 1 round. (16 stitches)
- Round 6: *Sc in the next 2 stitches, dec; repeat from * around. (12 stitches)
- Round 7: Dec around. (6 stitches)
- Fasten off and leave a long tail for sewing.
Spots:
- With white yarn, make a magic ring.
- Round 1: Work 3 sc into the magic ring. (3 stitches)
- Fasten off, leaving a long tail for sewing.
Assembly:
- Sew the white spots onto the red cap.
- Attach the cap to the green stem (see below).
Stem:
- Ch 4.
- Row 1: Sc in the 2nd ch from the hook and in each ch across. (3 stitches)
- Row 2: Ch 1, turn; sc in each stitch across for 3 rows.
- Fasten off and sew the stem to the bottom of the cap.
Your tiny toadstool is now complete!
Tips for Personalizing Your Crochet Mushrooms
Personalizing your crochet mushrooms can be a delightful way to make each piece unique and reflect your style. Here are some creative suggestions to help you customize your mushrooms:
- Add Safety Eyes: Incorporating safety eyes can bring your mushrooms to life! These plastic eyes come in various sizes and colors, allowing you to create expressive faces on your mushrooms. Simply sew them onto the cap before finishing the assembly.
- Embroider Details: Use embroidery thread to add fun details like spots, stripes, or even little faces. Simple stitches like French knots or backstitch can enhance the character of your mushrooms. This is a great way to practice your embroidery skills while adding a personal touch.
- Experiment with Yarn Textures: Try using different yarn types to create varied textures. For example, a fuzzy yarn can give a whimsical look, while a smooth cotton yarn can create a more polished finish. Mixing yarns can also add depth and interest to your mushrooms.
- Play with Sizes: Adjust the size of your mushrooms by using different yarn weights or hook sizes. A larger mushroom can serve as a statement piece, while smaller ones can be used as cute embellishments or part of a miniature garden scene.
- Color Combinations: Don’t be afraid to mix and match colors! Create a rainbow mushroom or use ombre techniques to blend colors seamlessly. You can also use variegated yarn for a unique look that changes as you crochet.
- Add Accessories: Consider adding small accessories like tiny flowers, leaves, or even little critters to your mushrooms. These can be crocheted separately and sewn onto your mushrooms for an extra touch of charm.
By experimenting with these ideas, you can create a unique collection of crochet mushrooms that showcase your creativity and personal style. Enjoy the process of making each mushroom your own!
Frequently Asked Questions
How do I adjust the size of the mushrooms?
To adjust the size of your crochet mushrooms, you can use different yarn weights and corresponding crochet hook sizes. For example, using a thicker yarn with a larger hook will create a bigger mushroom, while a thinner yarn with a smaller hook will yield a smaller mushroom. Additionally, you can modify the number of rounds or stitches in the pattern to achieve your desired size. Just keep in mind that altering the size may affect the overall proportions, so be sure to adjust accordingly.
What should I do if the gauge is off?
If your gauge is off, it’s important to make adjustments before continuing with your project. First, check your gauge swatch to see how many stitches and rows you have per inch. If you have more stitches than the pattern calls for, try using a larger crochet hook to create a looser fabric. Conversely, if you have fewer stitches, switch to a smaller hook for a tighter fabric. Always recheck your gauge after making changes to ensure your finished mushrooms will turn out as intended.
Can I use different yarn weights?
Yes, you can use different yarn weights for your crochet mushroom patterns! However, be aware that changing the yarn weight will affect the size and appearance of your finished mushrooms. If you choose to use a different weight, make sure to adjust your hook size accordingly and check your gauge. This will help ensure that your mushrooms maintain their intended shape and proportions. Experimenting with various yarn weights can also lead to unique and creative results!
Conclusion
Creating these adorable crochet mushrooms is not only a fun and rewarding experience but also a wonderful way to express your creativity. Each pattern offers a unique opportunity to explore different colors, textures, and techniques, allowing you to craft a delightful collection of mushrooms that can brighten up any space.
As you finish your crochet mushrooms, don’t forget to share your creations with friends and fellow crafters! Whether you display them in your home, gift them to loved ones, or use them as playful decorations, your handmade mushrooms are sure to bring joy. Happy crocheting!
Print
20 Cute Crochet Mushroom Patterns You’ll Want to Make – Free Step-by-Step Guide
- Total Time: 1-3 hours per mushroom
- Yield: 20 mushrooms
- Diet: Vegan
Description
A collection of 20 adorable crochet mushroom patterns that are easy to follow and perfect for all skill levels.
Ingredients
- Yarn in various colors
- Crochet hook (size appropriate for yarn)
- Scissors
- Tapestry needle
- Stuffing (optional)
Instructions
- Choose your favorite mushroom pattern from the list.
- Gather all necessary materials including yarn and crochet hook.
- Follow the step-by-step instructions provided for each pattern.
- Complete the crochet piece and weave in any loose ends.
- Optionally, stuff the mushroom for a 3D effect.
Notes
- Experiment with different yarn colors for unique designs.
- Use safety eyes for added character if desired.
- Store finished mushrooms in a cool, dry place.
- Patterns can be adjusted for size by using different yarn weights.
- Prep Time: 10 minutes
- Cook Time: Varies by pattern
- Category: Craft
- Method: Crocheting
- Cuisine: N/A
Nutrition
- Serving Size: N/A
- Calories: N/A
- Sugar: N/A
- Sodium: N/A
- Fat: N/A
- Saturated Fat: N/A
- Unsaturated Fat: N/A
- Trans Fat: N/A
- Carbohydrates: N/A
- Fiber: N/A
- Protein: N/A
- Cholesterol: N/A