
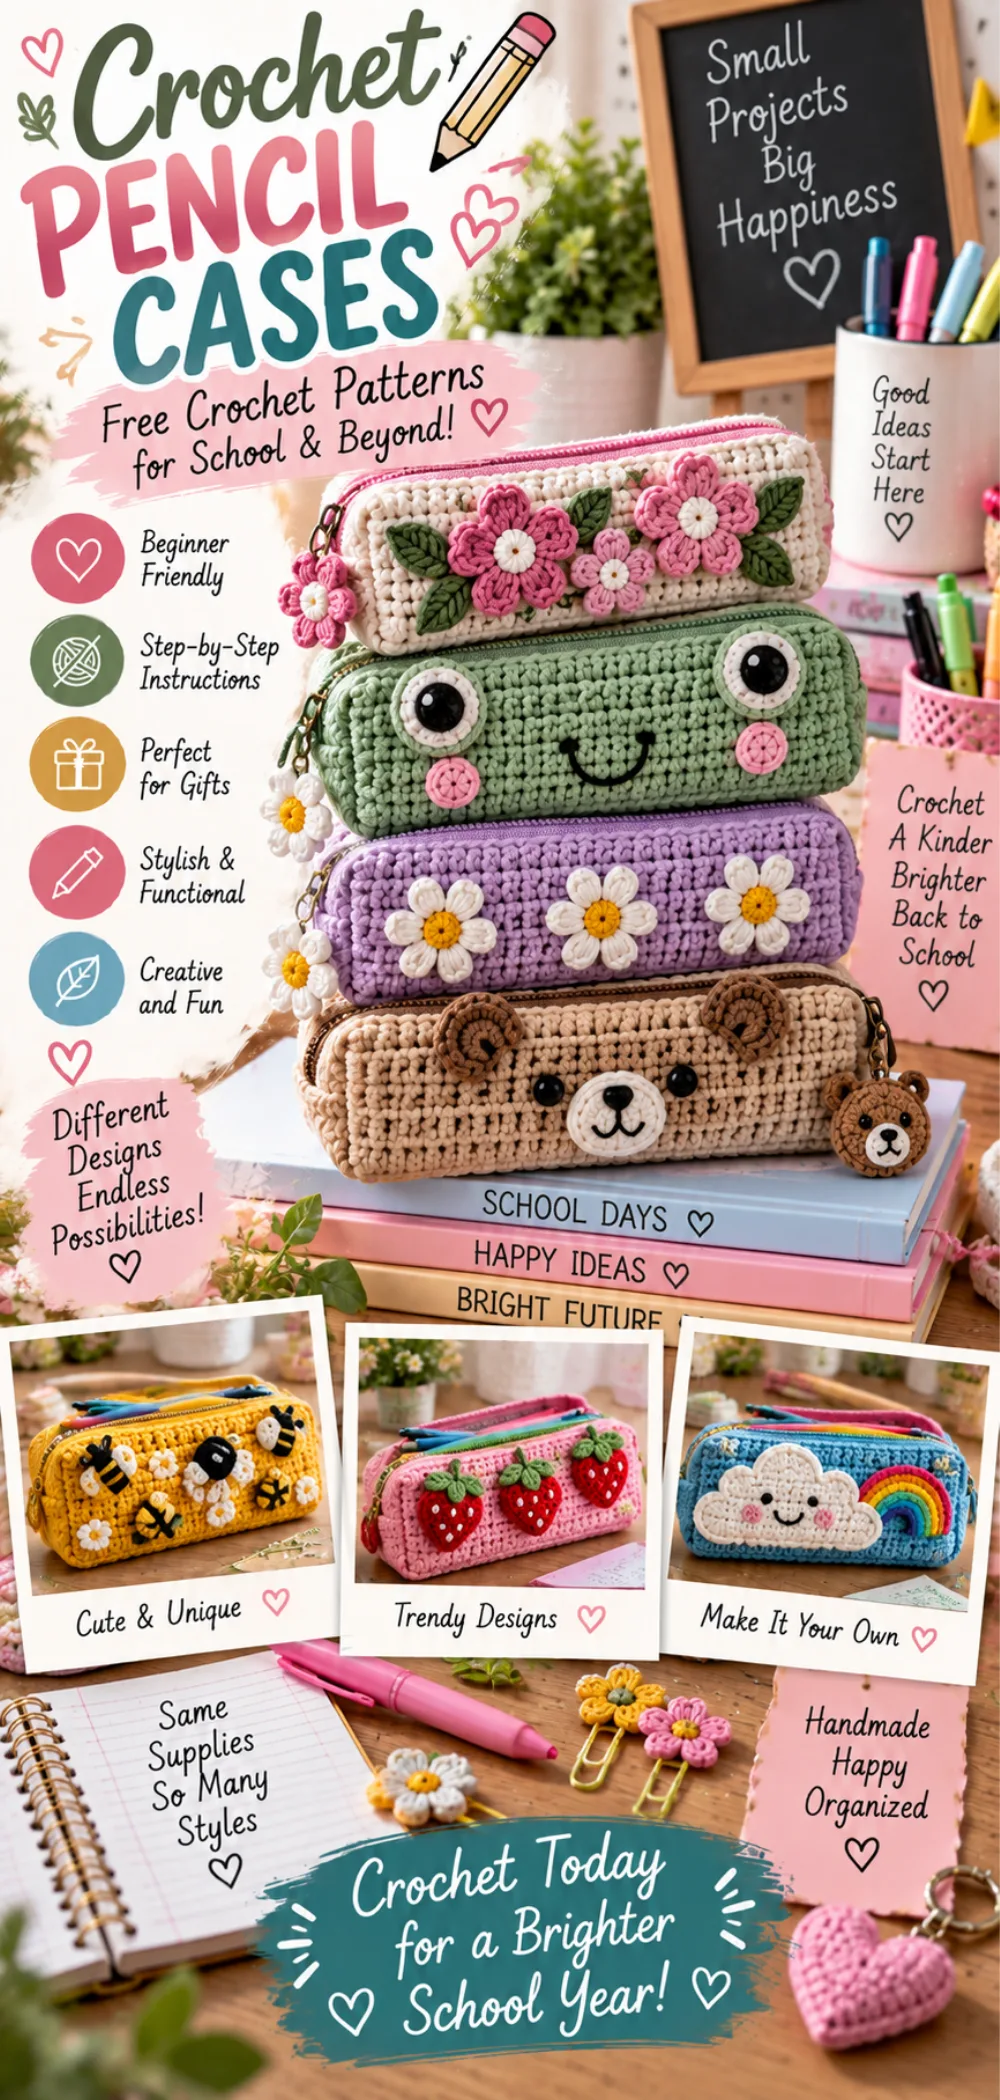
Step-by-Step Instructions for Back to School Pencil Cases Free Crochet Patterns
Step 1: Choose Your Yarn and Hook
Begin by selecting your yarn and crochet hook. For this project, use a worsted weight yarn and an H/8 (5.0 mm) crochet hook. This combination will provide a sturdy yet flexible pencil case.
Step 2: Create the Foundation Chain
Start with a foundation chain of 30 chains (ch). This length will create the base for your pencil case. Make sure your chain is not twisted before proceeding to the next step.
Step 3: Work the Body of the Pencil Case
Now, you will work in rows to create the body of the pencil case. Turn your work and begin with the first row:
Row 1: In the second chain from the hook, make 1 single crochet (sc). Continue to make 1 sc in each chain across. You should have 29 sc at the end of this row.
Row 2: Chain 1 (ch 1) and turn your work. Make 1 sc in each stitch across. You will have 29 sc at the end of this row.
Repeat Row 2 until your piece measures approximately 8 inches (20 cm) in height. This will create the main body of your pencil case.
Step 4: Fasten Off
Once you reach the desired height, fasten off your yarn. To do this, cut the yarn, leaving a tail of about 6 inches. Pull the tail through the last loop on your hook to secure it.
Step 5: Weave in Loose Ends
Using a tapestry needle, weave in any loose ends from your work. This will give your pencil case a clean finish.
Step 6: Fold and Seam the Pencil Case
Fold the rectangle in half, aligning the edges. Use a slip stitch (sl st) to seam the sides together. Insert your hook through both layers of fabric, yarn over, and pull through both layers, then pull the yarn through the loop on your hook. Repeat this along the side until you reach the top.
Step 7: Add a Closure
If you want to add a zipper, position it along the top edge of the pencil case and sew it in place using a tapestry needle. Alternatively, you can create a button closure by making a small loop with yarn and sewing a button on the opposite side.
Step 8: Final Touches
Once your closure is secure, you can add any additional embellishments, such as crochet flowers or appliqués, to personalize your pencil case. Get creative with colors and designs!
IMAGE: A step-by-step visual guide showing the process of creating the pencil case, including the foundation chain, working rows, and seaming.
ALT: Step-by-step instructions for making Back to School Pencil Cases Free Crochet Patterns, including foundation chain and seaming process.
Introduction / About This Back to School Pencil Cases Free Crochet Patterns
Welcome to the world of crochet, where you can create stylish and functional pencil cases using free crochet patterns! This project is perfect for both beginners and intermediate crocheters, making it an excellent choice for anyone looking to enhance their skills while crafting something practical.
Personalizing your pencil case for back-to-school needs is not only enjoyable but also allows you to express your creativity. Imagine having a unique pencil case that reflects your style, making it a fun accessory to carry to class. With these patterns, you can mix and match colors, textures, and designs to create a pencil case that is truly one-of-a-kind.
The versatility of these patterns means you can experiment with different yarns and embellishments, ensuring that your pencil case is not just functional but also a reflection of your personality. So grab your yarn and hook, and let’s get started on this exciting crochet journey!
IMAGE: A vibrant, neatly arranged collection of finished pencil cases in various colors and styles, displayed on a wooden desk with school supplies in the background.
ALT: A collection of Back to School Pencil Cases Free Crochet Patterns displayed on a desk with school supplies.
Crochet Pattern Quick Overview
| Detail | Information |
| Skill Level | Beginner to Intermediate |
| Crochet Terminology | US Terms |
| Yarn Weight | Worsted Weight |
| Crochet Hook Size | H/8 (5.0 mm) |
| Approximate Finished Size | 8” x 4” (20 cm x 10 cm) |
| Approximate Working Time | 1 hour |
| Construction Method | Worked in rows |
| Crochet Technique | Basic stitches and finishing |
| Pattern Type | Free Crochet Pattern |
About This Back to School Pencil Cases Free Crochet Patterns
The construction of this pencil case is straightforward and beginner-friendly. You will work the pencil case in rows, starting with a foundation chain and then creating the body using basic crochet stitches. Once you have completed the body, you will fold the rectangle in half and seam the sides together to form the pencil case.
Throughout this project, you will practice essential crochet skills, including the single crochet (sc) stitch, which forms the main body of the case, and the slip stitch (sl st), which is used for seaming. Additionally, you will learn how to add closures, such as a zipper or button, to keep your supplies secure. This project not only enhances your crochet skills but also allows for creativity in personalizing your pencil case with embellishments and unique designs.
Materials and Supplies
To create your Back to School pencil case, you will need a few essential materials. Choosing the right yarn and tools is crucial for ensuring that your pencil case is both durable and aesthetically pleasing. Here’s a list of what you will need:
- Yarn: Select a worsted weight yarn in various colors to suit your style.
- Crochet Hook: An H/8 (5.0 mm) crochet hook is recommended for this project.
- Scissors: For cutting your yarn at the end of your project.
- Tapestry Needle: To weave in loose ends and sew any closures.
- Measuring Tape: To ensure your pencil case reaches the desired dimensions.
Choosing the right yarn is essential for both durability and aesthetics. A sturdy yarn will help your pencil case hold its shape and withstand daily use, while a colorful yarn can make your pencil case a fun accessory. Cotton yarn is a great option for its durability and ease of cleaning, while acrylic yarn offers a wide range of colors and textures.
IMAGE: A flat lay of the required yarn, crochet hook, scissors, and tapestry needle arranged neatly.
ALT: Materials for Back to School Pencil Cases Free Crochet Patterns including yarn, crochet hook, and tools.
Best Yarn for Back to School Pencil Cases
For this project, I recommend using a worsted weight yarn made from cotton or acrylic. Cotton yarn is ideal for pencil cases because it is durable, easy to clean, and holds its shape well. Acrylic yarn, on the other hand, is lightweight and comes in a vast array of colors, making it perfect for personalizing your pencil case.
When selecting colors, consider your personal style or school themes. Bright colors can make your pencil case stand out, while neutral tones can provide a classic look. You can also mix and match colors to create stripes or patterns that reflect your personality.
Suitable Yarn Substitutions
If you don’t have worsted weight yarn on hand, you can substitute it with other yarns, but be sure to check the gauge and yardage. For example, you could use a light worsted or a DK weight yarn, but keep in mind that this may alter the final size of your pencil case.
When substituting yarn, consider the texture and durability. Avoid using very soft or fluffy yarns, as they may not provide the structure needed for a pencil case. Always make a gauge swatch to ensure your project will turn out the correct size.
Crochet Hook and Additional Tools
For this project, you will need an H/8 (5.0 mm) crochet hook. This size is perfect for working with worsted weight yarn and will help you achieve the right tension for your stitches.
In addition to your crochet hook, you will need:
- Scissors: To cut your yarn when finishing your project.
- Tapestry Needle: For weaving in loose ends and sewing on closures.
- Measuring Tape: To measure your work and ensure your pencil case is the correct size.
Each of these tools plays a vital role in the completion of your pencil case, helping you achieve a polished and professional look.
Crochet Stitches and Techniques Used
In this pencil case project, you will be using a few basic crochet stitches and techniques that are essential for creating a sturdy and functional item. Familiarity with these stitches will help you complete the project with ease. If you are new to any of these stitches, I recommend checking out the linked tutorials for detailed instructions.
Single Crochet Stitch
The single crochet stitch (sc) is the primary stitch used to create the body of the pencil case. This stitch is simple yet effective, providing a tight and durable fabric that will hold your supplies securely. To make a single crochet stitch, insert your hook into the stitch, yarn over, pull up a loop, yarn over again, and pull through both loops on your hook. This creates a solid foundation for your pencil case.
IMAGE: A close-up of the single crochet stitch, highlighting the stitch structure and insertion point.
ALT: Close-up of the single crochet stitch used in Back to School Pencil Cases Free Crochet Patterns.
Slip Stitch for Finishing
The slip stitch (sl st) is used for seaming the sides of the pencil case and adding closures. This stitch is worked by inserting your hook into the stitch, yarn over, and pulling the yarn through both the stitch and the loop on your hook. This creates a nearly invisible seam that helps maintain the neat appearance of your pencil case. It is also useful for attaching zippers or buttons securely.
Crochet Abbreviations
| Abbreviation | Meaning |
| ch | chain |
| sc | single crochet |
| sl st | slip stitch |
| st | stitch |
| yo | yarn over |
Gauge
Gauge is a crucial aspect of crochet that ensures your finished pencil case is the correct size. When your gauge matches the pattern’s specified gauge, you can be confident that your project will turn out as intended. If your gauge is off, the dimensions of your pencil case may differ, leading to a case that is either too small or too large for your needs.
To check your gauge, you will need to create a gauge swatch. For this project, work a swatch that measures 4 inches (10 cm) square using the same yarn and hook you plan to use for your pencil case. Here’s how to do it:
Gauge Swatch Instructions:
- Start with a foundation chain of 20 chains (ch).
- Work in single crochet (sc) for 20 rows, or until your swatch measures 4 inches (10 cm) in height.
- After completing the swatch, measure the number of stitches across and the number of rows in 4 inches (10 cm).
For example, if your gauge swatch shows that you have 12 single crochet stitches and 14 rows in 4 inches (10 cm), you can compare this to the pattern’s gauge. If your gauge does not match, you may need to adjust your hook size. A larger hook will create a looser fabric, while a smaller hook will create a tighter fabric.
Always remember to check your gauge before starting your project to ensure the best results!
Step-by-Step Instructions for Back to School Pencil Cases Free Crochet Patterns
Step 1: Choose Your Yarn and Hook
Begin by selecting your yarn and crochet hook. For this project, use a worsted weight yarn and an H/8 (5.0 mm) crochet hook. This combination will provide a sturdy yet flexible pencil case.
Step 2: Create the Foundation Chain
Start with a foundation chain of 30 chains (ch). This length will create the base for your pencil case. Make sure your chain is not twisted before proceeding to the next step.
Step 3: Work the Body of the Pencil Case
Now, you will work in rows to create the body of the pencil case. Turn your work and begin with the first row:
Row 1: In the second chain from the hook, make 1 single crochet (sc). Continue to make 1 sc in each chain across. You should have 29 sc at the end of this row.
Row 2: Chain 1 (ch 1) and turn your work. Make 1 sc in each stitch across. You will have 29 sc at the end of this row.
Repeat Row 2 until your piece measures approximately 8 inches (20 cm) in height. This will create the main body of your pencil case.
Step 4: Fasten Off
Once you reach the desired height, fasten off your yarn. To do this, cut the yarn, leaving a tail of about 6 inches. Pull the tail through the last loop on your hook to secure it.
Step 5: Weave in Loose Ends
Using a tapestry needle, weave in any loose ends from your work. This will give your pencil case a clean finish.
Step 6: Fold and Seam the Pencil Case
Fold the rectangle in half, aligning the edges. Use a slip stitch (sl st) to seam the sides together. Insert your hook through both layers of fabric, yarn over, and pull through both layers, then pull the yarn through the loop on your hook. Repeat this along the side until you reach the top.
Step 7: Add a Closure
If you want to add a zipper, position it along the top edge of the pencil case and sew it in place using a tapestry needle. Alternatively, you can create a button closure by making a small loop with yarn and sewing a button on the opposite side.
Step 8: Final Touches
Once your closure is secure, you can add any additional embellishments, such as crochet flowers or appliqués, to personalize your pencil case. Get creative with colors and designs!
IMAGE: A step-by-step visual guide showing the process of creating the pencil case, including the foundation chain, working rows, and seaming.
ALT: Step-by-step instructions for making Back to School Pencil Cases Free Crochet Patterns, including foundation chain and seaming process.
Tips for Personalizing Your Pencil Case
Personalizing your pencil case is a wonderful way to express your creativity and make it uniquely yours. Here are some suggestions to help you customize your pencil case:
- Add Embellishments: Consider adding crochet flowers, appliqués, or even small motifs that reflect your interests. These can be sewn or glued onto the surface of your pencil case for a decorative touch.
- Experiment with Colors: Use multiple colors of yarn to create stripes, patterns, or even ombre effects. You can change colors every few rows or create a color block design for a vibrant look.
- Incorporate Unique Closures: Instead of a standard zipper or button, think about using a decorative clasp or a snap closure. You can also crochet a loop and attach a fun button for a playful twist.
- Use Different Textures: Mix yarns with different textures, such as combining a smooth cotton yarn with a fuzzy yarn. This can add depth and interest to your pencil case.
- Try Different Shapes: While the basic design is rectangular, you can experiment with different shapes, such as rounded edges or even a triangular pencil case. Just adjust your foundation chain and rows accordingly.
- Add a Lining: For a more polished look, consider adding a fabric lining to your pencil case. This can help protect your crochet work and give it a finished appearance.
Don’t be afraid to experiment with different designs and techniques! The beauty of crochet is that you can create something truly one-of-a-kind. Let your imagination run wild, and enjoy the process of making your pencil case a reflection of your personal style.
Troubleshooting Common Issues
As you embark on your journey to create your Back to School pencil case, you may encounter a few common issues. Don’t worry; these challenges are part of the learning process! Here are some typical problems beginners might face, along with solutions and tips to help you overcome them.
Uneven Stitches
One of the most common issues is uneven stitches, which can occur for various reasons, such as tension inconsistencies or distractions while crocheting. To address this:
- Check Your Tension: Make sure you are holding your yarn consistently. If your stitches are too tight, try relaxing your grip on the yarn. If they are too loose, you may need to pull the yarn tighter as you work.
- Practice Makes Perfect: If you notice unevenness, take a moment to practice single crochet stitches on a scrap piece of yarn. This can help you find a comfortable tension before continuing with your project.
- Count Your Stitches: Regularly count your stitches to ensure you are not accidentally adding or skipping stitches. This will help maintain an even width throughout your pencil case.
Difficulty with Closures
Adding closures, such as zippers or buttons, can sometimes be tricky. Here are some tips to make this process smoother:
- Positioning the Zipper: When sewing in a zipper, ensure it is aligned evenly along the top edge of your pencil case. Use pins to hold it in place while you sew, which can help prevent shifting.
- Using a Tapestry Needle: A tapestry needle is ideal for sewing closures because it has a larger eye, making it easier to thread thicker yarn. This will help you secure the closure more effectively.
- Button Placement: If you are using a button closure, make sure to sew the button securely. You can create a small loop with yarn to attach to the button, ensuring it stays in place when opening and closing the pencil case.
Missed Stitches
It’s easy to miss a stitch, especially when working in rows. If you find that your pencil case is not the correct size or shape, check for missed stitches:
- Count Your Rows: Keep track of how many rows you have completed. If you notice a discrepancy, you may need to unravel a few rows to correct the mistake.
- Use Stitch Markers: Consider using stitch markers to mark the beginning of each row. This can help you keep track of your progress and ensure you don’t miss any stitches.
Twisted Starting Chain
A twisted starting chain can lead to an uneven foundation for your pencil case. If you notice this issue:
- Check Before You Start: Always lay your foundation chain flat before beginning your first row. If it’s twisted, carefully unravel it and start again.
- Use a Longer Chain: If you find it difficult to keep the chain untwisted, consider making a longer chain. This gives you more room to work and reduces the chance of twisting.
By being aware of these common issues and their solutions, you can troubleshoot effectively and enjoy the process of creating your pencil case. Remember, every crocheter faces challenges, and overcoming them is part of the fun!
Conclusion
Congratulations on completing your Back to School pencil case! I hope you enjoyed the process of creating something both stylish and functional. Now that you have your unique pencil case, I encourage you to share your finished projects on social media. Don’t forget to tag the tutorial so others can see your creativity and inspiration!
If you’re looking for more crochet fun, be sure to explore additional crochet patterns and tutorials for other back-to-school projects. There are endless possibilities to enhance your school supplies with your crochet skills. Happy crocheting!
Print
Back to School Pencil Cases Free Crochet Patterns – Easy DIY Guide
- Total Time: 1 hour
- Yield: 1 pencil case
- Diet: Vegan
Description
A collection of free crochet patterns for creating stylish and functional pencil cases perfect for back to school.
Ingredients
- Yarn (various colors)
- Crochet hook (size appropriate for yarn)
- Scissors
- Tapestry needle
- Measuring tape
Instructions
- Choose your yarn and crochet hook.
- Start with a foundation chain of the desired length for your pencil case.
- Follow the pattern instructions to create the body of the pencil case.
- Once the body is complete, fasten off and weave in any loose ends.
- Add a zipper or button closure if desired.
- Decorate with additional crochet embellishments if you like.
Notes
- Experiment with different yarn colors and textures for a personalized touch.
- Consider using cotton yarn for a more durable case.
- Store in a cool, dry place to maintain the shape.
- Prep Time: 30 minutes
- Cook Time: N/A
- Category: Craft
- Method: Crocheting
- Cuisine: N/A
Nutrition
- Serving Size: N/A
- Calories: N/A
- Sugar: N/A
- Sodium: N/A
- Fat: N/A
- Saturated Fat: N/A
- Unsaturated Fat: N/A
- Trans Fat: N/A
- Carbohydrates: N/A
- Fiber: N/A
- Protein: N/A
- Cholesterol: N/A