
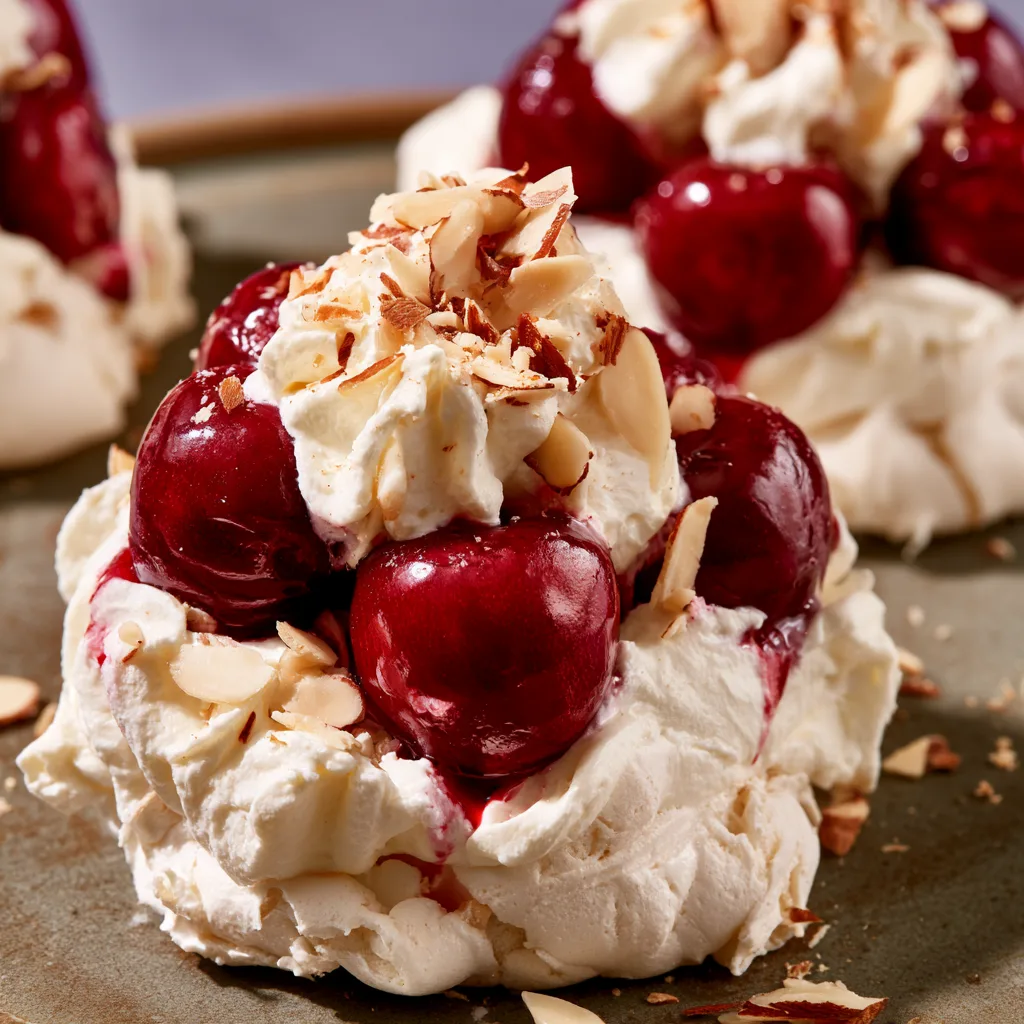
Introduction to Cherries in the Snow: A Delightful Winter Treat!
As the winter chill sets in, I find myself craving something sweet and comforting. That’s where Cherries in the Snow: A Delightful Winter Treat! comes into play. This no-bake dessert is not just a treat; it’s a quick solution for busy days when you want to impress your loved ones without spending hours in the kitchen. With its creamy topping and vibrant cherries, it’s a delightful way to brighten up any holiday gathering. Trust me, this dessert will have everyone asking for seconds, and it’s so easy to whip up!
Why You’ll Love This Cherries in the Snow
This delightful dessert is a lifesaver for busy moms and professionals alike. It requires minimal effort, taking just 15 minutes to prepare. Plus, it’s a no-bake recipe, so you won’t heat up your kitchen. The combination of sweet cherries and fluffy cream creates a taste sensation that’s sure to impress. It’s the perfect winter treat that brings joy without the stress of complicated cooking!
Ingredients for Cherries in the Snow
Gathering the right ingredients is the first step to creating this delightful winter treat. Here’s what you’ll need:
- Frozen cherries: These sweet gems are the star of the show. They add a burst of flavor and vibrant color to your dessert.
- Heavy cream: This is what gives the dessert its rich, fluffy texture. If you’re looking for a lighter option, feel free to swap it for whipped topping.
- Powdered sugar: This sweetener dissolves easily into the cream, giving it that perfect sweetness without any graininess.
- Vanilla extract: A splash of this adds warmth and depth to the flavor. You can also experiment with almond extract for a unique twist!
- Crushed graham crackers: These create a deliciously crunchy base. They’re easy to crush and add a lovely texture contrast to the creamy topping.
- Melted butter: This binds the graham cracker crust together, making it rich and flavorful.
For exact measurements, check the bottom of the article where you can find everything listed for easy printing. Enjoy the process of gathering these ingredients, as each one plays a vital role in making Cherries in the Snow: A Delightful Winter Treat! a memorable dessert!
How to Make Cherries in the Snow
Now that you have all your ingredients ready, let’s dive into making this delightful winter treat! Follow these simple steps, and you’ll have a stunning dessert that’s sure to impress.
Step 1: Prepare the Crust
Start by combining the crushed graham crackers and melted butter in a bowl. Mix them until the crumbs are well-coated. This mixture should resemble wet sand. Next, press it firmly into the bottom of your serving dish. I like to use the back of a measuring cup for an even layer. This crust is the foundation of your Cherries in the Snow, so make sure it’s nice and compact!
Step 2: Whip the Cream
In a separate bowl, pour in the heavy cream. Using an electric mixer, whip it on medium speed until soft peaks form. This usually takes about 2-3 minutes. It’s like watching a fluffy cloud come to life! Once you see those soft peaks, add the powdered sugar and vanilla extract. Continue whipping until stiff peaks form. This means the cream will hold its shape beautifully when you spread it over the crust.
Step 3: Combine Ingredients
Now it’s time to bring everything together! Gently spread the whipped cream mixture over the graham cracker crust. Use a spatula to create an even layer. Then, take your frozen cherries and sprinkle them evenly on top of the whipped cream. The cherries will add a pop of color and sweetness, making your dessert look as good as it tastes!
Step 4: Chill and Serve
Cover the dish with plastic wrap and place it in the refrigerator. Let it chill for at least 2 hours. This step is crucial as it allows the flavors to meld together. When you’re ready to serve, simply slice it up and enjoy! Each bite of Cherries in the Snow is like a winter wonderland on your plate.
Tips for Success
- Make sure your heavy cream is cold for better whipping results.
- For a smoother crust, crush the graham crackers in a food processor.
- Chill your dessert overnight for even better flavor and texture.
- Use fresh cherries in summer for a seasonal twist!
- Don’t skip the chilling time; it’s key for the perfect set!
Equipment Needed
- Mixing bowls: A set of various sizes will help you combine ingredients easily.
- Electric mixer: This is essential for whipping the cream. A whisk works too, but it’ll take longer!
- Spatula: Use this for spreading the whipped cream evenly over the crust.
- Serving dish: Any shallow dish will do, but a glass one showcases the layers beautifully.
Variations
- Chocolate Lovers: Drizzle melted chocolate over the whipped cream before adding the cherries for a decadent twist.
- Nutty Delight: Add chopped nuts like almonds or walnuts to the graham cracker crust for an extra crunch.
- Fruit Medley: Mix in other frozen fruits like blueberries or raspberries for a colorful and flavorful combination.
- Vegan Option: Substitute heavy cream with coconut cream and use vegan butter for a plant-based version.
- Spiced Up: Add a pinch of cinnamon or nutmeg to the whipped cream for a warm, cozy flavor.
Serving Suggestions
- Pair Cherries in the Snow with a warm cup of spiced cider for a cozy winter treat.
- Serve alongside buttery shortbread cookies for a delightful contrast in textures.
- Garnish with fresh mint leaves for a pop of color and freshness.
- Present in individual cups for a charming touch at holiday gatherings.
- Drizzle with chocolate sauce for an extra indulgent experience!
FAQs about Cherries in the Snow
Can I use fresh cherries instead of frozen?
Absolutely! Fresh cherries can be used when they’re in season. Just make sure to pit and slice them before adding to your dessert. They’ll add a delightful burst of flavor!
How long can I store Cherries in the Snow?
This dessert can be stored in the refrigerator for up to 3 days. Just cover it well to keep it fresh. However, I recommend enjoying it within the first couple of days for the best taste and texture.
Can I make this dessert ahead of time?
Is this dessert suitable for a gluten-free diet?
To make it gluten-free, simply substitute the graham crackers with gluten-free alternatives. There are many delicious options available that will work perfectly!
What can I serve with Cherries in the Snow?
This dessert pairs wonderfully with a warm beverage like hot chocolate or spiced tea. You can also serve it with a scoop of vanilla ice cream for an extra treat!
Final Thoughts
Creating Cherries in the Snow: A Delightful Winter Treat! is more than just making a dessert; it’s about bringing joy to your table. This recipe captures the essence of winter with its vibrant colors and creamy textures. Each bite is a reminder of cozy gatherings and sweet moments shared with loved ones. Plus, the ease of preparation means you can focus on what truly matters—making memories. So, whether it’s a holiday celebration or a simple family dinner, this delightful treat is sure to warm hearts and satisfy sweet cravings. Enjoy every delicious moment!
Print
Cherries in the Snow: Discover This Winter’s Sweet Surprise!
- Total Time: 2 hours 15 minutes
- Yield: 8 servings 1x
- Diet: Vegetarian
Description
Cherries in the Snow is a delightful winter dessert that combines the sweetness of cherries with a creamy, fluffy topping, perfect for holiday gatherings.
Ingredients
- 2 cups frozen cherries
- 1 cup heavy cream
- 1/2 cup powdered sugar
- 1 teaspoon vanilla extract
- 1 cup crushed graham crackers
- 1/4 cup melted butter
Instructions
- In a bowl, combine the crushed graham crackers and melted butter, then press the mixture into the bottom of a serving dish.
- In a separate bowl, whip the heavy cream until soft peaks form.
- Add the powdered sugar and vanilla extract to the whipped cream and continue to whip until stiff peaks form.
- Spread the whipped cream mixture over the graham cracker crust.
- Top with frozen cherries, spreading them evenly over the whipped cream.
- Chill in the refrigerator for at least 2 hours before serving.
Notes
- For a lighter version, you can use whipped topping instead of heavy cream.
- Feel free to add a splash of almond extract for extra flavor.
- This dessert can be made a day in advance for convenience.
- Prep Time: 15 minutes
- Cook Time: 0 minutes
- Category: Dessert
- Method: No-bake
- Cuisine: American
Nutrition
- Serving Size: 1 serving
- Calories: 250
- Sugar: 20g
- Sodium: 50mg
- Fat: 15g
- Saturated Fat: 10g
- Unsaturated Fat: 3g
- Trans Fat: 0g
- Carbohydrates: 30g
- Fiber: 1g
- Protein: 2g
- Cholesterol: 40mg