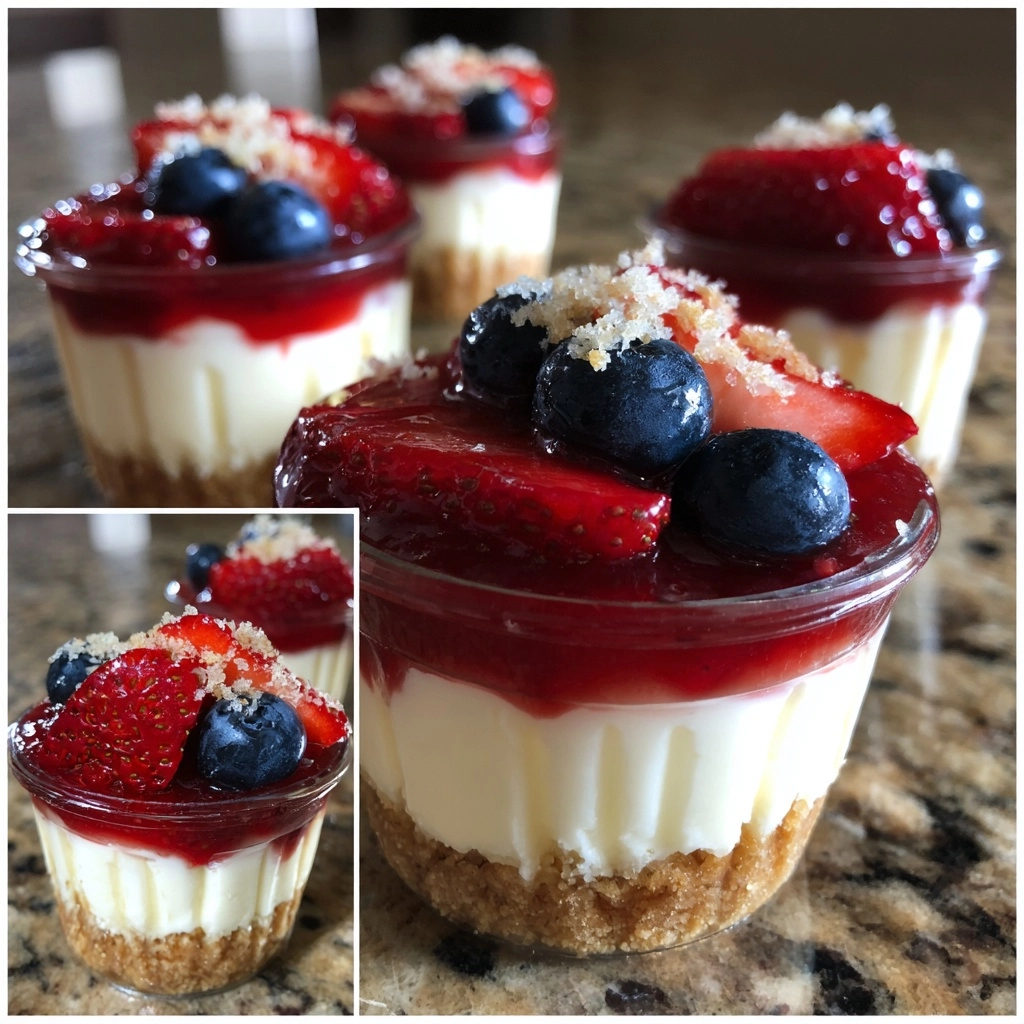
Introduction to Patriotic Mini Cheesecakes
As a busy mom, I know how important it is to have quick and delightful recipes on hand. That’s why I absolutely love these Patriotic Mini Cheesecakes. They’re not just a treat; they’re a celebration in a cup! Perfect for national holidays or any gathering, these mini cheesecakes are sure to impress your loved ones. With their vibrant colors and creamy texture, they bring a festive spirit to any table. Plus, they’re easy to whip up, making them a fantastic solution for those hectic days when you still want to create something special.
Why You’ll Love This Patriotic Mini Cheesecakes
These Patriotic Mini Cheesecakes are a dream come true for busy moms and professionals alike. They come together in just 40 minutes, making them a quick and easy dessert option. The creamy, rich flavor paired with the festive colors will have everyone raving. Plus, they’re perfect for any occasion, whether it’s a backyard barbecue or a holiday celebration. You’ll love how effortlessly they elevate your dessert game!
Ingredients for Patriotic Mini Cheesecakes
Gathering the right ingredients is the first step to creating these delightful Patriotic Mini Cheesecakes. Here’s what you’ll need:
- Cream Cheese: The star of the show! It gives the cheesecake its rich and creamy texture.
- Granulated Sugar: This sweetens the mixture, balancing the tanginess of the cream cheese.
- Vanilla Extract: A splash of vanilla adds warmth and depth to the flavor profile.
- Whipped Cream: Light and fluffy, it makes the cheesecake airy and delightful.
- Graham Cracker Crumbs: These form the crust, providing a crunchy contrast to the creamy filling.
- Unsalted Butter: Helps bind the crust together and adds richness.
- Red and Blue Food Coloring: Essential for that festive look! Feel free to adjust the shades to your liking.
- Fresh Strawberries and Blueberries: These not only add a pop of color but also a fresh, fruity flavor on top.
For those looking to make substitutions, you can use low-fat cream cheese for a lighter version or swap out the graham crackers for crushed cookies if you prefer a different flavor. The exact quantities for each ingredient are available at the bottom of the article for easy printing!
How to Make Patriotic Mini Cheesecakes
Creating these Patriotic Mini Cheesecakes is a fun and straightforward process. Follow these simple steps, and you’ll have a delightful dessert that’s sure to impress!
Step 1: Preheat the Oven
First things first, preheat your oven to 325°F (160°C). Preheating is crucial because it ensures even baking. If you skip this step, your cheesecakes might not set properly, and nobody wants a gooey mess!
Step 2: Prepare the Cream Cheese Mixture
In a mixing bowl, combine the softened cream cheese, granulated sugar, and vanilla extract. Use a hand mixer or a whisk to blend until the mixture is smooth and creamy. This step is vital for achieving that luscious cheesecake texture!
Step 3: Fold in the Whipped Cream
Now, gently fold in the whipped cream. Use a spatula and a light hand to combine. This technique keeps the mixture airy and fluffy, which is what we want for our mini cheesecakes. Remember, no one likes a dense cheesecake!
Step 4: Make the Crust
In another bowl, mix the graham cracker crumbs with melted butter until well combined. This mixture should resemble wet sand. Press it firmly into the bottom of your mini cheesecake cups. A good crust is the foundation of a great cheesecake!
Step 5: Color the Cheesecake Mixture
Divide the cream cheese mixture into three bowls. Leave one bowl plain, add red food coloring to the second, and blue food coloring to the third. Mix until you achieve your desired shades. This is where the fun begins—get creative with the colors!
Step 6: Layer the Mixtures
Now it’s time to layer! Start with the plain mixture at the bottom of each cup, followed by the red, and then the blue. Use a spoon or piping bag for a neat presentation. The layers should be distinct and colorful, just like a festive flag!
Step 7: Bake the Cheesecakes
Place the filled cups in the preheated oven and bake for 15-20 minutes. Keep an eye on them; they should be set but still slightly jiggly in the center. This ensures they’ll firm up as they cool. A toothpick inserted should come out clean!
Step 8: Cool and Top
Once baked, let the cheesecakes cool completely at room temperature. After they’ve cooled, refrigerate them for a few hours for the best texture. Just before serving, top with fresh strawberries and blueberries for that extra pop of color and flavor!
Tips for Success
- Make sure your cream cheese is softened for easy mixing.
- Use a spatula to gently fold in the whipped cream for a light texture.
- Don’t skip the cooling step; it enhances the flavor and texture.
- Experiment with food coloring to create your desired shades.
- For a firmer cheesecake, refrigerate them overnight before serving.
Equipment Needed
- Mixing Bowls: Use any size you have; just ensure they’re large enough for mixing.
- Hand Mixer or Whisk: A hand mixer makes it easier, but a whisk works too!
- Mini Cheesecake Cups: Muffin tins or silicone molds are great alternatives.
- Spatula: Essential for folding and scraping the mixture.
- Oven: A standard oven is perfect for baking these treats.
Variations of Patriotic Mini Cheesecakes
- Chocolate Swirl: Add melted chocolate to the cream cheese mixture for a rich, chocolatey twist.
- Fruit-Infused: Mix in pureed strawberries or blueberries into the cream cheese for a fruity flavor.
- Gluten-Free: Substitute graham cracker crumbs with gluten-free cookies or almond flour for a gluten-free crust.
- Vegan Option: Use vegan cream cheese and coconut whipped cream for a dairy-free version.
- Nutty Crust: Incorporate crushed nuts like almonds or pecans into the crust for added texture and flavor.
Serving Suggestions for Patriotic Mini Cheesecakes
- Pair with a refreshing lemonade or iced tea for a delightful summer treat.
- Serve on a festive platter adorned with red, white, and blue decorations.
- Garnish with mint leaves for a pop of color and freshness.
- Offer a scoop of vanilla ice cream on the side for extra indulgence.
- Present with sparklers for a fun, celebratory touch at gatherings!
FAQs about Patriotic Mini Cheesecakes
Can I make these Patriotic Mini Cheesecakes ahead of time?
Absolutely! These mini cheesecakes can be made a day in advance. Just store them in the refrigerator until you’re ready to serve. This actually enhances the flavors!
What can I use instead of cream cheese?
If you’re looking for a lighter option, you can use low-fat cream cheese. For a dairy-free version, try using vegan cream cheese. Both will work beautifully in this recipe!
How do I store leftover cheesecakes?
Store any leftovers in an airtight container in the refrigerator. They’ll stay fresh for up to three days. Just remember to top them with fresh fruit right before serving!
Can I freeze these mini cheesecakes?
Yes, you can freeze them! Just make sure they’re well-wrapped in plastic wrap and then placed in a freezer-safe container. They can last up to two months in the freezer.
What’s the best way to serve these cheesecakes?
Serve them chilled, topped with fresh strawberries and blueberries. For an extra festive touch, you can add whipped cream or even a sprinkle of edible glitter!
Final Thoughts
Making these Patriotic Mini Cheesecakes is more than just baking; it’s about creating joyful moments with family and friends. The vibrant colors and creamy texture bring a festive spirit to any gathering, making them a delightful centerpiece. I love how easy they are to prepare, allowing me to spend more time enjoying the company of my loved ones. Whether it’s a holiday celebration or a simple backyard barbecue, these mini cheesecakes are sure to bring smiles and sweet memories. So, roll up your sleeves and let the festivities begin!
Print
Patriotic Mini Cheesecakes: A Festive Treat to Wow!
- Total Time: 40 minutes
- Yield: 12 mini cheesecakes 1x
- Diet: Vegetarian
Description
These Patriotic Mini Cheesecakes are a delightful and festive dessert perfect for celebrating national holidays or any patriotic occasion.
Ingredients
- 8 oz cream cheese, softened
- 1/2 cup granulated sugar
- 1 tsp vanilla extract
- 1 cup whipped cream
- 1 cup graham cracker crumbs
- 1/4 cup unsalted butter, melted
- Red and blue food coloring
- Fresh strawberries and blueberries for topping
Instructions
- Preheat the oven to 325°F (160°C).
- In a mixing bowl, combine the cream cheese, sugar, and vanilla extract until smooth.
- Fold in the whipped cream gently until well combined.
- In another bowl, mix the graham cracker crumbs with melted butter and press the mixture into the bottom of mini cheesecake cups.
- Divide the cream cheese mixture into three bowls. Leave one bowl plain, add red food coloring to the second, and blue food coloring to the third.
- Layer the colored mixtures into the cups, starting with the plain, then red, and finally blue.
- Bake for 15-20 minutes until set. Let cool completely.
- Top with fresh strawberries and blueberries before serving.
Notes
- For a firmer cheesecake, refrigerate for a few hours before serving.
- Feel free to adjust the food coloring to achieve desired shades.
- These can be made a day in advance for convenience.
- Prep Time: 20 minutes
- Cook Time: 20 minutes
- Category: Dessert
- Method: Baking
- Cuisine: American
Nutrition
- Serving Size: 1 mini cheesecake
- Calories: 150
- Sugar: 10g
- Sodium: 150mg
- Fat: 8g
- Saturated Fat: 5g
- Unsaturated Fat: 2g
- Trans Fat: 0g
- Carbohydrates: 15g
- Fiber: 1g
- Protein: 2g
- Cholesterol: 30mg

