
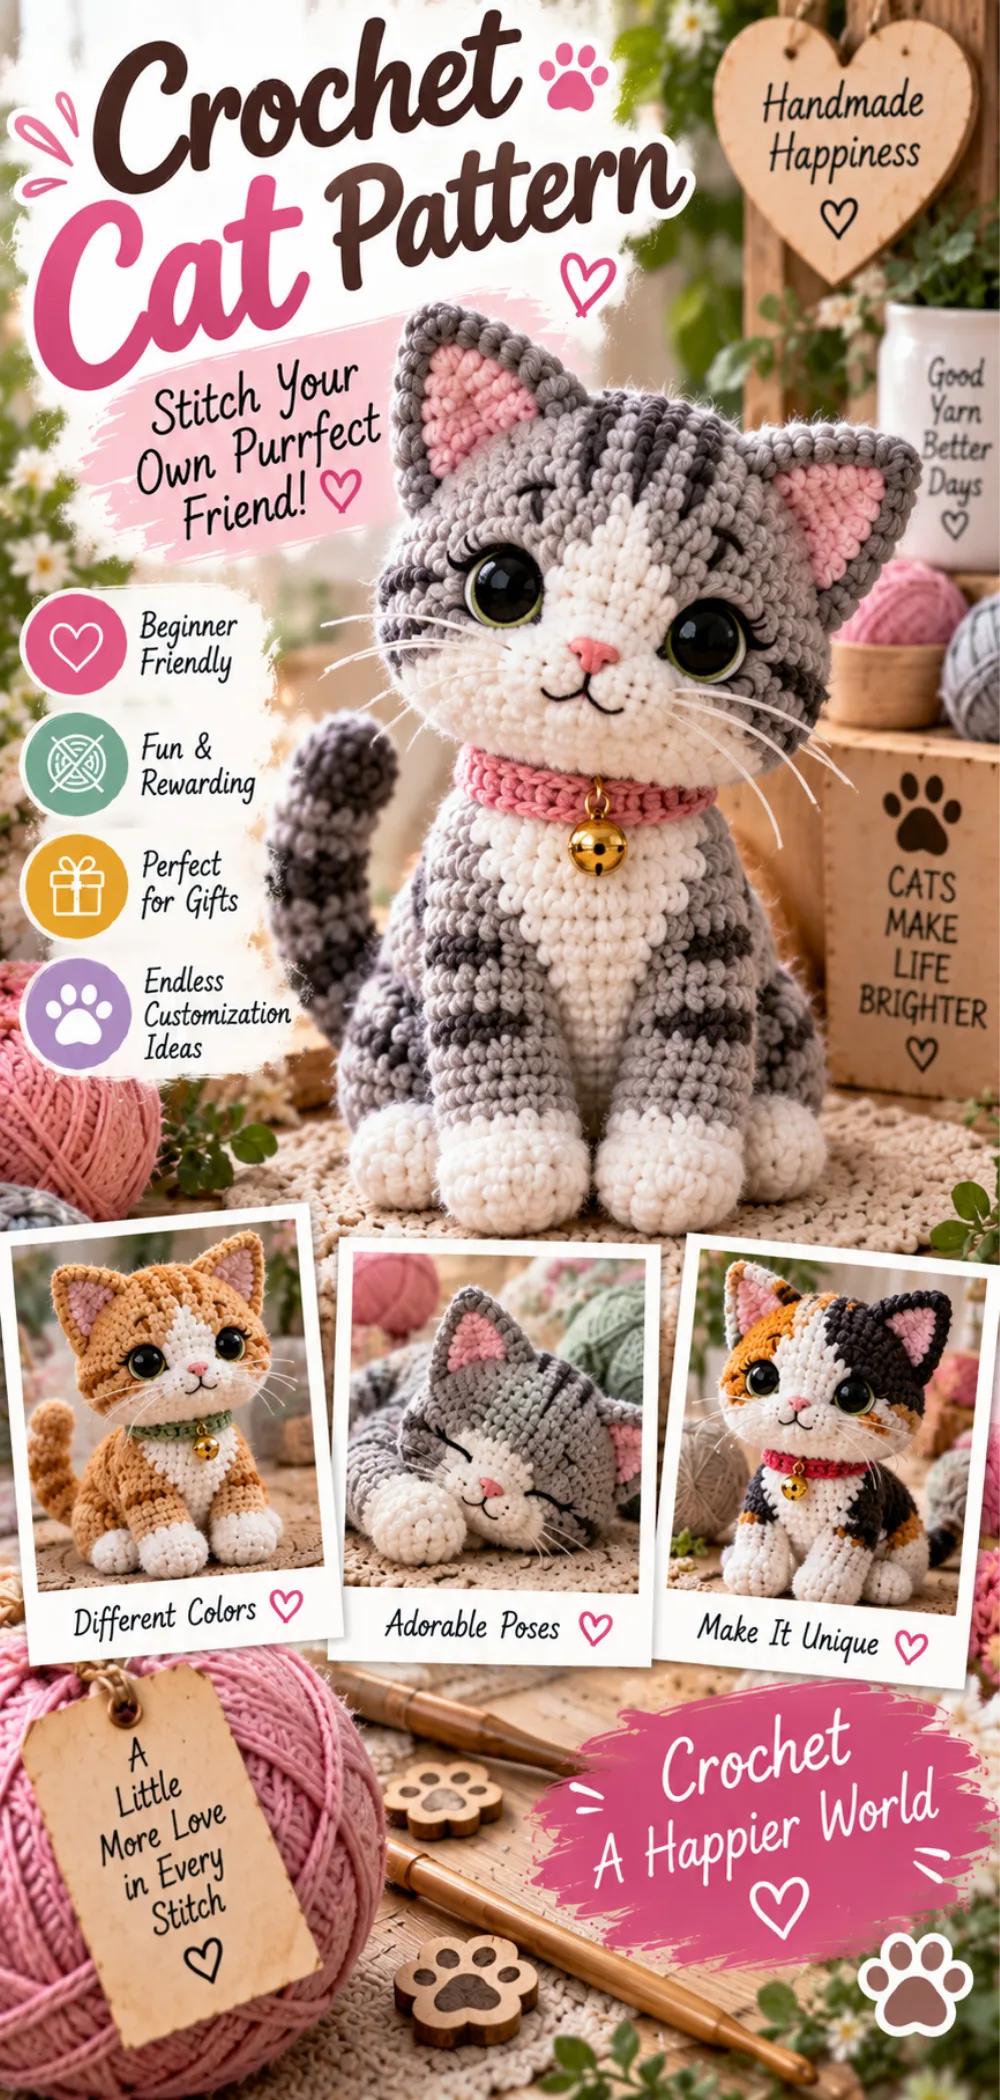
Step-by-Step Instructions for Crocheting Your Own Cute Cat
Round 1: Start by creating a magic ring with your yarn. This will form the center of your cat. Make sure the ring is tight to avoid gaps.
Round 2: Chain 2 (this does not count as a stitch). Work 6 single crochets (sc) into the magic ring. Pull the tail of the ring to close it. You should have 6 stitches in total.
Round 3: Increase each stitch by working 2 single crochets in each stitch around. You will have 12 stitches at the end of this round.
Round 4: *1 sc in the next stitch, inc in the next stitch.* Repeat from * to * around. You will have 18 stitches at the end of this round.
Round 5: *1 sc in the next 2 stitches, inc in the next stitch.* Repeat from * to * around. You will have 24 stitches at the end of this round.
Rounds 6-10: Work 1 sc in each stitch around for 5 rounds. This will create the body of the cat. You should still have 24 stitches at the end of each of these rounds.
Round 11: *1 sc in the next 2 stitches, dec (decrease) in the next stitch.* Repeat from * to * around. You will have 18 stitches at the end of this round.
Round 12: *1 sc in the next stitch, dec in the next stitch.* Repeat from * to * around. You will have 12 stitches at the end of this round.
Round 13: Stuff the body with fiberfill as you go. Continue to dec in each stitch around. You will have 6 stitches at the end of this round.
Round 14: Finish stuffing the body if needed. Dec in each stitch around. You will have 3 stitches at the end of this round.
Round 15: Cut the yarn, leaving a long tail. Use the yarn needle to thread the tail through the remaining stitches and pull tight to close. Weave in any loose ends.
Head: Repeat the same process as the body for the head, but stop after Round 10. Stuff the head lightly before closing.
Limbs: For each limb, create a magic ring and work 6 sc into the ring. Increase in each stitch for the next round, then work 1 sc in each stitch for 3 rounds. Stuff lightly and close as you did for the body.
Assembly: Attach the head to the body using the yarn needle. Position the limbs and sew them onto the body securely. Attach safety eyes and embroider a nose and mouth to complete your cute cat.
Final Touch: Weave in any remaining loose ends and ensure everything is securely attached. Your cute cat is now complete!
Introduction / About This From Yarn to Meow: Crocheting Your Own Cute Cat
Welcome to the delightful world of crochet! In this project, you will learn how to create your very own cute cat. This pattern is designed for both beginners and intermediate crocheters, making it a perfect choice for anyone looking to expand their skills while having fun.
There’s something truly special about crafting a personalized stuffed animal. Not only do you get to enjoy the process of making it, but you also end up with a unique creation that can serve as a wonderful gift or a charming addition to your home decor. Imagine the joy of gifting a handmade cat to a friend or family member, or simply enjoying it as a cozy companion on your couch!
One of the most exciting aspects of this project is the opportunity for creativity. You can choose from a variety of yarn colors to bring your cat to life, allowing you to customize its features and personality. Whether you prefer a classic tabby, a playful calico, or a sleek black cat, the possibilities are endless. Let your imagination run wild as you select the perfect yarn to match your vision!
IMAGE: A beautifully crocheted cute cat sitting on a cozy blanket, with a soft focus background of a living room setting, showcasing its vibrant colors and detailed features.
ALT: Cute crocheted cat from the pattern “From Yarn to Meow.”
Crochet Pattern Quick Overview
| Detail | Information |
| Skill level | Beginner to Intermediate |
| Crochet terminology | US terms |
| Yarn weight | Worsted weight |
| Crochet hook size | G/4.0 mm |
| Approximate finished size | 10 inches tall |
| Approximate working time | 2 hours 30 minutes |
| Construction method | Worked in rounds |
| Crochet technique | Amigurumi |
| Pattern type | Free crochet pattern |
About This From Yarn to Meow: Crocheting Your Own Cute Cat
This adorable cat is constructed using continuous rounds, which means you will be working in a spiral without joining each round. This technique helps create a seamless look, perfect for amigurumi projects like this one.
The project involves creating several separate pieces: the body, head, and limbs. Each piece is crocheted individually and stuffed with fiberfill to give your cat a nice, plush shape. Once all the pieces are completed, they will be assembled together to form your cute cat.
Throughout this project, you will practice essential crochet skills. You will learn how to create a magic ring, which is a great technique for starting projects that require a tight center. Additionally, you will work with single crochet stitches and practice increasing stitches to shape your cat effectively. These skills are fundamental for any crocheter and will serve you well in future projects!
Materials and Supplies
To create your adorable crocheted cat, you will need a few essential materials and supplies. Choosing the right yarn and tools is crucial for achieving the desired look and feel of your finished project. Here’s what you will need:
- Yarn (worsted weight)
- Crochet hook (size G/4.0 mm)
- Fiberfill stuffing
- Safety eyes
- Yarn needle
- Scissors
IMAGE: All required materials for crocheting the cute cat, including yarn, crochet hook, and safety eyes, arranged aesthetically on a crafting table.
ALT: Materials for crocheting a cute cat from the pattern “From Yarn to Meow.”
Best Yarn for From Yarn to Meow: Crocheting Your Own Cute Cat
For this project, a worsted weight yarn is recommended. This type of yarn strikes a balance between thickness and manageability, making it ideal for amigurumi. You can choose from various fiber types, such as:
- Acrylic: This is a popular choice due to its affordability, wide range of colors, and ease of care. It is machine washable and durable, making it perfect for toys.
- Cotton: Cotton yarn is another excellent option, especially if you prefer a more natural fiber. It has a lovely texture and holds its shape well, but it may not be as soft as acrylic.
When selecting colors, think about the personality you want your cat to have. You can create a classic tabby with browns and oranges, a playful calico with a mix of colors, or even a sleek black cat. The choice is yours, so have fun with it!
Suitable Yarn Substitutions
If you don’t have worsted weight yarn on hand, there are suitable alternatives you can use. Just be sure to check the gauge and yardage to ensure your cat turns out the right size. Some alternatives include:
- DK weight yarn: This is slightly thinner than worsted weight, so you may need to adjust your hook size or work more stitches to achieve the same dimensions.
- Bulky weight yarn: This thicker yarn will create a larger cat, so you may need to modify the pattern accordingly.
When substituting yarn, always consider the texture and drape. A yarn that is too stiff may not give your cat the cuddly feel you desire, while a very soft yarn may not hold its shape well.
Crochet Hook and Additional Tools
For this project, you will need a crochet hook size G/4.0 mm. This size is perfect for working with worsted weight yarn and will help you achieve the right tension for your stitches.
In addition to your crochet hook, here are some other essential tools:
- Scissors: Use these to cut your yarn when you finish your project or need to change colors.
- Yarn needle: This is crucial for weaving in loose ends and sewing pieces together. A large-eyed needle will make it easier to thread your yarn.
- Stitch markers: These can be helpful for marking the beginning of rounds or keeping track of your stitch count.
Having the right tools will make your crocheting experience smoother and more enjoyable, so be sure to gather everything before you start!
Crochet Stitches and Techniques Used
In this project, you will use several essential crochet stitches and techniques to create your cute cat. Familiarity with basic crochet stitches is important, as they will form the foundation of your work. Here are the key stitches and techniques you will be using:
Single Crochet
The single crochet (sc) stitch is the primary stitch used throughout this project. It creates a tight and sturdy fabric, which is perfect for amigurumi. You will use single crochet to shape the body, head, and limbs of your cat. To work a single crochet, follow these steps:
- Insert your hook into the stitch where you want to work.
- Yarn over and pull up a loop (you will have two loops on your hook).
- Yarn over again and pull through both loops on the hook.
This simple stitch is versatile and forms the basis of many crochet projects, making it a valuable skill to master.
IMAGE: Close-up of the single crochet stitch, highlighting the stitch structure and insertion point.
ALT: Single crochet stitch used in the “From Yarn to Meow” cat pattern.
Magic Ring
The magic ring technique is crucial for starting your cat project, as it allows you to create a tight center for your work. This is especially important in amigurumi, where gaps can detract from the finished look. To create a magic ring, follow these steps:
- Wrap the yarn around your fingers to form a loop, leaving a long tail.
- Insert your hook through the loop and yarn over to pull up a loop.
- Chain 1 to secure the ring.
- Work your desired number of stitches into the ring, pulling the tail to tighten the loop as you go.
This technique ensures that your starting point is snug and prevents any gaps, giving your cat a polished appearance right from the beginning.
Crochet Abbreviations
| Abbreviation | Meaning |
|---|---|
| ch | chain |
| sc | single crochet |
| inc | increase |
| st | stitch |
| rnd | round |
| sl st | slip stitch |
Gauge
Gauge is an essential aspect of crocheting, especially for projects like this cute cat. It refers to the number of stitches and rows per inch in your crochet work. Ensuring that your gauge matches the pattern is crucial for achieving the correct size of your finished cat. If your gauge is off, your cat may end up larger or smaller than intended, which can affect its overall appearance and proportions.
To check your gauge, it’s a good idea to create a gauge swatch before starting your project. Here’s how to do it:
- Using the same yarn and hook you plan to use for your cat, chain 20 stitches.
- Work in single crochet for 10 rows, or until your swatch measures at least 4 inches square.
- After completing the swatch, measure the number of stitches and rows within a 4-inch square.
For example, if your gauge swatch measures 16 stitches and 20 rows in 4 inches, you will need to adjust your hook size or tension to match the recommended gauge for this pattern, which is typically around 12-14 stitches per 4 inches for worsted weight yarn. If your gauge is tighter, try using a larger hook; if it’s looser, switch to a smaller hook.
By taking the time to check your gauge, you can ensure that your crocheted cat turns out just the right size and shape, making your crafting experience more enjoyable and successful!
Step-by-Step Instructions for Crocheting Your Own Cute Cat
Round 1: Start by creating a magic ring with your yarn. This will form the center of your cat. Make sure the ring is tight to avoid gaps.
Round 2: Chain 2 (this does not count as a stitch). Work 6 single crochets (sc) into the magic ring. Pull the tail of the ring to close it. You should have 6 stitches in total.
Round 3: Increase each stitch by working 2 single crochets in each stitch around. You will have 12 stitches at the end of this round.
Round 4: *1 sc in the next stitch, inc in the next stitch.* Repeat from * to * around. You will have 18 stitches at the end of this round.
Round 5: *1 sc in the next 2 stitches, inc in the next stitch.* Repeat from * to * around. You will have 24 stitches at the end of this round.
Rounds 6-10: Work 1 sc in each stitch around for 5 rounds. This will create the body of the cat. You should still have 24 stitches at the end of each of these rounds.
Round 11: *1 sc in the next 2 stitches, dec (decrease) in the next stitch.* Repeat from * to * around. You will have 18 stitches at the end of this round.
Round 12: *1 sc in the next stitch, dec in the next stitch.* Repeat from * to * around. You will have 12 stitches at the end of this round.
Round 13: Stuff the body with fiberfill as you go. Continue to dec in each stitch around. You will have 6 stitches at the end of this round.
Round 14: Finish stuffing the body if needed. Dec in each stitch around. You will have 3 stitches at the end of this round.
Round 15: Cut the yarn, leaving a long tail. Use the yarn needle to thread the tail through the remaining stitches and pull tight to close. Weave in any loose ends.
Head: Repeat the same process as the body for the head, but stop after Round 10. Stuff the head lightly before closing.
Limbs: For each limb, create a magic ring and work 6 sc into the ring. Increase in each stitch for the next round, then work 1 sc in each stitch for 3 rounds. Stuff lightly and close as you did for the body.
Assembly: Attach the head to the body using the yarn needle. Position the limbs and sew them onto the body securely. Attach safety eyes and embroider a nose and mouth to complete your cute cat.
Final Touch: Weave in any remaining loose ends and ensure everything is securely attached. Your cute cat is now complete!
Tips for Customizing Your Cat
One of the most enjoyable aspects of crocheting your own cute cat is the opportunity to personalize it. Here are some suggestions to help you customize your cat and make it truly unique:
- Change Colors: Experiment with different yarn colors to create a cat that reflects your style. You can use a single color for a classic look or mix and match colors for a more playful design. Consider using variegated yarn for a fun, multi-colored effect.
- Add Accessories: Give your cat some personality by adding accessories. You can crochet a small collar, a bow tie, or even a tiny hat. These little details can make your cat stand out and showcase your creativity.
- Use Different Yarn Textures: Try using yarns with different textures to add depth to your cat. For example, a soft, fluffy yarn can create a cuddly look, while a smoother yarn can give a sleek appearance. Mixing textures can also enhance the visual interest of your finished piece.
- Embroider Unique Features: Instead of using safety eyes, consider embroidering the eyes or adding unique facial features. You can create a whimsical expression or even personalize it with a name or initials.
- Experiment with Size: If you want a larger or smaller cat, adjust your yarn weight and hook size accordingly. Using a thicker yarn and a larger hook will create a bigger cat, while a thinner yarn will result in a smaller version.
Remember, there are no strict rules when it comes to creativity! Feel free to experiment with different designs and ideas. The more you customize, the more special your crocheted cat will be. Enjoy the process and let your imagination guide you!
Troubleshooting Common Issues
As you embark on your journey to crochet your cute cat, you may encounter a few common issues, especially if you are a beginner. Here are some typical problems and helpful solutions to ensure your project goes smoothly:
Uneven Stitches
One of the most common challenges crocheters face is uneven stitches. This can happen for several reasons, including tension issues or not inserting the hook into the correct stitch.
- Solution: Pay attention to your tension. Try to keep your yarn tension consistent throughout your work. If you notice that your stitches are too tight, relax your grip on the yarn. Conversely, if they are too loose, try to hold the yarn a bit tighter.
- Tip: Use a stitch marker to mark the beginning of each round. This will help you keep track of your stitches and ensure you are working into the correct stitch.
Difficulty with Stuffing
Stuffing your cat can sometimes be tricky. You want to ensure it is filled enough to hold its shape but not so much that it becomes lumpy or misshapen.
- Solution: Use small amounts of fiberfill at a time. Start by adding a little stuffing, then gently shape the body or limb before adding more. This will help you achieve an even distribution of stuffing.
- Tip: Use a blunt object, like a pencil or a crochet hook, to help push the stuffing into the corners and ensure it is evenly spread throughout the piece.
Missed Stitches
It’s easy to miss a stitch, especially when working in continuous rounds. This can lead to holes or gaps in your work.
- Solution: If you notice a gap, you can go back and add a stitch in the missed spot. Alternatively, you can use a yarn needle to sew the gap closed after finishing your cat.
- Tip: Count your stitches at the end of each round to ensure you have the correct number. This will help you catch any mistakes early on.
Twisted Starting Chain
A twisted starting chain can lead to an uneven base for your project, making it difficult to work in rounds.
- Solution: When creating your magic ring or starting chain, make sure it is flat and not twisted. If you notice a twist, you can carefully untwist it before proceeding.
- Tip: Take your time when forming the magic ring. Ensure that the yarn is positioned correctly before you start crocheting into it.
By being aware of these common issues and their solutions, you can troubleshoot effectively and enjoy a smoother crocheting experience. Remember, practice makes perfect, and every crocheter faces challenges along the way. Don’t hesitate to take a break and come back to your project with fresh eyes if you encounter difficulties!
Caring for Your Crocheted Cat
Once you have completed your adorable crocheted cat, it’s important to know how to care for it to ensure it remains in great condition. Here are some tips for washing and storing your finished product:
Washing Your Crocheted Cat
To keep your cat looking its best, you may need to clean it occasionally. Here are some washing tips:
- Hand Wash: It’s best to hand wash your crocheted cat to avoid damaging the stitches. Fill a basin with lukewarm water and add a gentle detergent. Submerge the cat and gently agitate the water to clean it. Avoid scrubbing or twisting the fabric.
- Rinse Thoroughly: After washing, rinse the cat in clean, cool water to remove any soap residue. Make sure to gently squeeze out excess water without wringing or twisting the fabric.
- Air Dry: Lay your crocheted cat flat on a clean towel to air dry. Avoid hanging it, as this can distort its shape. Reshape the cat as needed while it dries to maintain its form.
Storage Tips
Proper storage is essential for keeping your crocheted cat in good condition. Here are some storage tips:
- Cool, Dry Place: Store your cat in a cool, dry location to prevent moisture buildup, which can lead to mold or mildew. Avoid placing it in direct sunlight, as this can cause colors to fade over time.
- Avoid Compression: When storing your cat, avoid compressing it with heavy items. This can cause it to lose its shape. Instead, keep it in a spacious area where it can maintain its form.
- Use a Storage Bag: If you want to protect your cat from dust, consider placing it in a breathable storage bag. Avoid plastic bags, as they can trap moisture and lead to damage.
By following these care instructions, you can ensure that your crocheted cat remains a cherished companion for years to come. Regular maintenance will help preserve its shape and quality, allowing you to enjoy your handmade creation for a long time!
Conclusion
Congratulations on completing your adorable crocheted cat! We hope you enjoyed the process and are proud of your creation. We encourage you to share your finished projects on social media using the hashtag #FromYarnToMeow. Engaging with the crochet community is a wonderful way to connect with fellow crafters, gain inspiration, and showcase your unique designs.
If you’re eager to continue your crochet journey, be sure to explore more crochet patterns and tutorials available on our website. There are plenty of exciting projects waiting for you, whether you’re looking to challenge yourself or simply enjoy some relaxing crafting time. Happy crocheting!
Print
From Yarn to Meow: Free Step-by-Step Crochet Pattern
- Total Time: 2 hours 30 minutes
- Yield: 1 cute cat
- Diet: Vegan
Description
A comprehensive guide to crocheting your own cute cat using a free step-by-step pattern.
Ingredients
- Yarn (worsted weight)
- Crochet hook (size G/4.0 mm)
- Fiberfill stuffing
- Safety eyes
- Yarn needle
- Scissors
Instructions
- Start by creating a magic ring with your yarn.
- Chain 2 and work 6 single crochets into the ring.
- Increase each stitch in the next round to create a round shape.
- Continue crocheting in rounds, following the pattern for the body, head, and limbs.
- Stuff the cat with fiberfill as you go.
- Attach safety eyes and embroider a nose and mouth.
- Finish by closing the top and weaving in any loose ends.
Notes
- Choose yarn colors that match your desired cat design.
- For a larger cat, use a thicker yarn and larger hook.
- Store your finished cat in a cool, dry place.
- Prep Time: 30 minutes
- Cook Time: 2 hours
- Category: Craft
- Method: Crocheting