
Step-by-Step Instructions for Easy Crochet Fall Wreath Pattern for Your Front Door
Step 1: Start with a Slip Knot: Make a slip knot and chain enough stitches to cover the wire wreath frame. The number of chains will depend on your tension, but aim for a length that wraps around the frame comfortably.
Step 2: Join the Chain: Join the chain to form a circle by inserting your hook into the first chain stitch and making a slip stitch. This creates a loop to work into.
Step 3: Crochet Around the Frame: Begin crocheting around the wire frame using single crochet stitches. Insert your hook into the wire frame, yarn over, pull up a loop, yarn over again, and pull through both loops on your hook. Make sure to work tightly enough to cover the frame completely.
Step 4: Continue Crocheting: Keep crocheting until the entire frame is covered. If you run out of yarn, simply join a new piece by tying it to the old one and continuing. Ensure that the stitches are evenly spaced for a neat appearance.
Step 5: Secure the Yarn: Once the frame is fully covered, secure the end of the yarn by making a slip stitch in the last stitch. Cut off any excess yarn, leaving a small tail to weave in later.
Step 6: Attach Embellishments: Use the hot glue gun to attach embellishments like faux leaves, acorns, or pumpkins to the wreath. Arrange them in a way that feels balanced and visually appealing.
Step 7: Allow to Dry: Let the glue dry completely before hanging your wreath on the front door. This ensures that all embellishments are securely attached and will not fall off.
Introduction / About This Easy Crochet Fall Wreath Pattern for Your Front Door
Welcome to the world of crochet! In this tutorial, you will learn how to create a beautiful and simple crochet fall wreath for your front door. This project is designed to be accessible for both beginners and intermediate crocheters, making it a perfect way to enhance your seasonal decor.
Crafting your own wreath allows you to express your creativity while adding a personal touch to your home. The vibrant colors of fall—think rich oranges, warm yellows, and deep browns—will bring a cozy ambiance to your entryway. Plus, the satisfaction of making something with your own hands is truly rewarding.
Throughout this project, you will work with basic crochet techniques, including chaining and single crochet stitches, to cover a wire wreath frame. With just a few materials and some time, you can create a stunning piece that celebrates the beauty of autumn.
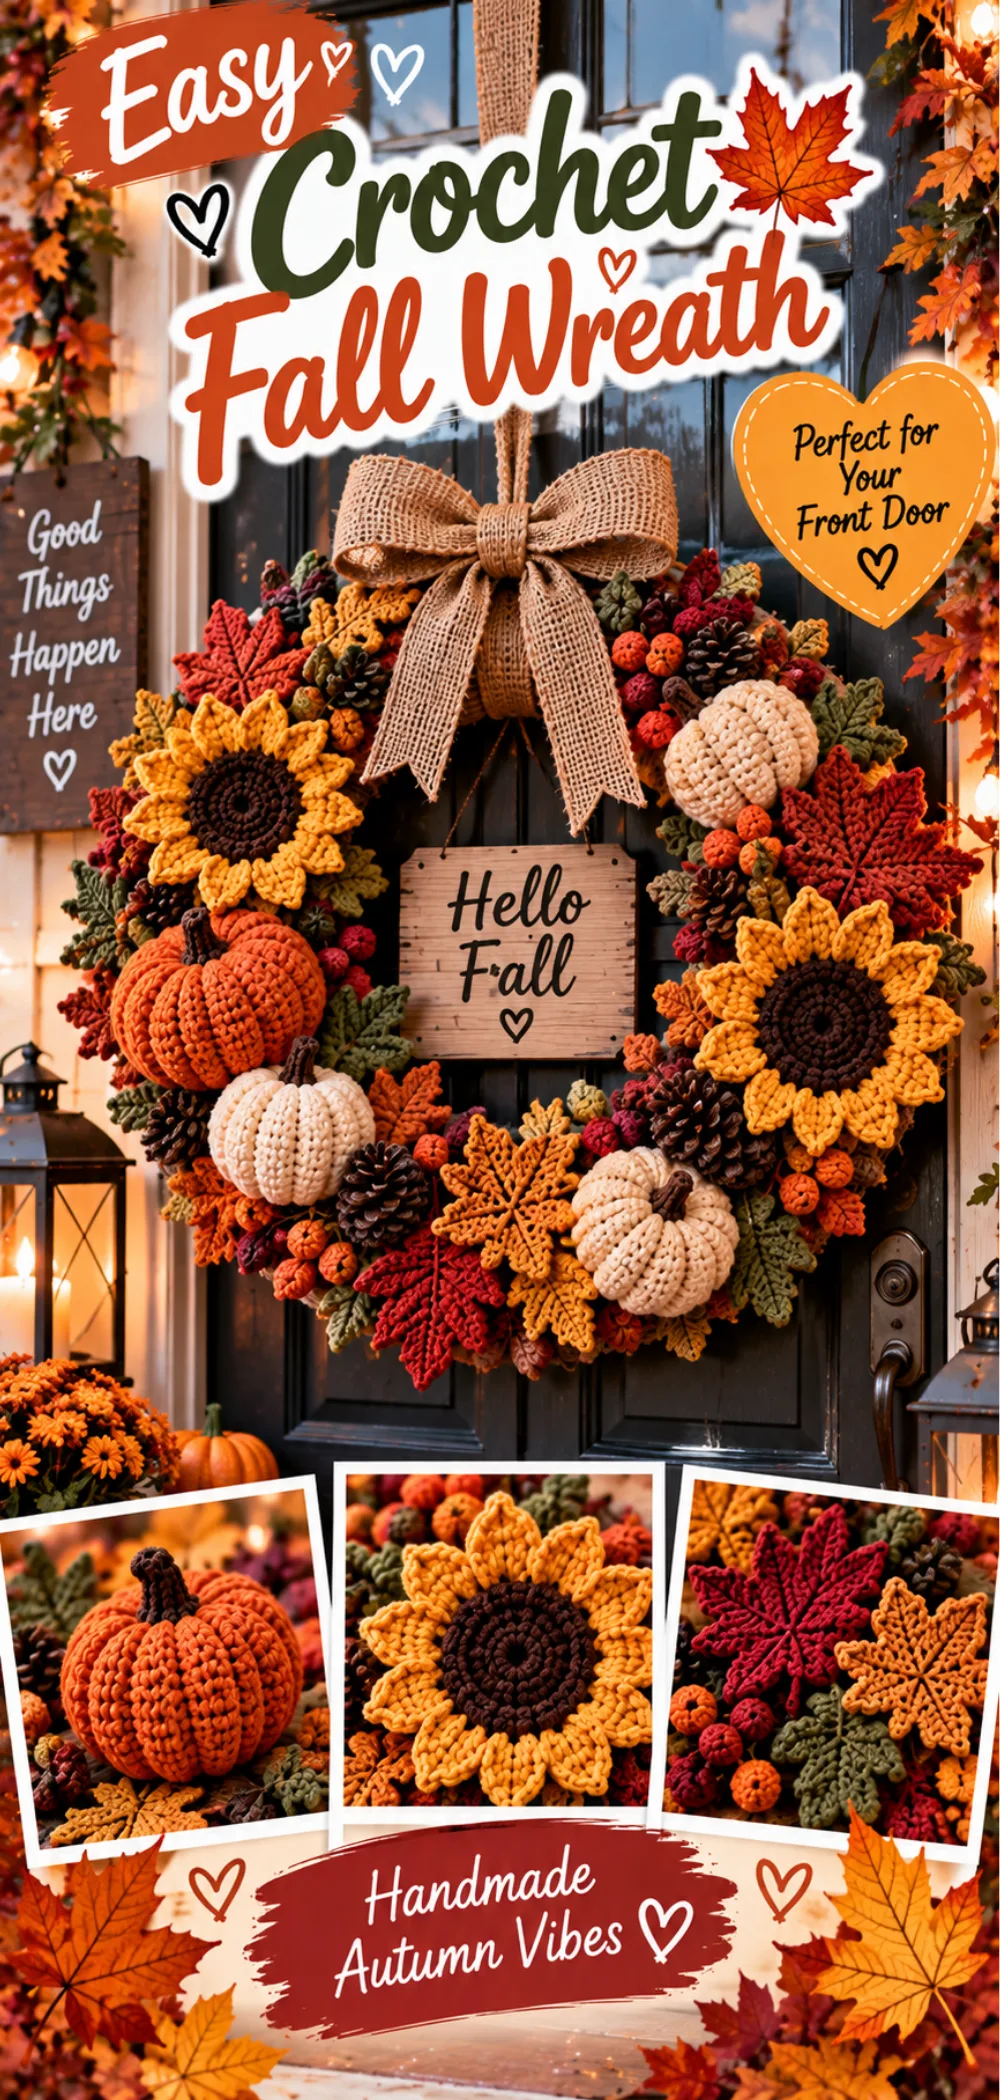
IMAGE: A beautifully crafted crochet fall wreath hanging on a front door, showcasing vibrant fall colors like orange, yellow, and brown, with embellishments like faux leaves and pumpkins.
ALT: Easy Crochet Fall Wreath Pattern for Your Front Door displayed on a welcoming front door.
Crochet Pattern Quick Overview
| Skill Level | Beginner to Intermediate |
| Crochet Terminology | US Terms |
| Yarn Weight | Worsted Weight |
| Crochet Hook Size | H/8 (5mm) |
| Approximate Finished Size | 12 inches in diameter |
| Approximate Working Time | 2 hours 30 minutes |
| Construction Method | Crocheting around a wire frame |
| Crochet Technique | Single crochet |
| Pattern Type | Free crochet pattern |
About This Easy Crochet Fall Wreath Pattern for Your Front Door
This Easy Crochet Fall Wreath Pattern is a delightful project that involves crocheting around a wire wreath frame. The construction method is straightforward, making it an excellent choice for both beginners and those with some crochet experience.
To create this beautiful wreath, you will start by making a chain that wraps around the wire frame. Once the chain is complete, you will join it to form a circle. The main technique used in this project is the single crochet stitch, which you will use to cover the entire frame. This stitch is not only simple but also provides a sturdy and textured finish to your wreath.
As you work through this project, you will practice essential crochet skills, such as chaining and single crocheting, while creating a decorative piece that adds warmth and charm to your front door. The satisfaction of completing this wreath will inspire you to explore more crochet projects in the future!
Materials and Supplies
To create your Easy Crochet Fall Wreath, you will need a few essential materials. Choosing the right colors and yarn type is crucial for achieving that warm, inviting fall aesthetic. Here’s what you’ll need:
- Wool yarn in fall colors (orange, yellow, brown)
- Crochet hook (size H/8 or 5mm)
- Wire wreath frame (12 inches)
- Scissors
- Hot glue gun and glue sticks
- Embellishments (like faux leaves, acorns, or pumpkins)
IMAGE: All required materials for the Easy Crochet Fall Wreath Pattern neatly arranged, including yarn, crochet hook, and embellishments.
ALT: Materials for Easy Crochet Fall Wreath Pattern for Your Front Door, including yarn and tools.
Best Yarn for Easy Crochet Fall Wreath Pattern for Your Front Door
The recommended yarn weight for this project is worsted weight, which provides the right thickness and durability for your wreath. You can choose between wool or acrylic fibers, depending on your preference. Wool offers warmth and a cozy feel, while acrylic is often more affordable and easier to care for.
For a beautiful fall aesthetic, consider using color combinations like:
- Rich orange for a vibrant touch
- Warm yellow to brighten the design
- Deep brown for a grounding effect
Approximately 200-300 yards of yarn should be sufficient for this project, depending on your tension and how tightly you crochet.
Suitable Yarn Substitutions
If you don’t have worsted weight yarn on hand, you can substitute it with other yarns, but be sure to check the gauge and yardage. For example, a bulky yarn can be used for a thicker wreath, but you may need to adjust your hook size accordingly.
When selecting alternative yarns, consider how the fiber behaves. For instance, cotton yarn is less stretchy than wool or acrylic, which may affect the overall shape and durability of your wreath. Always choose a fiber that will hold up well when displayed outdoors.
Crochet Hook and Additional Tools
For this project, you will need a crochet hook size H/8 (5mm). This size is ideal for working with worsted weight yarn and will help you achieve the right tension for your stitches.
In addition to the crochet hook, gather the following tools:
- Scissors for cutting yarn
- Hot glue gun and glue sticks for attaching embellishments
Having these materials and tools ready will ensure a smooth crafting experience as you create your beautiful fall wreath!
Crochet Stitches and Techniques Used
In this Easy Crochet Fall Wreath Pattern, the primary stitch you will use is the single crochet stitch. This stitch is perfect for covering the wire frame, providing a sturdy and textured finish that enhances the overall look of your wreath. As you work on this project, it’s important to be familiar with basic crochet skills, including how to hold your yarn and hook, as well as how to make a slip knot and chain stitches.
Single Crochet Stitch
The single crochet stitch is a fundamental stitch in crochet that creates a tight and dense fabric. To use the single crochet stitch for covering the wire frame, follow these steps:
- Insert your hook into the wire frame.
- Yarn over and pull up a loop, which will leave you with two loops on your hook.
- Yarn over again and pull through both loops on your hook to complete the stitch.
This stitch will be repeated around the frame, ensuring that the entire surface is covered. Working tightly will help to prevent any gaps, giving your wreath a polished appearance.
IMAGE: Close-up of the single crochet stitch, highlighting the stitch structure and insertion point.
ALT: Single crochet stitch used in the Easy Crochet Fall Wreath Pattern for Your Front Door.
Joining Techniques
Joining the chain to form a circle is a crucial step in this project. Here’s how to do it:
- After chaining enough stitches to cover the wire frame, insert your hook into the first chain stitch.
- Make a slip stitch by yarn over and pulling through both the first chain and the loop on your hook. This creates a loop to work into.
Once you have joined the chain, you can begin crocheting around the frame. To secure the end of the yarn after finishing your last stitch, make a slip stitch in the last stitch and cut off any excess yarn, leaving a small tail to weave in later. This will ensure that your work remains neat and tidy.
Crochet Abbreviations
| Abbreviation | Meaning |
| ch | Chain |
| sc | Single Crochet |
| sl st | Slip Stitch |
| yo | Yarn Over |
Gauge
Gauge is an important aspect of crochet that can significantly affect the finished size and appearance of your project. For the Easy Crochet Fall Wreath Pattern, achieving the correct gauge ensures that your wreath will fit the 12-inch wire frame properly and maintain its shape. If your stitches are too tight or too loose, the wreath may end up being smaller or larger than intended.
To check your gauge, it’s a good idea to create a gauge swatch before starting the wreath. Here’s how to do it:
- Using your chosen yarn and crochet hook (H/8 or 5mm), make a chain of 12 stitches.
- Work in single crochet for 10 rows, or until your swatch measures approximately 4 inches in height.
- After completing the swatch, measure the width and height. You should aim for a gauge of 4 inches = 12 single crochet stitches.
If your gauge swatch does not match this measurement, you may need to adjust your tension. If your swatch is smaller than 4 inches, try using a larger hook. If it’s larger, switch to a smaller hook. Remember, achieving the correct gauge is essential for ensuring your wreath looks just right!
Step-by-Step Instructions for Easy Crochet Fall Wreath Pattern for Your Front Door
Step 1: Start with a Slip Knot: Make a slip knot and chain enough stitches to cover the wire wreath frame. The number of chains will depend on your tension, but aim for a length that wraps around the frame comfortably.
Step 2: Join the Chain: Join the chain to form a circle by inserting your hook into the first chain stitch and making a slip stitch. This creates a loop to work into.
Step 3: Crochet Around the Frame: Begin crocheting around the wire frame using single crochet stitches. Insert your hook into the wire frame, yarn over, pull up a loop, yarn over again, and pull through both loops on your hook. Make sure to work tightly enough to cover the frame completely.
Step 4: Continue Crocheting: Keep crocheting until the entire frame is covered. If you run out of yarn, simply join a new piece by tying it to the old one and continuing. Ensure that the stitches are evenly spaced for a neat appearance.
Step 5: Secure the Yarn: Once the frame is fully covered, secure the end of the yarn by making a slip stitch in the last stitch. Cut off any excess yarn, leaving a small tail to weave in later.
Step 6: Attach Embellishments: Use the hot glue gun to attach embellishments like faux leaves, acorns, or pumpkins to the wreath. Arrange them in a way that feels balanced and visually appealing.
Step 7: Allow to Dry: Let the glue dry completely before hanging your wreath on the front door. This ensures that all embellishments are securely attached and will not fall off.
Customization Tips
One of the best parts of creating your Easy Crochet Fall Wreath is the opportunity to personalize it to reflect your unique style and home decor. Here are some tips to help you customize your wreath:
- Color Choices: While the traditional fall colors of orange, yellow, and brown are beautiful, feel free to experiment with other shades. Consider using deep reds, muted greens, or even metallics like gold or copper for a more modern twist.
- Embellishments: The embellishments you choose can dramatically change the look of your wreath. In addition to faux leaves, acorns, and pumpkins, think about adding pinecones, berries, or even small fabric flowers. You can also use seasonal items like mini ornaments for winter or flowers for spring.
- Seasonal Variations: To keep your wreath fresh throughout the year, consider creating interchangeable embellishments. You can make a base wreath and then switch out the decorations for different seasons or holidays. For example, add snowflakes and holly for winter, or bright flowers for spring.
- Texture and Layers: Add depth to your wreath by incorporating different textures. Use yarns with varying thicknesses or combine crochet with other materials like burlap or ribbon. Layering different elements can create a more dynamic and visually interesting piece.
- Size Adjustments: If you want a larger or smaller wreath, simply adjust the number of chains in the first step. A larger wreath can make a bold statement, while a smaller one can be a charming accent.
By personalizing your Easy Crochet Fall Wreath, you can create a unique piece that not only enhances your front door but also showcases your creativity and style. Enjoy the process of making it your own!
Care and Storage
Caring for your Easy Crochet Fall Wreath is essential to ensure it remains beautiful and vibrant for many seasons to come. Here are some tips on how to maintain your wreath and store it when not in use:
- Regular Dusting: To keep your wreath looking fresh, gently dust it with a soft cloth or a feather duster. This will help remove any accumulated dust or debris without damaging the yarn or embellishments.
- Avoid Direct Sunlight: If you hang your wreath outdoors, try to place it in a shaded area. Prolonged exposure to direct sunlight can cause the colors to fade over time.
- Check for Damage: Periodically inspect your wreath for any loose embellishments or frayed yarn. If you notice any issues, use a hot glue gun to reattach or secure any parts that may have come loose.
- Storage: When the fall season is over, store your wreath in a cool, dry place. Consider placing it in a large plastic bag or a storage box to protect it from dust and moisture. Avoid crushing or bending the wreath to maintain its shape.
- Reuse for Future Seasons: One of the best aspects of your crochet wreath is that it can be reused year after year. With proper care and storage, you can enjoy your beautiful creation for many autumns to come. Feel free to refresh it with new embellishments or colors each season to keep it looking new!
By following these care and storage tips, you can ensure that your Easy Crochet Fall Wreath remains a cherished part of your seasonal decor for years ahead.
Conclusion
Creating your Easy Crochet Fall Wreath is not just a fun project; it’s a wonderful way to celebrate the beauty of the autumn season. As you work through the steps, you’ll find joy in crafting something unique that enhances your home’s entrance. The vibrant colors and personal touches you add will make your wreath a delightful focal point for friends and family.
We encourage you to share your finished projects! Whether you stick to the traditional fall colors or customize your wreath with your own flair, we’d love to see how your creativity shines through. Happy crocheting!
Print
Easy Crochet Fall Wreath Pattern for Your Front Door – Step-by-Step Tutorial
- Total Time: 2 hours 30 minutes
- Yield: 1 wreath
- Diet: Vegan
Description
A simple and beautiful crochet pattern to create a fall wreath for your front door.
Ingredients
- Wool yarn in fall colors (orange, yellow, brown)
- Crochet hook (size H/8 or 5mm)
- Wire wreath frame (12 inches)
- Scissors
- Hot glue gun and glue sticks
- Embellishments (like faux leaves, acorns, or pumpkins)
Instructions
- Start by making a slip knot and chaining enough stitches to cover the wire wreath frame.
- Join the chain to form a circle and begin crocheting around the frame using single crochet stitches.
- Continue crocheting until the entire frame is covered, adding more yarn as needed.
- Once the frame is covered, secure the end of the yarn and cut off any excess.
- Use the hot glue gun to attach embellishments to the wreath, arranging them as desired.
- Allow the glue to dry completely before hanging your wreath on the front door.
Notes
- Feel free to customize the colors and embellishments to match your home decor.
- This wreath can be stored in a cool, dry place for future use.
- If you want a larger wreath, simply increase the number of chains in the first step.
- Prep Time: 30 minutes
- Cook Time: 2 hours
- Category: Craft
- Method: Crocheting
- Cuisine: N/A
Nutrition
- Serving Size: N/A
- Calories: N/A
- Sugar: N/A
- Sodium: N/A
- Fat: N/A
- Saturated Fat: N/A
- Unsaturated Fat: N/A
- Trans Fat: N/A
- Carbohydrates: N/A
- Fiber: N/A
- Protein: N/A
- Cholesterol: N/A