
Step-by-Step Instructions for Easy Crochet Christmas Tree Pattern Using Scrap Yarn
Step 1: Gather your scrap yarn and choose your colors. Select a variety of colors to create a vibrant and festive look for your Christmas tree.
Step 2: Start with a magic ring. To create a magic ring, wrap the yarn around your fingers to form a loop, then insert your crochet hook into the loop, yarn over, and pull up a loop. This will be the starting point for your tree.
Step 3: Crochet the base of the tree. Chain 1, then work 6 single crochets (sc) into the magic ring. Pull the tail of the yarn to tighten the ring. You should have 6 stitches in total.
Round 1: Work 2 single crochets (sc) in each stitch around. You will have a total of 12 stitches at the end of this round.
Round 2: *1 sc in the next stitch, 2 sc in the following stitch; repeat from * around. You will have 18 stitches at the end of this round.
Round 3: *1 sc in the next 2 stitches, 2 sc in the following stitch; repeat from * around. You will have 24 stitches at the end of this round.
Round 4: *1 sc in the next 3 stitches, 2 sc in the following stitch; repeat from * around. You will have 30 stitches at the end of this round.
Step 4: Continue increasing until you reach your desired width for the tree. You can adjust the number of rounds and increases based on how large you want your tree to be.
Step 5: Change colors as desired to add decorations. To change colors, complete the last stitch of the current color, then yarn over with the new color and pull through. Continue crocheting with the new color.
Step 6: Finish the top of the tree with a star or other embellishment. You can crochet a small star using a separate color and attach it to the top of the tree using a tapestry needle.
Step 7: Weave in any loose ends with a tapestry needle. This will help keep your project neat and tidy.
Step 8: Optionally, stuff the tree for added dimension. If you choose to stuff it, use a small amount of stuffing to give your tree a fuller appearance.
Now you have your very own Easy Crochet Christmas Tree made from scrap yarn! Enjoy decorating your home with this festive creation.
Introduction / About This Easy Crochet Christmas Tree Pattern Using Scrap Yarn
Welcome to the delightful world of crochet! In this tutorial, you will learn how to create a festive Christmas tree using scrap yarn. This project is not only fun but also a fantastic way to use up leftover yarn from previous projects. Whether you are a beginner or an intermediate crocheter, this pattern is designed to be accessible and enjoyable.
There’s something truly special about making personalized holiday decorations. Each tree you create can reflect your unique style and color preferences, adding a personal touch to your home during the festive season. The satisfaction of crafting something with your own hands is unmatched, and this easy crochet Christmas tree pattern allows you to do just that.
The construction method is straightforward: you will start with a magic ring to form the base of the tree and then work in rounds, increasing stitches to shape the tree. You can customize the colors and sizes to suit your taste, making each tree a one-of-a-kind decoration. Let’s get started on this joyful crochet journey!
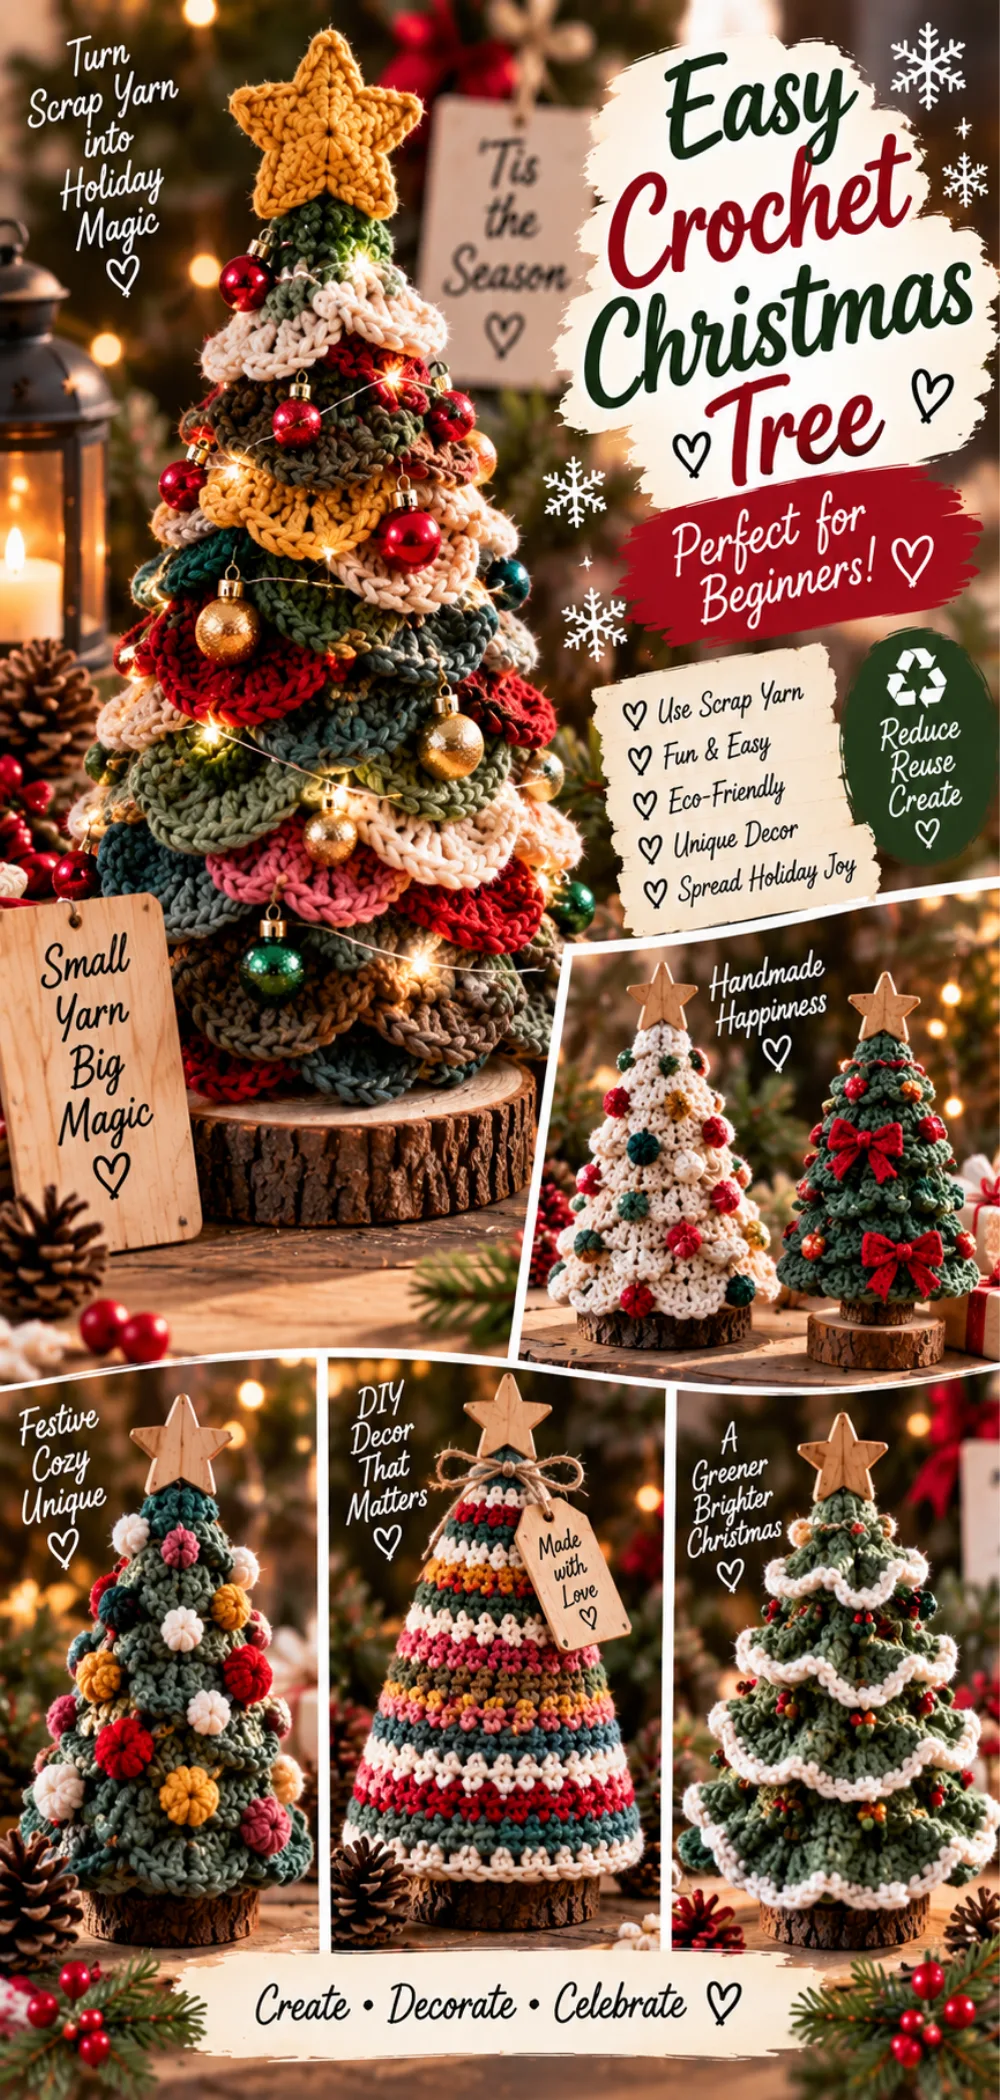
IMAGE: A beautifully crafted crochet Christmas tree in various colors, placed on a wooden table with holiday decorations in the background, showcasing the texture and details of the stitches.
ALT: Easy Crochet Christmas Tree Pattern Using Scrap Yarn displayed on a festive table setting.
Crochet Pattern Quick Overview
| Skill Level | Beginner to Intermediate |
| Crochet Terminology | US Terms |
| Yarn Weight | Worsted or DK |
| Crochet Hook Size | 4.0 mm (G) or appropriate size |
| Approximate Finished Size | 8-12 inches tall (varies) |
| Approximate Working Time | 40 minutes |
| Construction Method | Worked in rounds |
| Crochet Technique | Basic stitches and color changes |
About This Easy Crochet Christmas Tree Pattern Using Scrap Yarn
This charming Christmas tree is constructed in rounds, beginning with a magic ring to form a solid base. As you crochet, you will increase stitches to create the lovely triangular shape that resembles a traditional Christmas tree. This method not only helps in shaping the tree but also allows for a smooth and seamless finish.
Throughout this project, you will have the opportunity to practice essential crochet skills. Working in rounds is a fundamental technique that will enhance your crocheting abilities. Additionally, you will learn how to change colors effectively, adding a festive flair to your tree. Finally, you will master finishing techniques, such as weaving in ends and adding embellishments, which are crucial for achieving a polished look in your crochet projects.
Materials and Supplies
To create your Easy Crochet Christmas Tree, you will need the following materials:
- Scrap yarn in various colors
- Crochet hook (size appropriate for yarn)
- Scissors
- Tapestry needle
- Stuffing (optional)
Using scrap yarn not only allows you to be creative but also promotes sustainability by reducing waste. This project is a perfect opportunity to use up leftover yarn from previous projects, making it both economical and environmentally friendly.
Choosing the right yarn and hook size is crucial for achieving the desired look and feel of your Christmas tree. The yarn weight should be suitable for the pattern, and the hook size should match the yarn to ensure proper tension and stitch definition.
IMAGE: A neatly arranged display of scrap yarn in various colors, a crochet hook, scissors, and a tapestry needle.
ALT: Materials for Easy Crochet Christmas Tree Pattern Using Scrap Yarn including colorful yarn and tools.
Best Yarn for Easy Crochet Christmas Tree Pattern Using Scrap Yarn
For this project, worsted weight or DK yarn is recommended. These yarn weights provide a good balance of thickness and flexibility, making them ideal for creating a sturdy yet soft tree. Fiber types such as acrylic or cotton work well, as they are durable and easy to care for.
When selecting colors, consider using a mix of vibrant and festive shades to create a cheerful appearance. You can also choose a color palette that matches your holiday decor. Approximately 50-100 yards of yarn in total should be sufficient, depending on the size of the tree you wish to create.
Suitable Yarn Substitutions
If you don’t have worsted or DK yarn on hand, you can substitute with other yarn weights, but be sure to check your gauge and total yardage. For example, if you use a lighter weight yarn, you may need to adjust your hook size and the number of rounds to achieve the desired height and shape of the tree.
Crochet Hook and Additional Tools
For this project, a 4.0 mm (G) crochet hook is recommended, but you can use a size that matches your chosen yarn. Additionally, you will need scissors to cut your yarn and a tapestry needle for weaving in ends. If you choose to stuff your tree for added dimension, having some stuffing material on hand will be helpful.
Crochet Stitches and Techniques Used
In this Easy Crochet Christmas Tree Pattern, you will use several basic crochet stitches and techniques. The primary stitches involved are single crochet (sc) and double crochet (dc), along with the technique of changing colors. Familiarity with these stitches will help you create a beautiful and festive tree.
Single crochet is the foundation of this project, providing a solid and sturdy base for your tree. You will also use color changes to add visual interest and create a multi-colored effect. If you are new to these stitches, consider checking out beginner tutorials to get comfortable with the techniques before starting your project.
Single Crochet
Single crochet is used throughout the base and body of the tree. It creates a tight and dense fabric, which is perfect for shaping the tree. To work a single crochet, insert your hook into the stitch, yarn over, pull up a loop, yarn over again, and pull through both loops on your hook. This stitch is essential for building the structure of your Christmas tree.
IMAGE: A close-up of the single crochet stitch, highlighting the stitch structure and insertion point.
ALT: Single crochet stitch used in the Easy Crochet Christmas Tree Pattern Using Scrap Yarn.
Color Change Technique
Changing colors is a fun way to add personality to your crochet tree. To change colors, complete the last stitch of the current color, then yarn over with the new color and pull through to finish the stitch. This technique allows you to create stripes or sections of different colors, enhancing the festive look of your tree.
It’s important to weave in the ends of the yarn after changing colors to keep your project neat. Use a tapestry needle to thread the loose ends back through the stitches, securing them in place. This will prevent any unraveling and give your tree a polished finish.
Crochet Abbreviations
| Abbreviation | Meaning |
|---|---|
| ch | chain |
| sc | single crochet |
| dc | double crochet |
| st | stitch |
| rnd | round |
| sl st | slip stitch |
| inc | increase |
| dec | decrease |
Gauge
Gauge is an essential aspect of crocheting, especially for projects where the finished size is important, such as this Easy Crochet Christmas Tree. Achieving the correct gauge ensures that your tree will turn out as intended, both in height and shape. If your gauge is off, your tree may end up larger or smaller than the approximate finished size of 8-12 inches tall.
To check your gauge, it’s a good idea to create a simple gauge swatch. Here’s how to do it:
Gauge Swatch Instructions:
- Using your chosen yarn and crochet hook, chain 20 stitches.
- Work in single crochet (sc) for 10 rows, or until your swatch measures approximately 4 inches wide.
- Measure your swatch to see how many stitches you have per inch. You should aim for about 4-5 single crochets per inch.
If your gauge does not match this, you may need to adjust your hook size. If you have too many stitches per inch, try using a larger hook. If you have too few, switch to a smaller hook. Remember, achieving the correct gauge will help ensure your Christmas tree turns out just right!
Step-by-Step Instructions for Easy Crochet Christmas Tree Pattern Using Scrap Yarn
Step 1: Gather your scrap yarn and choose your colors. Select a variety of colors to create a vibrant and festive look for your Christmas tree.
Step 2: Start with a magic ring. To create a magic ring, wrap the yarn around your fingers to form a loop, then insert your crochet hook into the loop, yarn over, and pull up a loop. This will be the starting point for your tree.
Step 3: Crochet the base of the tree. Chain 1, then work 6 single crochets (sc) into the magic ring. Pull the tail of the yarn to tighten the ring. You should have 6 stitches in total.
Round 1: Work 2 single crochets (sc) in each stitch around. You will have a total of 12 stitches at the end of this round.
Round 2: *1 sc in the next stitch, 2 sc in the following stitch; repeat from * around. You will have 18 stitches at the end of this round.
Round 3: *1 sc in the next 2 stitches, 2 sc in the following stitch; repeat from * around. You will have 24 stitches at the end of this round.
Round 4: *1 sc in the next 3 stitches, 2 sc in the following stitch; repeat from * around. You will have 30 stitches at the end of this round.
Step 4: Continue increasing until you reach your desired width for the tree. You can adjust the number of rounds and increases based on how large you want your tree to be.
Step 5: Change colors as desired to add decorations. To change colors, complete the last stitch of the current color, then yarn over with the new color and pull through. Continue crocheting with the new color.
Step 6: Finish the top of the tree with a star or other embellishment. You can crochet a small star using a separate color and attach it to the top of the tree using a tapestry needle.
Step 7: Weave in any loose ends with a tapestry needle. This will help keep your project neat and tidy.
Step 8: Optionally, stuff the tree for added dimension. If you choose to stuff it, use a small amount of stuffing to give your tree a fuller appearance.
Now you have your very own Easy Crochet Christmas Tree made from scrap yarn! Enjoy decorating your home with this festive creation.
Customization Tips
One of the best aspects of the Easy Crochet Christmas Tree Pattern is its versatility. You can easily customize the size, colors, and embellishments to create a tree that perfectly fits your style and decor.
Adjusting the Size: If you want a larger or smaller tree, simply adjust the number of rounds you crochet. For a taller tree, continue increasing stitches for more rounds before switching to color changes. Conversely, for a smaller tree, you can stop increasing earlier or use a lighter weight yarn with a smaller hook.
Choosing Colors: The color combinations are endless! You can stick to traditional green for a classic look or use bright, bold colors for a modern twist. Consider using a gradient effect by transitioning from one color to another, or create a striped pattern for a playful design. Don’t hesitate to mix and match colors to reflect your personality or holiday theme.
Adding Embellishments: Personalize your tree further by adding embellishments. You can crochet small ornaments, garlands, or even tiny presents to place around the base. Consider using buttons, beads, or other decorative items to enhance the festive feel. A star or bow at the top can also add a charming finishing touch.
Feel free to experiment with different yarns and techniques. You might try using textured yarns for a unique look or incorporating different crochet stitches to add depth and interest. The more you play with your design, the more unique your tree will become!
Remember, the goal is to have fun and express your creativity. Each tree you make can be a reflection of your style, so let your imagination run wild!
Care Instructions
Taking care of your Easy Crochet Christmas Tree will help it last for many holiday seasons to come. Here are some simple care instructions to keep your tree looking its best:
Storage: When the holiday season is over, store your crochet tree in a cool, dry place. Avoid damp areas to prevent mold or mildew. You can place it in a plastic storage bin or a breathable fabric bag to protect it from dust and damage. If you have multiple trees, consider wrapping them in tissue paper to keep them safe from scratches or snagging.
Cleaning: If your tree gets dusty or dirty, gently shake it to remove loose debris. For more thorough cleaning, use a soft brush or a lint roller to pick up any dust. If necessary, you can hand wash your tree in cold water with a mild detergent. Lay it flat on a clean towel to dry, reshaping it as needed. Avoid wringing or twisting the fabric, as this can distort the shape.
By following these care instructions, you can ensure that your crochet Christmas tree remains a cherished decoration for years to come!
Conclusion
Thank you for following along with this Easy Crochet Christmas Tree Pattern Using Scrap Yarn tutorial! We hope you enjoyed creating your festive tree and found the instructions clear and helpful. Remember, the beauty of this project lies in its versatility—feel free to customize your tree with different colors, sizes, and embellishments to make it truly your own.
As you display your handmade tree, take pride in the creativity and effort you put into crafting a unique holiday decoration. Whether you keep it for yourself or gift it to someone special, your crochet tree is sure to bring joy and warmth to the holiday season.
Happy crocheting, and may your holidays be filled with creativity and cheer!
Print
Easy Crochet Christmas Tree Pattern Using Scrap Yarn – Step-by-Step Photo Tutorial
- Total Time: 40 minutes
- Yield: 1 Christmas tree
- Diet: Vegan
Description
A simple and fun crochet pattern to create a Christmas tree using scrap yarn, perfect for holiday decorations.
Ingredients
- Scrap yarn in various colors
- Crochet hook (size appropriate for yarn)
- Scissors
- Tapestry needle
- Stuffing (optional)
Instructions
- Gather your scrap yarn and choose your colors.
- Start with a magic ring and crochet the base of the tree.
- Increase stitches to create the tree shape.
- Change colors as desired to add decorations.
- Finish the top of the tree with a star or other embellishment.
- Weave in any loose ends with a tapestry needle.
- Optionally, stuff the tree for added dimension.
Notes
- This pattern is customizable; feel free to adjust the size and colors.
- Use any leftover yarn to make mini trees.
- Store finished trees in a cool, dry place.
- Prep Time: 10 minutes
- Cook Time: 30 minutes
- Category: Craft
- Method: Crocheting
- Cuisine: N/A
Nutrition
- Serving Size: N/A
- Calories: N/A
- Sugar: N/A
- Sodium: N/A
- Fat: N/A
- Saturated Fat: N/A
- Unsaturated Fat: N/A
- Trans Fat: N/A
- Carbohydrates: N/A
- Fiber: N/A
- Protein: N/A
- Cholesterol: N/A