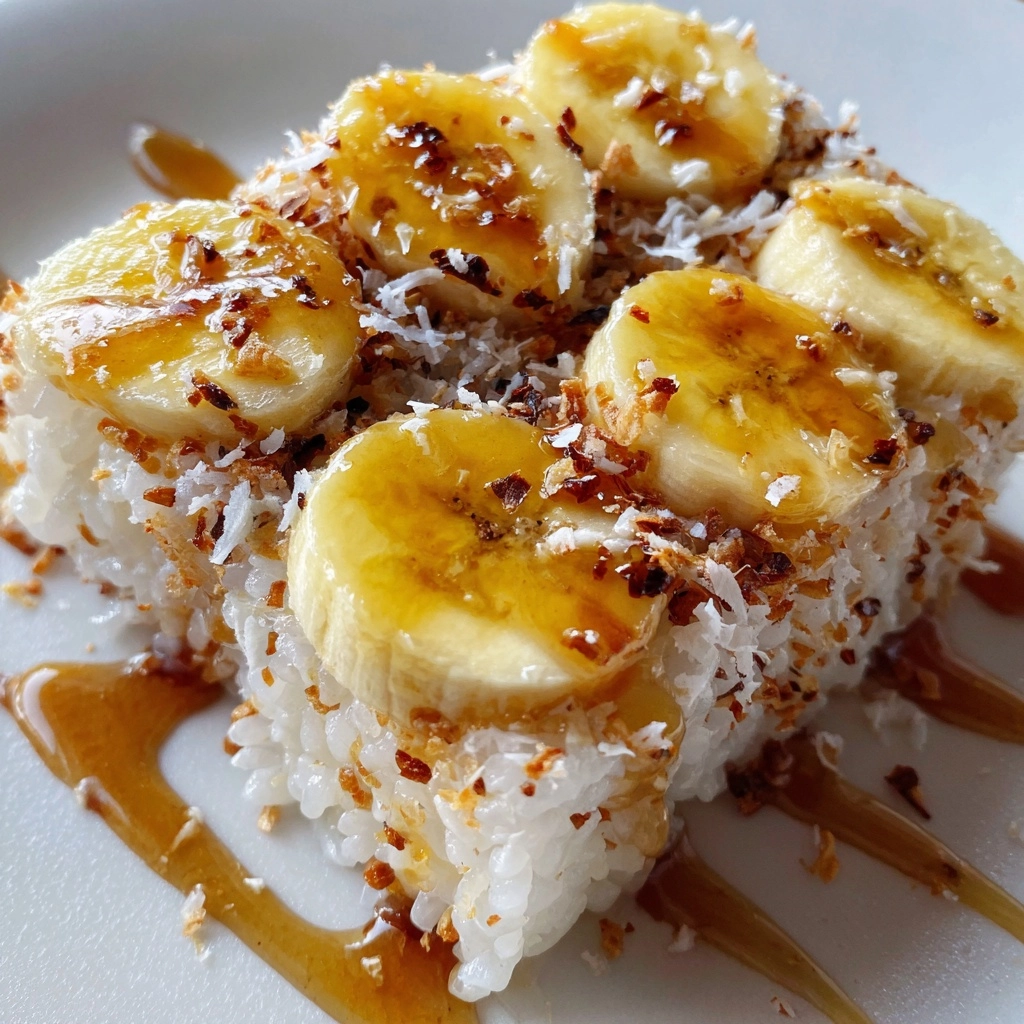
Introduction to Banana Sushi
Have you ever found yourself in a rush, craving something sweet yet healthy? Let me introduce you to Banana Sushi! This delightful twist on a classic treat is not only fun to make but also a fantastic way to sneak in some nutrition. As a busy mom, I know how challenging it can be to whip up something that pleases everyone. With Banana Sushi, you can impress your loved ones while keeping it simple. It’s a quick solution for those hectic days when you want to serve something special without the fuss!
Why You’ll Love This Banana Sushi
Banana Sushi is a game-changer for busy days! It’s incredibly easy to make, taking just 30 minutes from start to finish. The taste? Oh, it’s a delightful blend of creamy peanut butter, sweet honey, and chewy coconut that dances on your taste buds. Plus, it’s a healthy dessert option that kids adore. You’ll love how it brings smiles to the table without the stress of complicated recipes!
Ingredients for Banana Sushi
Gathering the right ingredients is the first step to creating your delicious Banana Sushi. Here’s what you’ll need:
- Ripe Bananas: The star of the show! Choose bananas that are just ripe for the best flavor and texture.
- Cooked Rice: This adds a unique twist. Use short-grain rice for a stickier texture that holds everything together.
- Peanut Butter: Creamy or crunchy, it adds richness and protein. If you have nut allergies, try sunflower seed butter instead.
- Honey: A natural sweetener that enhances the flavors. For a vegan option, maple syrup works beautifully.
- Shredded Coconut: This adds a tropical flair and chewy texture. Unsweetened coconut is a great choice for a healthier option.
- Chopped Nuts (optional): Almonds, walnuts, or pecans can add a delightful crunch. Feel free to skip if you prefer a nut-free treat.
- Chocolate Spread (optional): For those with a sweet tooth, a drizzle of chocolate spread can elevate your Banana Sushi to dessert heaven!
For exact measurements, check the bottom of the article where you can find everything available for printing. Now that you have your ingredients ready, let’s dive into the fun part—making your Banana Sushi!
How to Make Banana Sushi
Now that you have your ingredients ready, let’s get started on making this delightful Banana Sushi! Follow these simple steps, and you’ll have a fun and healthy treat in no time.
Step 1: Cook the Rice
Begin by cooking the rice according to the package instructions. I usually rinse the rice first to remove excess starch, which helps it become nice and sticky. Once it’s cooked, let it cool completely. This step is crucial because warm rice can make the bananas mushy. Trust me, you want that perfect texture!
Step 2: Prepare the Bananas
Next, peel the bananas carefully. I like to use ripe bananas for their sweetness and creaminess. Spread a generous layer of peanut butter over each banana. This not only adds flavor but also helps the rice stick. If you’re feeling adventurous, try using almond butter or sunflower seed butter for a twist!
Step 3: Roll in Rice
Now comes the fun part! Take the peanut butter-coated bananas and roll them in the cooled rice. Make sure they are fully coated. I find that using my hands works best for this step. It’s a bit messy, but that’s part of the joy of cooking, right? Plus, the rice adds a delightful crunch!
Step 4: Add Honey
Once your bananas are coated in rice, it’s time to drizzle some honey over them. This adds a touch of sweetness that complements the peanut butter perfectly. If you’re opting for a vegan version, maple syrup is a fantastic alternative. Just a little drizzle goes a long way!
Step 5: Add Toppings
Now, sprinkle shredded coconut and chopped nuts on top for added texture. The coconut gives a tropical vibe, while the nuts add a satisfying crunch. Feel free to get creative here! You can mix and match toppings based on what you have at home or what your family loves.
Step 6: Optional Chocolate Spread
If you want to take your Banana Sushi to the next level, drizzle some chocolate spread over the top. This step is purely optional, but oh, it makes for a sweeter treat! It’s like a dessert sushi that everyone will adore. Just a little goes a long way!
Step 7: Slice and Serve
Finally, slice the bananas into bite-sized pieces. I usually aim for about an inch thick. This makes them easy to grab and enjoy. Serve immediately for the best taste and texture. Trust me, your family will be asking for seconds!
Tips for Success
- Use ripe bananas for the best flavor and creaminess.
- Let the rice cool completely to avoid mushy bananas.
- Experiment with different nut butters for unique flavors.
- Customize toppings based on your family’s preferences.
- For a fun twist, try adding a sprinkle of cinnamon or cocoa powder.
- Make a double batch for easy snacks throughout the week!
Equipment Needed
- Medium Pot: For cooking the rice. A rice cooker works too!
- Cutting Board: Essential for slicing the bananas. A sturdy plate can work in a pinch.
- Sharp Knife: For cutting the bananas into bite-sized pieces. A butter knife can suffice for softer bananas.
- Mixing Spoon: To spread the peanut butter. A spatula is a great alternative!
Variations of Banana Sushi
- Nut-Free Version: Swap peanut butter for sunflower seed butter to make it safe for those with nut allergies.
- Fruit-Filled Delight: Add slices of strawberries or kiwi inside the banana before rolling for an extra fruity twist.
- Chocolate Lovers: Use chocolate rice or sprinkle cocoa powder on the rice for a chocolatey flavor.
- Spicy Kick: Mix a pinch of cayenne pepper into the peanut butter for a surprising spicy-sweet combination.
- Granola Crunch: Instead of nuts, use granola for a delightful crunch and added fiber.
- Vegan Delight: Use maple syrup instead of honey and opt for dairy-free chocolate spread for a fully vegan treat.
Serving Suggestions for Banana Sushi
- Fresh Fruit Salad: Pair with a colorful fruit salad for a refreshing side.
- Yogurt Dip: Serve with a side of Greek yogurt for a creamy contrast.
- Herbal Tea: Enjoy with a warm cup of chamomile or mint tea.
- Fun Platter: Arrange on a vibrant platter for a visually appealing presentation.
- Chocolate Drizzle: Add an extra drizzle of chocolate sauce on the plate for a gourmet touch.
FAQs about Banana Sushi
Can I make Banana Sushi ahead of time?
Absolutely! You can prepare the components in advance. However, I recommend assembling them just before serving for the best texture. The bananas can brown if left too long, so it’s best to enjoy them fresh!
Is Banana Sushi a healthy dessert option?
Yes! Banana Sushi is a fun and healthy dessert. It’s packed with nutrients from bananas, healthy fats from peanut butter, and fiber from rice. Plus, you can customize it to suit your dietary needs!
What can I substitute for peanut butter?
If you have nut allergies, sunflower seed butter is a fantastic alternative. You can also try tahini or even cream cheese for a different flavor profile!
Can I use other fruits instead of bananas?
While bananas are the star of this dish, you can experiment with other fruits like apples or pears. Just make sure they’re firm enough to hold up when rolled in rice!
How do I store leftover Banana Sushi?
If you have any leftovers, store them in an airtight container in the fridge. They’re best enjoyed within a day or two. Just keep in mind that the bananas may brown over time!
Final Thoughts
Making Banana Sushi is more than just preparing a fun treat; it’s about creating joyful moments in the kitchen. I love how this recipe brings my family together, sparking laughter and creativity as we customize our rolls. The delightful combination of flavors and textures makes it a hit with both kids and adults. Plus, it’s a guilt-free dessert that satisfies sweet cravings without the fuss. So, whether you’re looking for a quick snack or a fun dessert, Banana Sushi is sure to bring smiles to your table. Give it a try, and enjoy the delicious adventure!
Print
“Banana Sushi: An Irresistible Twist on a Classic Treat!”
- Total Time: 30 minutes
- Yield: 2 servings 1x
- Diet: Vegetarian
Description
Banana Sushi is a fun and healthy twist on traditional sushi, using bananas as the main ingredient wrapped in various toppings.
Ingredients
- 2 ripe bananas
- 1 cup of rice (cooked)
- 1/4 cup of peanut butter
- 1/4 cup of honey
- 1/4 cup of shredded coconut
- 1/4 cup of chopped nuts (optional)
- 1/4 cup of chocolate spread (optional)
Instructions
- Start by cooking the rice according to package instructions and let it cool.
- Peel the bananas and spread a layer of peanut butter over each banana.
- Roll the bananas in the cooked rice until fully coated.
- Drizzle honey over the rice-coated bananas.
- Sprinkle shredded coconut and chopped nuts on top for added texture.
- If desired, drizzle chocolate spread over the top for a sweeter treat.
- Slice the bananas into bite-sized pieces and serve immediately.
Notes
- Feel free to customize the toppings based on your preferences.
- For a vegan option, use maple syrup instead of honey.
- These can be made ahead of time but are best served fresh.
- Prep Time: 10 minutes
- Cook Time: 20 minutes
- Category: Dessert
- Method: No-cook
- Cuisine: Fusion
Nutrition
- Serving Size: 1 serving
- Calories: 250
- Sugar: 15g
- Sodium: 5mg
- Fat: 10g
- Saturated Fat: 3g
- Unsaturated Fat: 7g
- Trans Fat: 0g
- Carbohydrates: 35g
- Fiber: 3g
- Protein: 5g
- Cholesterol: 0mg

