
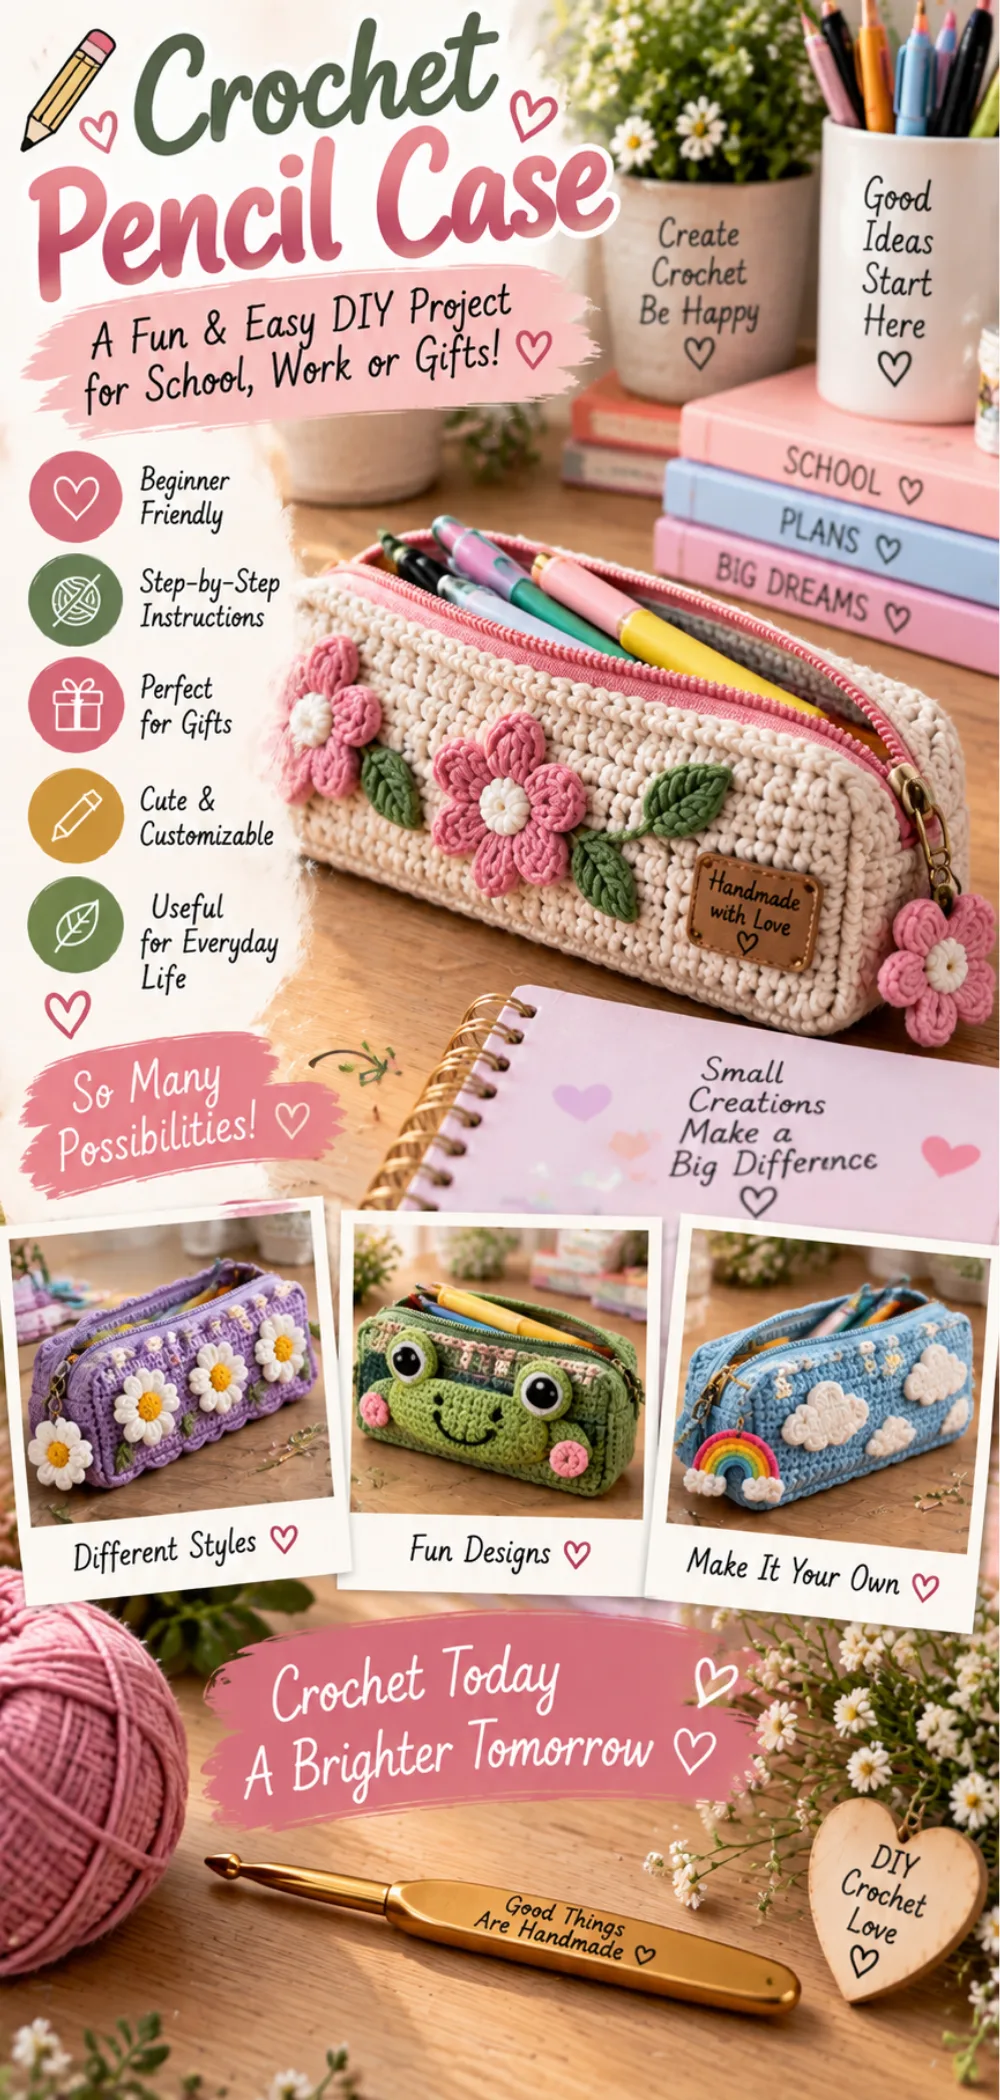
Step-by-Step Instructions for Crocheted Pencil Case
Step 1: Start with a slip knot and chain 30.
Step 2: Single crochet in the second chain from the hook and across the row. You should have 29 single crochet stitches at the end of this row.
Step 3: Chain 1 and turn your work. Single crochet in each stitch across for a total of 10 rows. This will create the body of your pencil case.
Step 4: Once you have completed 10 rows, fold the piece in half so that the short edges meet. Make sure the right sides are facing each other.
Step 5: Using a slip stitch, join the sides together. Insert your hook through both layers of the fabric, yarn over, and pull through both layers. Continue this process along the side until you reach the top edge.
Step 6: Fasten off your yarn by cutting it and pulling the tail through the last loop on your hook. Weave in any loose ends using a tapestry needle.
Step 7: Optionally, you can add a button or zipper for closure. This will give your pencil case a finished look and keep your items secure.
Introduction / About This Crocheted Pencil Case
Welcome to the world of crochet! Today, we’re diving into a delightful project: the crocheted pencil case. This pattern is not only simple but also a lot of fun to make. It’s perfect for beginners who are just starting their crochet journey.
You can complete this project in about 40 minutes, making it a quick and satisfying craft. The versatility of this pencil case means it can be used for school supplies, office essentials, or even as a stylish accessory for personal use. Whether you need a place to store your pens, pencils, or other small items, this case has you covered.
One of the best parts of this project is the opportunity to personalize your pencil case. Feel free to choose any color yarn that speaks to you, and consider adding embellishments like buttons or decorative stitches to make it uniquely yours. Let your creativity shine!
IMAGE: A beautifully arranged crocheted pencil case in vibrant colors, placed on a wooden desk with stationery items around it, showcasing the texture and design of the crochet work.
ALT: Crocheted pencil case in vibrant colors on a wooden desk with stationery items.
Crochet Pattern Quick Overview
| Detail | Information |
| Skill Level | Beginner |
| Crochet Terminology | US Terms |
| Yarn Weight | Worsted Weight |
| Crochet Hook Size | 4.0 mm |
| Approximate Finished Size | Customizable (based on chain) |
| Approximate Working Time | 40 minutes |
| Construction Method | Worked in rows |
| Crochet Technique | Basic stitches |
| Pattern Type | Free crochet pattern |
About This Crocheted Pencil Case
The construction of this crocheted pencil case is both simple and effective. You will work the pencil case in rows, starting with a foundation chain and then creating the body using single crochet stitches. Once you have completed the desired number of rows, you will fold the piece in half and use slip stitching to join the sides together, forming a neat and functional case.
This project is an excellent way for beginners to practice essential crochet skills. You will become comfortable with chaining, which is the foundation of many crochet projects, as well as single crochet, the most basic stitch used throughout the pattern. Additionally, you will learn how to slip stitch, a technique that is crucial for finishing your work neatly.
The straightforward nature of this pattern makes it easy for beginners to follow along. Each step is clearly outlined, allowing you to focus on mastering your stitches without feeling overwhelmed. With just a little practice, you’ll have a lovely crocheted pencil case ready to use or gift!
Materials and Supplies
To create your crocheted pencil case, you will need a few essential materials. Choosing the right yarn and tools is crucial for achieving the best results. Here’s what you’ll need:
- Worsted weight yarn (any color)
- 4.0 mm crochet hook
- Scissors
- Tapestry needle
- Stitch marker (optional)
Using worsted weight yarn is highly recommended for this project. This type of yarn is not only widely available but also offers a good balance of durability and ease of handling. Worsted weight yarn is thick enough to provide structure to your pencil case while still being flexible enough to work with comfortably. It also holds its shape well, ensuring that your finished pencil case will be both functional and attractive.
IMAGE: A neatly arranged display of the required yarn, crochet hook, scissors, and tapestry needle.
ALT: Materials for crocheted pencil case including yarn, crochet hook, scissors, and tapestry needle.
Best Yarn for Crocheted Pencil Case
For this project, a worsted weight yarn made from acrylic or cotton is ideal. Acrylic yarn is budget-friendly, comes in a wide variety of colors, and is easy to care for, making it a popular choice for beginners. Cotton yarn, on the other hand, offers a more natural feel and is highly durable, which is great for items that will see regular use.
When selecting your yarn, consider the color options available. You can choose a solid color for a classic look or mix and match different colors for a fun and vibrant pencil case. The choice is yours, and it’s a great way to express your personal style!
Suitable Yarn Substitutions
If you don’t have worsted weight yarn on hand, there are suitable alternatives you can use. Just make sure to check the gauge and yardage to ensure your pencil case turns out the right size. You can use a lighter weight yarn, but keep in mind that you may need to adjust your starting chain and the number of rows to achieve the desired dimensions.
Maintaining the same weight and fiber type is important for the best results. If you choose a different yarn, be aware that it may affect the overall structure and durability of your pencil case. Always do a test swatch if you’re unsure!
Crochet Hook and Additional Tools
For this project, you will need a 4.0 mm crochet hook. This size is perfect for working with worsted weight yarn and will help you achieve the right tension for your stitches. Additionally, having a pair of scissors on hand will be necessary for cutting your yarn, and a tapestry needle will be useful for weaving in any loose ends once your project is complete.
As a beginner, you might find it helpful to use a stitch marker to keep track of your rows. This can be especially useful when you’re working on longer projects, as it helps you stay organized and ensures you don’t lose your place.
Crochet Stitches and Techniques Used
In this crocheted pencil case project, you will primarily use two basic stitches: the chain stitch and the single crochet stitch. As a beginner, it’s essential to be comfortable with these stitches, as they form the foundation of your work. If you need a refresher on these techniques, feel free to check out our internal tutorials on chain stitch and single crochet.
Single Crochet
The single crochet stitch is the main stitch used throughout the body of the pencil case. It creates a tight and sturdy fabric, which is perfect for holding your pens and pencils securely. To work a single crochet, you will insert your hook into the stitch, yarn over, pull up a loop, yarn over again, and pull through both loops on your hook. This simple yet effective stitch is what gives your pencil case its shape and structure.
IMAGE: A close-up of the single crochet stitch, highlighting the stitch structure and insertion point.
ALT: Close-up of single crochet stitch used in the crocheted pencil case.
Slip Stitch
The slip stitch is used to join the sides of the pencil case together after you have completed the body. This technique is crucial for finishing your project neatly. To perform a slip stitch, you will insert your hook into the stitch, yarn over, and pull the yarn through both the stitch and the loop on your hook. This creates a seamless join that keeps your pencil case looking tidy and professional. Mastering the slip stitch will not only enhance this project but also serve you well in future crochet endeavors.
Crochet Abbreviations
| Abbreviation | Meaning |
|---|---|
| ch | Chain |
| sc | Single Crochet |
| sl st | Slip Stitch |
| st | Stitch |
| rep | Repeat |
Gauge
Gauge is an important aspect of any crochet project, including this crocheted pencil case. It refers to the number of stitches and rows per inch that you achieve with your chosen yarn and hook size. Checking your gauge is especially crucial if you plan to customize the size of your pencil case. If your gauge differs from the pattern, it can result in a pencil case that is either too small or too large.
For this project, the recommended gauge for single crochet stitches is approximately 4 stitches per inch. To check your gauge, work a small swatch of single crochet stitches, measuring the number of stitches across and the number of rows down. If your gauge does not match, you may need to adjust your hook size or yarn choice to achieve the desired tension.
Taking the time to check your gauge before starting will help ensure that your finished pencil case turns out just the way you want it!
Step-by-Step Instructions for Crocheted Pencil Case
Step 1: Start with a slip knot and chain 30.
Step 2: Single crochet in the second chain from the hook and across the row. You should have 29 single crochet stitches at the end of this row.
Step 3: Chain 1 and turn your work. Single crochet in each stitch across for a total of 10 rows. This will create the body of your pencil case.
Step 4: Once you have completed 10 rows, fold the piece in half so that the short edges meet. Make sure the right sides are facing each other.
Step 5: Using a slip stitch, join the sides together. Insert your hook through both layers of the fabric, yarn over, and pull through both layers. Continue this process along the side until you reach the top edge.
Step 6: Fasten off your yarn by cutting it and pulling the tail through the last loop on your hook. Weave in any loose ends using a tapestry needle.
Step 7: Optionally, you can add a button or zipper for closure. This will give your pencil case a finished look and keep your items secure.
Tips for Personalizing Your Crocheted Pencil Case
Personalizing your crocheted pencil case is a wonderful way to make it truly your own. Here are some creative ideas to help you customize your project:
- Use Different Colors: Choose a single color for a classic look, or mix and match multiple colors for a vibrant, eye-catching design. You can even create stripes or color blocks by changing yarn colors every few rows.
- Add Embellishments: Consider sewing on buttons, patches, or decorative appliqués to give your pencil case a unique flair. You can also add a decorative border using a contrasting color to enhance the overall design.
- Incorporate a Lining: For added durability and a polished finish, you might want to line your pencil case with fabric. This can help protect the yarn from wear and tear and give it a more professional look.
- Experiment with Yarn Textures: Try using different yarn textures, such as boucle or chenille, to create a unique feel and appearance. Just remember to check the gauge if you switch yarn types to ensure your pencil case maintains the right size.
- Play with Patterns: If you feel adventurous, you can incorporate simple stitch patterns, like ribbing or shell stitches, into your pencil case. This adds visual interest and can make your project stand out even more.
Don’t be afraid to let your creativity shine! Personalizing your crocheted pencil case not only makes it special but also allows you to practice your crochet skills in new and exciting ways.
Troubleshooting Common Issues
As you embark on your journey to create a crocheted pencil case, you may encounter a few common issues. Don’t worry! These challenges are part of the learning process, and with a little guidance, you can easily overcome them. Here are some typical problems beginners face and tips on how to resolve them:
Uneven Stitches
One of the most common issues is uneven stitches, which can occur for various reasons, such as tension inconsistencies or not inserting the hook correctly. To address this:
- Check Your Tension: Make sure you are holding your yarn consistently. If your stitches are too tight, try relaxing your grip on the yarn. Conversely, if they are too loose, you may need to tighten your hold slightly.
- Practice Consistency: Focus on making each stitch the same size. You can practice on a small swatch before starting your pencil case to get comfortable with your tension.
- Count Your Stitches: Regularly count your stitches to ensure you are not accidentally skipping or adding stitches. This will help maintain an even width throughout your project.
Difficulty with Joining
Joining the sides of your pencil case with a slip stitch can be tricky for beginners. If you find this step challenging, consider the following tips:
- Align Your Edges: Ensure that the edges you are joining are aligned properly. This will help create a neat finish and prevent any gaps.
- Insert the Hook Correctly: When performing a slip stitch, make sure to insert your hook through both layers of fabric. This will create a secure join. If you’re unsure, practice on a scrap piece of yarn first.
- Take Your Time: Don’t rush this step. Take your time to ensure each slip stitch is done correctly. If you make a mistake, it’s okay to undo a few stitches and try again.
Missed Stitches
It’s easy to miss a stitch, especially when working on longer rows. If you notice that your row count is off, here’s what to do:
- Count as You Go: Regularly count your stitches at the end of each row. This will help you catch any mistakes early on.
- Use a Stitch Marker: If you’re having trouble keeping track of your rows, consider using a stitch marker to mark the end of each row. This can help you stay organized and prevent missed stitches.
Twisted Starting Chain
A twisted starting chain can lead to an uneven foundation for your project. If you find that your chain is twisted:
- Start Over: It’s best to start with a new chain. Make sure to lay the chain flat as you work to avoid twisting.
- Check Your Chain as You Go: Before you begin your first row, double-check that your chain is not twisted. This will save you time and frustration later on.
By keeping these troubleshooting tips in mind, you can confidently tackle any challenges that arise while making your crocheted pencil case. Remember, practice makes progress, and every mistake is an opportunity to learn!
Conclusion
Thank you for following along with this easy step-by-step pattern for creating your very own crocheted pencil case! We hope you enjoyed the process and found it to be a fun and rewarding project. Remember, the beauty of crochet lies in its versatility, so don’t hesitate to experiment with colors, yarn types, and embellishments to make your pencil case uniquely yours.
As you continue your crochet journey, keep practicing the skills you’ve learned here, such as chaining, single crochet, and slip stitching. These foundational techniques will serve you well in future projects. Whether you use your pencil case for school, work, or personal items, it’s a great way to showcase your creativity and crochet skills.
Happy crocheting, and we can’t wait to see what you create next!
Print
Crocheted Pencil Case – Easy Step-by-Step Pattern for Beginners
- Total Time: 40 minutes
- Yield: 1 pencil case 1x
- Diet: Vegan
Description
A simple and fun pattern to create a crocheted pencil case, perfect for beginners.
Ingredients
- Worsted weight yarn (any color)
- 4.0 mm crochet hook
- Scissors
- Tapestry needle
- Stitch marker (optional)
Instructions
- Start with a slip knot and chain 30.
- Single crochet in the second chain from the hook and across the row.
- Chain 1 and turn, then single crochet in each stitch for 10 rows.
- Fold the piece in half and slip stitch the sides together.
- Fasten off and weave in the ends.
- Add a button or zipper if desired for closure.
Notes
- Use any color yarn to personalize your pencil case.
- For a larger case, increase the starting chain.
- Store in a cool, dry place to maintain shape.
- Prep Time: 10 minutes
- Cook Time: 30 minutes
- Category: Craft
- Method: Crocheting