
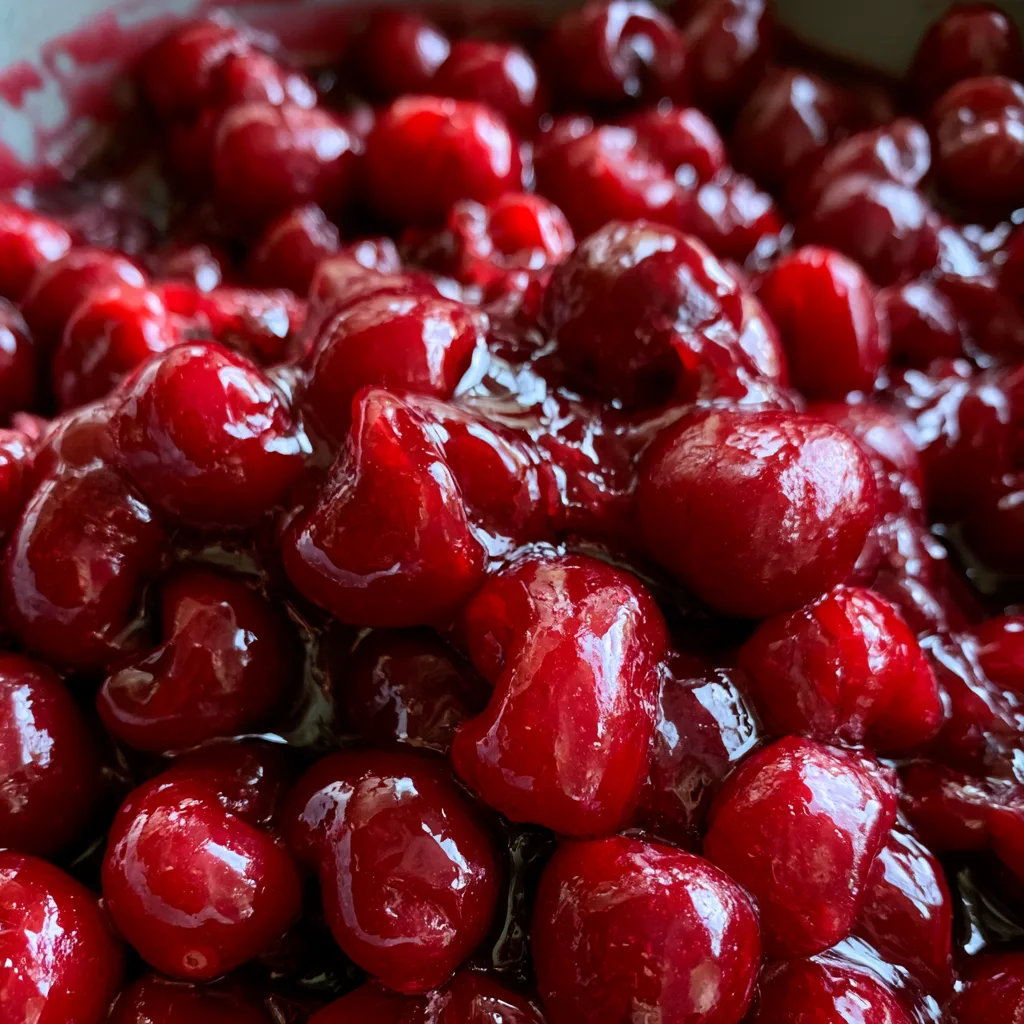
Introduction to Delicious Cherry Pie Filling Made Easy with Frozen Cherries!
Hey there, fellow home cooks! If you’re like me, juggling a busy life while trying to whip up something delightful can feel like a high-wire act. That’s why I’m excited to share this recipe for Delicious Cherry Pie Filling Made Easy with Frozen Cherries! It’s a quick solution for those hectic days when you want to impress your loved ones without spending hours in the kitchen. With just a handful of ingredients, you can create a luscious cherry filling that’s perfect for pies, tarts, or even as a topping for ice cream. Let’s dive in!
Why You’ll Love This Delicious Cherry Pie Filling Made Easy with Frozen Cherries
This cherry pie filling is a game-changer for busy moms and professionals alike. It’s incredibly easy to make, taking just 25 minutes from start to finish. The taste? Oh, it’s like a burst of summer in every bite! Plus, using frozen cherries means you can enjoy this delightful treat any time of year. You’ll love how versatile it is, perfect for pies, desserts, or even a sweet topping for breakfast.
Ingredients for Delicious Cherry Pie Filling Made Easy with Frozen Cherries
Gathering the right ingredients is the first step to creating your cherry pie masterpiece. Here’s what you’ll need:
- Frozen cherries: The star of the show! They’re sweet, juicy, and ready to use straight from the freezer. No need to pit or prep fresh cherries.
- Sugar: This adds the perfect sweetness to balance the tartness of the cherries. You can adjust the amount based on your taste preferences.
- Cornstarch: This is your thickening agent. It helps create that luscious, gooey texture we all love in pie fillings.
- Almond extract: A splash of this adds a delightful nutty flavor that complements the cherries beautifully. If you’re not a fan, feel free to skip it!
- Lemon juice: Just a tablespoon brightens the flavors and enhances the overall taste of the filling.
For those who like to experiment, consider adding a pinch of cinnamon or nutmeg for a warm spice twist. You can find the exact measurements for these ingredients at the bottom of the article, ready for printing. Happy cooking!
How to Make Delicious Cherry Pie Filling Made Easy with Frozen Cherries
Step 1: Combine the Ingredients
Start by grabbing a medium saucepan and tossing in those frozen cherries. Add in the sugar and lemon juice, creating a sweet and tangy mixture. I love how the cherries glisten as they mingle with the sugar, almost like a little party in the pan! Stir everything together gently, ensuring the cherries are well-coated. This step is crucial because it helps release the juices from the cherries, setting the stage for a delicious filling. Trust me, the aroma will have your family wandering into the kitchen in no time!
Step 2: Prepare the Cornstarch Slurry
While your cherry mixture is getting cozy, it’s time to prepare the cornstarch slurry. In a small bowl, mix the cornstarch with a splash of cold water. I usually start with about two tablespoons of water, stirring until it’s smooth and lump-free. This slurry is your secret weapon for thickening the filling. It’s like magic! Once you’ve got a nice consistency, set it aside for a moment. You’ll be adding it to the cherry mixture soon, and it’s going to transform everything into a luscious filling.
Step 3: Heat the Cherry Mixture
Now, let’s get that cherry mixture heating! Place the saucepan over medium heat and keep an eye on it. Stir occasionally, allowing the cherries to release their juices and the sugar to dissolve. You’ll know it’s ready when the mixture starts to bubble gently. This bubbling action is a sign that the flavors are melding beautifully. It’s like a warm hug for your taste buds! Just be patient; this step usually takes about 5-7 minutes. The anticipation is half the fun!
Step 4: Thicken the Filling
Once your cherry mixture is bubbling, it’s time to thicken it up! Stir in the cornstarch slurry you prepared earlier, along with the almond extract. Keep stirring as the mixture continues to cook for another 2-3 minutes. You’ll notice it thickening up nicely, transforming into that gooey filling we all crave. The almond extract adds a lovely depth of flavor, making it even more irresistible. Just imagine how good this will taste in your pie!
Step 5: Cool and Store
After thickening, remove the saucepan from the heat and let the filling cool for a bit. This is the hardest part—waiting! Once it’s cooled to room temperature, you can use it right away or store it in an airtight container. It keeps well in the fridge for up to a week, so you can make it ahead of time. Just think of all the delicious desserts you can create with this filling! Whether it’s a pie, tart, or even a topping for ice cream, the possibilities are endless.
Tips for Success
- Always taste your filling before cooling. Adjust the sugar if you prefer it sweeter.
- For a thicker filling, let it cook a bit longer after adding the cornstarch slurry.
- Use a non-stick saucepan to prevent sticking and make cleanup easier.
- Don’t rush the cooling process; it helps the flavors develop even more.
- Store any leftovers in a sealed container for quick dessert options later!
Equipment Needed
- Medium saucepan: A non-stick option works best for easy cleanup.
- Mixing bowl: Any size will do, just ensure it’s sturdy for mixing the slurry.
- Spoon or spatula: Use a wooden spoon or silicone spatula for stirring.
- Measuring cups: Essential for accurate ingredient measurements.
Variations on Delicious Cherry Pie Filling Made Easy with Frozen Cherries
- Spiced Cherry Filling: Add a pinch of cinnamon or nutmeg for a warm, cozy flavor that pairs beautifully with the cherries.
- Cherry Almond Delight: Increase the almond extract for a more pronounced nutty flavor, or even add slivered almonds for a delightful crunch.
- Chocolate Cherry Filling: Stir in some mini chocolate chips just before cooling for a decadent twist that chocolate lovers will adore.
- Low-Sugar Option: Substitute sugar with a sugar alternative like stevia or monk fruit sweetener for a healthier version.
- Berry Blend: Mix in other frozen berries like blueberries or raspberries for a mixed berry filling that’s bursting with flavor.
Serving Suggestions for Delicious Cherry Pie Filling Made Easy with Frozen Cherries
- Serve warm over vanilla ice cream for a delightful dessert.
- Use as a topping for pancakes or waffles for a sweet breakfast treat.
- Pair with a dollop of whipped cream for an elegant touch.
- Drizzle over cheesecake for a stunning presentation.
- Enjoy with a cup of coffee or tea for a cozy afternoon snack.
FAQs about Delicious Cherry Pie Filling Made Easy with Frozen Cherries
Can I use fresh cherries instead of frozen? Absolutely! If you have fresh cherries, feel free to use them. Just remember to pit and chop them before cooking. The process will be similar, but you may need to adjust the sugar based on their sweetness.
How long can I store the cherry pie filling? This filling can be stored in the refrigerator for up to a week. Just make sure to keep it in an airtight container. You can also freeze it for longer storage, making it a great option for meal prep!
What can I use this cherry filling for besides pie? The possibilities are endless! You can use it as a topping for ice cream, pancakes, or yogurt. It also works wonderfully in tarts, cheesecakes, or even as a filling for pastries.
Can I make this filling ahead of time? Yes! You can prepare the filling a day or two in advance. Just store it in the fridge, and it will be ready to use when you need it. This makes it a perfect option for busy days!
Is this cherry pie filling gluten-free? Yes! All the ingredients in this recipe are gluten-free, making it a delicious option for those with gluten sensitivities. Enjoy without worry!
Final Thoughts
Creating Delicious Cherry Pie Filling Made Easy with Frozen Cherries! has been a delightful journey for me, and I hope it brings you as much joy as it has brought to my kitchen. The simplicity of this recipe means you can whip it up in no time, making it perfect for busy days. Plus, the taste is simply divine! Whether you’re baking a pie for a family gathering or treating yourself to a sweet indulgence, this cherry filling is sure to impress. So, roll up your sleeves and let the cherry magic begin!
Print
Delicious Cherry Pie Filling Made Easy with Frozen Cherries!
- Total Time: 25 minutes
- Yield: About 5 cups 1x
- Diet: Vegetarian
Description
A simple and delicious recipe for cherry pie filling using frozen cherries, perfect for pies, desserts, and more.
Ingredients
- 4 cups frozen cherries
- 1 cup sugar
- 1/4 cup cornstarch
- 1/4 teaspoon almond extract
- 1 tablespoon lemon juice
Instructions
- In a medium saucepan, combine the frozen cherries, sugar, and lemon juice.
- In a separate bowl, mix the cornstarch with a little water to create a slurry.
- Heat the cherry mixture over medium heat until it starts to bubble.
- Stir in the cornstarch slurry and almond extract, and cook until thickened.
- Remove from heat and let cool before using in your pie.
Notes
- For a sweeter filling, adjust the sugar to taste.
- This filling can be stored in the refrigerator for up to a week.
- Use this filling for other desserts like tarts or ice cream toppings.
- Prep Time: 10 minutes
- Cook Time: 15 minutes
- Category: Dessert
- Method: Stovetop
- Cuisine: American
Nutrition
- Serving Size: 1/4 cup
- Calories: 120
- Sugar: 20g
- Sodium: 5mg
- Fat: 0g
- Saturated Fat: 0g
- Unsaturated Fat: 0g
- Trans Fat: 0g
- Carbohydrates: 30g
- Fiber: 2g
- Protein: 1g
- Cholesterol: 0mg