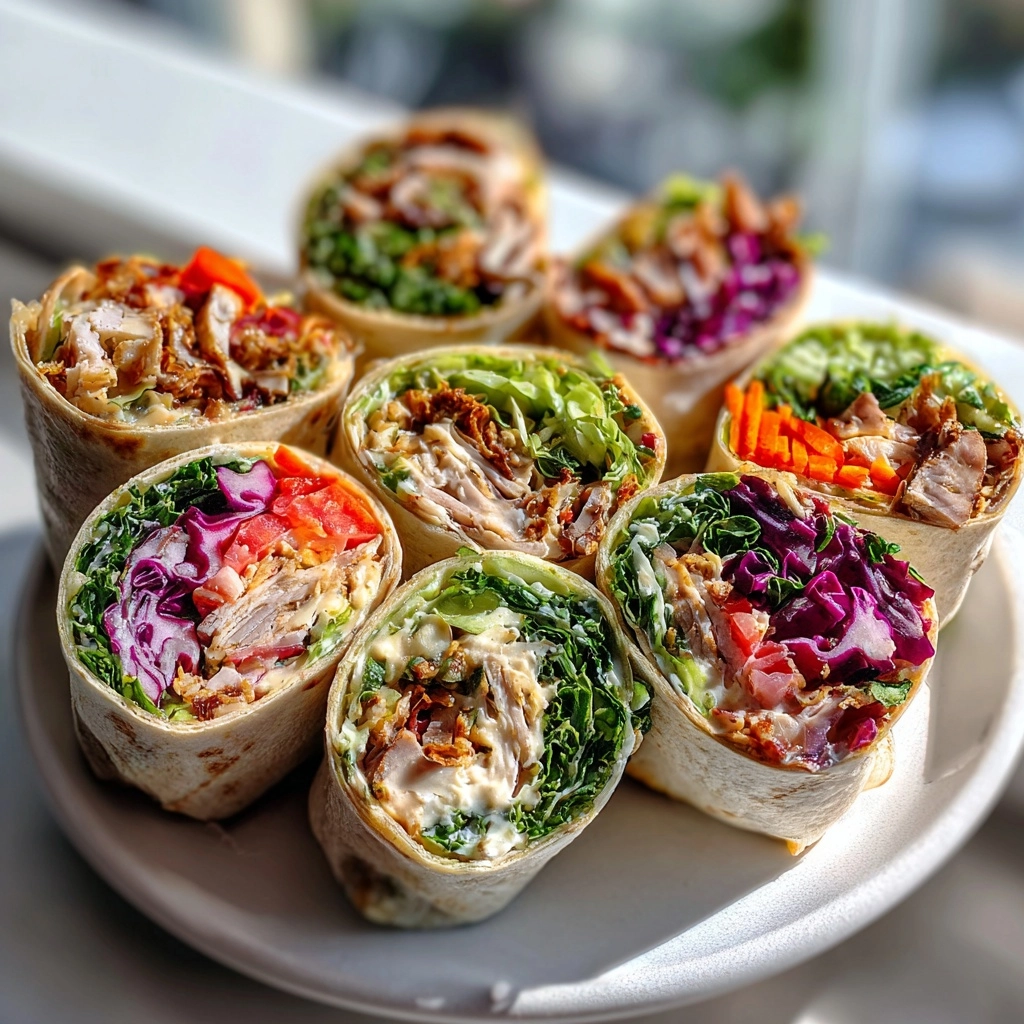
Introduction to Mini Wraps
As a busy mom, I know how challenging it can be to whip up something delicious and satisfying in a hurry. That’s where mini wraps come to the rescue! These delightful little bundles are not only quick to prepare but also incredibly versatile. Whether you’re looking for a snack to keep the kids happy or a light meal to impress your friends, mini wraps are the perfect solution. With just a few ingredients, you can create a tasty treat that everyone will love. Let’s dive into this easy recipe that’s sure to become a family favorite!
Why You’ll Love This Mini Wraps
Mini wraps are a game-changer for busy days! They come together in just 15 minutes, making them a lifesaver when time is tight. Plus, their bite-sized nature means they’re perfect for little hands or as a fun appetizer for gatherings. The combination of flavors and textures is simply irresistible. You can customize them to suit everyone’s tastes, ensuring that even picky eaters will be satisfied. What’s not to love?
Ingredients for Mini Wraps
Gathering the right ingredients is key to making delicious mini wraps. Here’s what you’ll need:
- Tortillas: Large tortillas serve as the base. You can use flour, whole wheat, or even spinach for a pop of color.
- Cooked Chicken: Shredded chicken adds protein and flavor. You can use rotisserie chicken for convenience or leftover grilled chicken from last night’s dinner.
- Lettuce: Chopped lettuce provides a fresh crunch. Romaine or iceberg works well, but feel free to experiment with spinach or arugula.
- Cherry Tomatoes: Halved cherry tomatoes bring a burst of sweetness. If you prefer, diced bell peppers or cucumbers can be great substitutes.
- Cheese: Shredded cheese adds creaminess. Cheddar, mozzarella, or pepper jack are all fantastic choices.
- Ranch Dressing: This creamy dressing ties everything together. You can swap it for hummus, guacamole, or any dressing you love.
Feel free to customize the fillings based on your preferences. The beauty of mini wraps is their versatility! For exact quantities, check the bottom of the article where you can find a printable version.
How to Make Mini Wraps
Making mini wraps is a breeze! Follow these simple steps, and you’ll have a delicious snack or meal ready in no time. Let’s get started!
Step 1: Prepare the Tortillas
First, lay out your large tortillas on a clean, flat surface. This could be a cutting board or your kitchen counter. Make sure they’re smooth and ready for all the tasty fillings. A little prep goes a long way in making the rolling process easier!
Step 2: Spread the Dressing
Next, grab your ranch dressing and spread it evenly over each tortilla. Use a spatula or the back of a spoon for this. You want a nice, even layer that covers the entire surface. This creamy goodness will help hold everything together and add a burst of flavor!
Step 3: Add the Fillings
Now it’s time to layer on the good stuff! Start with the shredded chicken, followed by the chopped lettuce, halved cherry tomatoes, and shredded cheese. Feel free to get creative here! You can add more veggies or even some spicy jalapeños if you like a kick. Just make sure not to overfill, or rolling will become a challenge!
Step 4: Roll the Wraps
Once your fillings are in place, it’s time to roll! Start at one end of the tortilla and gently fold it over the fillings. Tuck in the sides as you go to keep everything secure. Roll tightly but not too tight, or the fillings might spill out. You want a nice, snug wrap that holds together beautifully!
Step 5: Slice and Serve
Finally, slice each wrap into bite-sized pieces. I usually cut them in half and then into smaller sections for easy snacking. You can serve them immediately or refrigerate them until you’re ready to enjoy. They make a fantastic grab-and-go meal or a fun appetizer for gatherings!
Tips for Success
- Prep your ingredients ahead of time to save on cooking day.
- Use a sharp knife for clean cuts when slicing the wraps.
- Experiment with different dressings to keep things exciting.
- Wrap tightly but not too tight to avoid spills.
- Store leftovers in an airtight container to maintain freshness.
Equipment Needed
- Cutting Board: A sturdy surface for assembling your wraps. A clean countertop works too!
- Sharp Knife: Essential for slicing the wraps. A pizza cutter can also do the trick!
- Spatula or Spoon: Perfect for spreading the dressing evenly on the tortillas.
- Mixing Bowl: Handy for combining any additional ingredients or toppings.
Variations of Mini Wraps
- Veggie Delight: Swap the chicken for a mix of colorful veggies like bell peppers, cucumbers, and shredded carrots for a refreshing vegetarian option.
- Spicy Southwest: Add black beans, corn, and a spicy chipotle dressing for a zesty twist that packs a punch!
- Italian Style: Use sliced salami, provolone cheese, and a drizzle of balsamic vinaigrette for a taste of Italy.
- Breakfast Wrap: Fill with scrambled eggs, diced tomatoes, and avocado for a hearty breakfast on the go.
- Low-Carb Option: Use lettuce leaves instead of tortillas for a lighter, low-carb version that’s just as delicious!
Serving Suggestions for Mini Wraps
- Fresh Veggies: Serve with a side of crunchy carrot sticks or cucumber slices for a refreshing crunch.
- Dips: Pair with extra ranch dressing, hummus, or guacamole for added flavor.
- Drinks: A chilled lemonade or iced tea complements these wraps perfectly.
- Presentation: Arrange the wraps on a colorful platter for a vibrant display at gatherings.
FAQs about Mini Wraps
Can I make mini wraps ahead of time?
Absolutely! Mini wraps are perfect for meal prep. You can assemble them a day in advance and store them in the fridge. Just make sure to wrap them tightly in plastic wrap or place them in an airtight container to keep them fresh.
What can I use instead of ranch dressing?
If ranch isn’t your thing, no worries! You can swap it out for hummus, guacamole, or any dressing you love. A zesty vinaigrette or creamy Caesar dressing can also add a delightful twist to your mini wraps.
Are mini wraps suitable for kids?
How do I store leftover mini wraps?
To keep your mini wraps fresh, store any leftovers in an airtight container in the fridge. They should stay good for about 2-3 days. Just remember to enjoy them cold or give them a quick zap in the microwave if you prefer them warm!
Can I freeze mini wraps?
Yes, you can freeze mini wraps! Just wrap them tightly in plastic wrap and place them in a freezer-safe bag. When you’re ready to eat, let them thaw in the fridge overnight, and they’ll be ready to enjoy!
Final Thoughts
Mini wraps are more than just a quick meal; they’re a canvas for creativity and a way to bring the family together. I love how they can be customized to fit any taste, making them a hit at any gathering. Whether you’re enjoying them as a snack or a light meal, each bite is a delightful explosion of flavors. Plus, they’re perfect for busy days when time is short. So, roll up your sleeves, gather your ingredients, and let the mini wrap magic begin! You’ll find that these little bundles of joy can brighten up any day.
Print
Mini Wraps: Discover Easy and Delicious Recipe Ideas!
- Total Time: 15 minutes
- Yield: 4 servings 1x
- Diet: Low Calorie
Description
Mini wraps are a versatile and delicious option for snacks or meals, perfect for any occasion.
Ingredients
- 4 large tortillas
- 1 cup cooked chicken, shredded
- 1 cup lettuce, chopped
- 1/2 cup cherry tomatoes, halved
- 1/2 cup cheese, shredded
- 1/4 cup ranch dressing
Instructions
- Lay out the tortillas on a flat surface.
- Spread ranch dressing evenly over each tortilla.
- Layer shredded chicken, lettuce, cherry tomatoes, and cheese on top of the dressing.
- Roll the tortillas tightly to form wraps.
- Slice each wrap into bite-sized pieces.
- Serve immediately or refrigerate until ready to serve.
Notes
- Feel free to customize the fillings based on your preferences.
- These wraps can be made ahead of time for easy meal prep.
- Try using different dressings for varied flavors.
- Prep Time: 15 minutes
- Cook Time: 0 minutes
- Category: Appetizer
- Method: No-cook
- Cuisine: American
Nutrition
- Serving Size: 1 wrap
- Calories: 150
- Sugar: 2g
- Sodium: 300mg
- Fat: 7g
- Saturated Fat: 3g
- Unsaturated Fat: 4g
- Trans Fat: 0g
- Carbohydrates: 15g
- Fiber: 2g
- Protein: 10g
- Cholesterol: 30mg

