
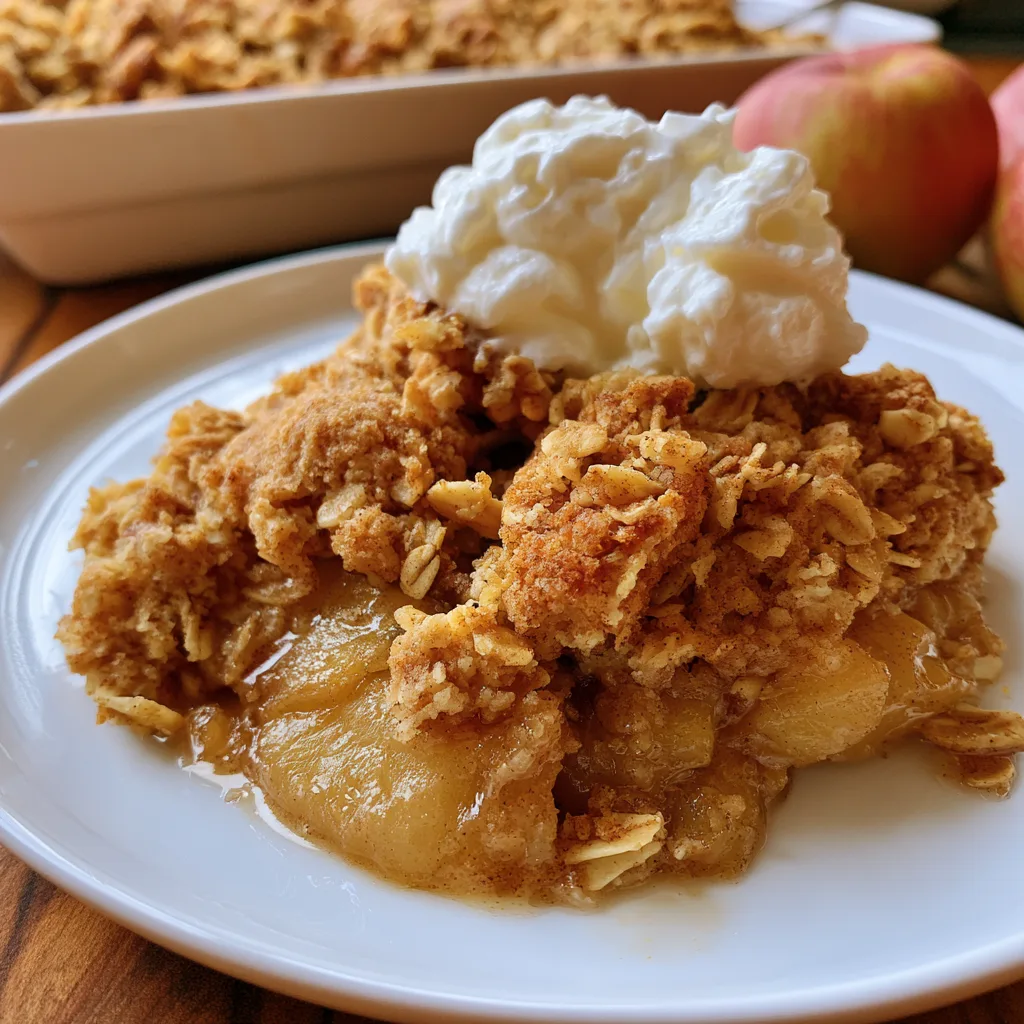
Introduction to The Easiest Apple Crisp
As a busy mom, I know how precious time can be, especially when it comes to whipping up something delicious. That’s why I’m excited to share with you The Easiest Apple Crisp you’ll ever make! This recipe is a warm hug in dessert form, perfect for those hectic days when you want to impress your loved ones without spending hours in the kitchen. With just a handful of ingredients and minimal prep, you can create a comforting treat that fills your home with the sweet aroma of baked apples and cinnamon. Trust me, your family will thank you!
Why You’ll Love This The Easiest Apple Crisp
This apple crisp is a game-changer for busy days! It’s incredibly easy to make, taking just 15 minutes of prep time. The delightful combination of sweet, tender apples and a crunchy topping will have your family begging for seconds. Plus, it’s versatile enough to adapt to whatever fruits you have on hand. Whether it’s a weeknight dessert or a special occasion, this recipe is sure to impress!
Ingredients for The Easiest Apple Crisp
Gathering the right ingredients is the first step to creating The Easiest Apple Crisp. Here’s what you’ll need:
- Sliced Apples: Use your favorite variety, like Granny Smith or Honeycrisp, for a perfect balance of tartness and sweetness.
- Brown Sugar: This adds a rich, caramel-like flavor. You can substitute with coconut sugar for a healthier option.
- Rolled Oats: They provide that delightful crunch. Quick oats work too, but rolled oats give a better texture.
- All-Purpose Flour: This helps bind the topping together. For a gluten-free version, try almond or oat flour.
- Cinnamon: A warm spice that enhances the apple flavor. Feel free to add nutmeg for an extra kick!
- Unsalted Butter: Melted butter brings richness to the crumble. You can use coconut oil for a dairy-free alternative.
For exact measurements, check the bottom of the article where you can find everything listed for easy printing. Happy cooking!
How to Make The Easiest Apple Crisp
Now that you have your ingredients ready, let’s dive into making The Easiest Apple Crisp! Follow these simple steps, and you’ll have a delicious dessert in no time.
Step 1: Preheat the Oven
First things first, preheat your oven to 350°F (175°C). Preheating is crucial because it ensures even baking. You want that perfect golden-brown topping, and starting with a hot oven helps achieve that. So, while you prepare the rest, let the oven do its thing!
Step 2: Prepare the Apples
Next, grab those sliced apples and place them in a large bowl. Sprinkle in some cinnamon and half of the brown sugar. Toss everything together gently. This step is where the magic begins! The cinnamon will enhance the apple flavor, making your kitchen smell heavenly. Make sure the apples are evenly coated for the best taste.
Step 3: Make the Crumble Topping
In another bowl, combine the rolled oats, all-purpose flour, the remaining brown sugar, and melted butter. Mix until it resembles a crumbly texture. This topping is what makes The Easiest Apple Crisp so delightful! The oats add a lovely crunch, while the butter binds everything together. Don’t be afraid to get your hands in there for the best results!
Step 4: Assemble the Dish
Now it’s time to layer! Spread the apple mixture evenly in a baking dish. Then, sprinkle the crumble topping generously over the apples. Make sure to cover all the apples; you want every bite to be delicious. This layering creates a beautiful contrast between the soft apples and the crunchy topping.
Step 5: Bake to Perfection
Pop your dish into the preheated oven and bake for 30-35 minutes. Keep an eye on it! You’ll know it’s done when the top is golden brown and the apples are tender. If you want to be extra sure, you can poke a fork into the apples to check their softness. The aroma wafting through your home will be irresistible!
Step 6: Cool and Serve
Once baked, let your apple crisp cool for a few minutes. This waiting time allows the juices to settle, making it easier to serve. Trust me, a warm bowl of apple crisp topped with vanilla ice cream is pure bliss. Enjoy every bite of this comforting dessert!
Tips for Success
- Use a mix of sweet and tart apples for a balanced flavor.
- Don’t skip the cinnamon; it elevates the taste of the apples.
- For a crunchier topping, let the crumble sit in the fridge for 10 minutes before baking.
- Experiment with adding nuts or dried fruits to the topping for extra texture.
- Serve warm for the best experience, especially with ice cream!
Equipment Needed
- Baking Dish: A 9×13 inch dish works perfectly. You can also use a cast-iron skillet for a rustic touch.
- Mixing Bowls: Have a couple of medium-sized bowls on hand for mixing ingredients.
- Measuring Cups: Essential for accurate ingredient portions. Use a kitchen scale for precision if you prefer.
- Spatula: Great for mixing and spreading the apple mixture evenly.
Variations of The Easiest Apple Crisp
- Berry Bliss: Add a cup of fresh or frozen berries like blueberries or raspberries for a fruity twist.
- Pear Perfection: Substitute half of the apples with ripe pears for a unique flavor combination.
- Nutty Crunch: Mix in chopped walnuts or pecans into the crumble topping for added crunch and nutrition.
- Gluten-Free Delight: Use gluten-free oats and almond flour instead of all-purpose flour for a gluten-free version.
- Spiced Up: Add a pinch of nutmeg or ginger to the apple mixture for an extra layer of warmth and spice.
Serving Suggestions for The Easiest Apple Crisp
- Serve warm with a scoop of vanilla ice cream for a classic pairing.
- Drizzle caramel sauce over the top for an indulgent touch.
- Pair with a dollop of whipped cream for a light finish.
- Enjoy with a cup of hot tea or coffee for a cozy dessert experience.
- Garnish with fresh mint leaves for a pop of color and freshness.
FAQs about The Easiest Apple Crisp
As you embark on your journey to make The Easiest Apple Crisp, you might have a few questions. Here are some common queries I’ve encountered, along with helpful answers!
Can I use frozen apples for this recipe?
Absolutely! Frozen apples work well, but make sure to thaw and drain them first. This prevents excess moisture from making your crisp soggy.
How do I store leftovers?
Store any leftovers in an airtight container in the refrigerator for up to three days. Just reheat in the oven for a few minutes to bring back that fresh-baked taste!
Can I make this apple crisp ahead of time?
Yes! You can prepare the apple mixture and crumble topping separately. Just assemble and bake when you’re ready to serve. It’s a great time-saver for busy days!
What can I substitute for brown sugar?
If you’re out of brown sugar, you can use white sugar mixed with a bit of molasses. Alternatively, coconut sugar is a fantastic, healthier option!
Is this recipe suitable for a gluten-free diet?
Definitely! Just swap the all-purpose flour for gluten-free flour and ensure your oats are certified gluten-free. You’ll still enjoy that delicious crunch!
Final Thoughts
Making The Easiest Apple Crisp is more than just baking; it’s about creating memories in the kitchen. The joy of watching your family gather around the table, eagerly anticipating that first warm bite, is truly priceless. This recipe is a reminder that simple ingredients can lead to extraordinary moments. Whether it’s a cozy weeknight dessert or a special occasion, this apple crisp brings comfort and happiness. So, roll up your sleeves, embrace the sweet aroma, and enjoy the delightful experience of sharing this delicious treat with your loved ones. Happy baking!
Print
The Easiest Apple Crisp You’ll Ever Make Today!
- Total Time: 50 minutes
- Yield: 8 servings 1x
- Diet: Vegetarian
Description
A simple and delicious apple crisp recipe that is easy to make and perfect for any occasion.
Ingredients
- 6 cups of sliced apples
- 1 cup of brown sugar
- 1 cup of rolled oats
- 1 cup of all-purpose flour
- 1 teaspoon of cinnamon
- 1/2 cup of unsalted butter, melted
Instructions
- Preheat the oven to 350°F (175°C).
- In a large bowl, combine sliced apples with cinnamon and half of the brown sugar.
- In another bowl, mix the oats, flour, remaining brown sugar, and melted butter until crumbly.
- Spread the apple mixture in a baking dish and top with the oat mixture.
- Bake for 30-35 minutes or until the top is golden brown and the apples are tender.
- Let it cool slightly before serving.
Notes
- Serve warm with vanilla ice cream for an extra treat.
- Feel free to mix in other fruits like pears or berries.
- Store leftovers in the refrigerator for up to 3 days.
- Prep Time: 15 minutes
- Cook Time: 35 minutes
- Category: Dessert
- Method: Baking
- Cuisine: American
Nutrition
- Serving Size: 1 serving
- Calories: 250
- Sugar: 15g
- Sodium: 150mg
- Fat: 10g
- Saturated Fat: 5g
- Unsaturated Fat: 3g
- Trans Fat: 0g
- Carbohydrates: 38g
- Fiber: 3g
- Protein: 2g
- Cholesterol: 15mg