Introduction to S’more Bars
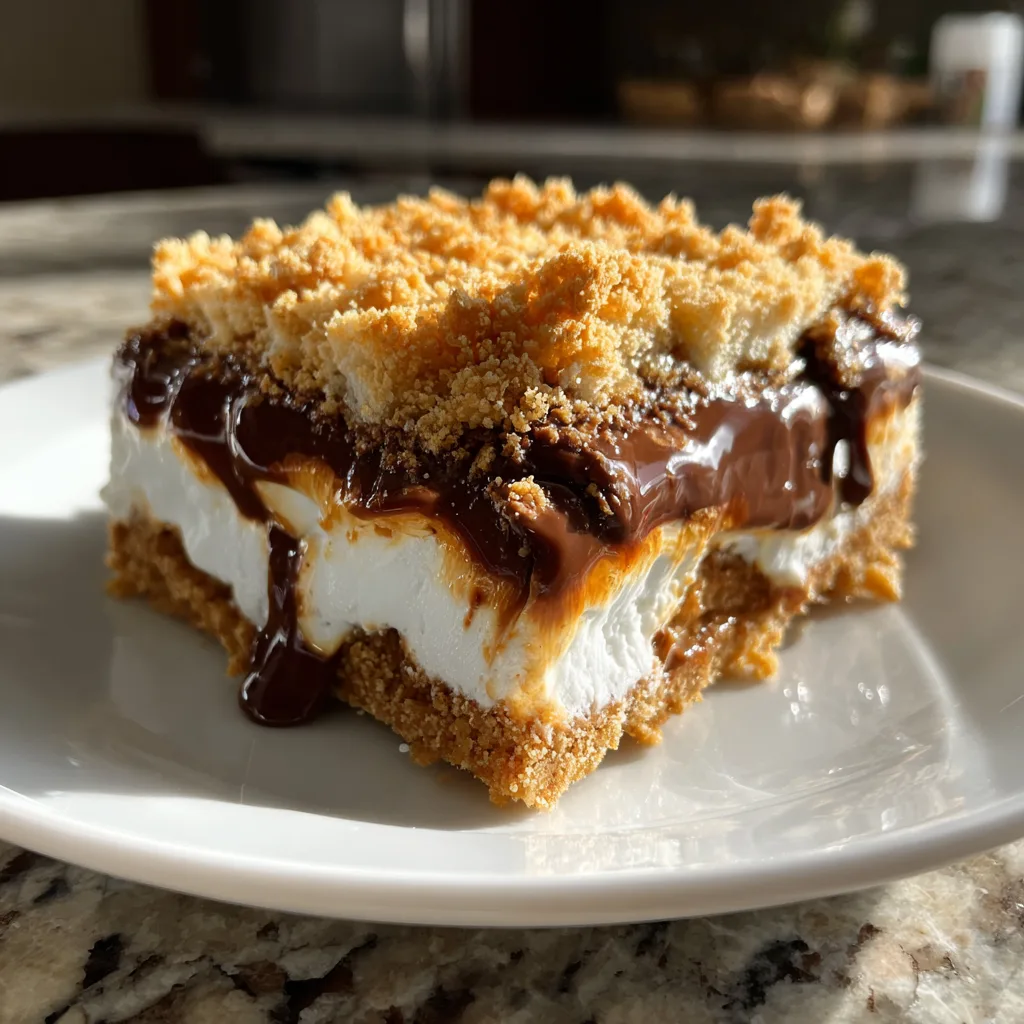
As a busy mom, I know how precious time can be, especially when it comes to whipping up something sweet. That’s why I absolutely adore these S’more Bars! They capture the nostalgic flavors of campfire s’mores in a convenient, easy-to-make bar form. Imagine the delightful combination of graham crackers, gooey marshmallows, and rich chocolate, all baked into one delicious treat. Whether you’re looking to impress your loved ones or simply satisfy your sweet tooth after a long day, these bars are the perfect solution. Trust me, they’ll have everyone coming back for seconds!
Why You’ll Love This S’more Bars
These S’more Bars are a dream come true for busy lives! They come together in just 15 minutes of prep time, making them a quick solution for unexpected guests or a sweet treat after dinner. The taste? Oh, it’s like a warm hug from your childhood! With that perfect balance of crunchy, gooey, and chocolaty goodness, they’re sure to become a family favorite. Plus, who doesn’t love a dessert that’s this easy to make?
Ingredients for S’more Bars
Gathering the right ingredients is half the fun! Here’s what you’ll need to create these delightful S’more Bars:
- Graham cracker crumbs: These provide the classic base and crunch. You can crush whole graham crackers if you prefer a fresher taste.
- Unsalted butter: This adds richness and helps bind the crust together. If you’re looking for a lighter option, coconut oil works well too.
- Brown sugar: It brings a lovely caramel flavor to the bars. You can substitute with white sugar, but the taste will be slightly different.
- Mini marshmallows: These are the gooey stars of the show! If you can’t find mini ones, regular marshmallows cut into smaller pieces will do.
- Chocolate chips: Use semi-sweet for a classic taste, or dark chocolate for a richer flavor. You can even mix in some peanut butter chips for a fun twist!
- All-purpose flour: This helps to create a nice texture in the bars. If you’re gluten-free, almond flour or a gluten-free blend can be great substitutes.
- Salt: Just a pinch enhances all the flavors. If you’re watching your sodium intake, feel free to skip it.
For exact measurements, check the bottom of the article where you can find everything listed for easy printing!
How to Make S’more Bars
Now that you have your ingredients ready, let’s dive into the fun part—making these delicious S’more Bars! Follow these simple steps, and you’ll have a sweet treat that’s sure to impress.
Step 1: Preheat the Oven
First things first, preheat your oven to 350°F (175°C). Preheating is crucial because it ensures even baking. If you skip this step, your bars might end up unevenly cooked. Trust me, you want that perfect golden brown finish!
Step 2: Prepare the Crust
In a mixing bowl, combine your graham cracker crumbs, melted butter, and brown sugar. Stir until everything is well mixed and resembles wet sand. This mixture will form the base of your S’more Bars, so make sure it’s evenly blended for the best texture.
Step 3: Press the Mixture
Next, take your crust mixture and press it firmly into the bottom of a greased baking pan. Use your fingers or the back of a measuring cup to create an even layer. This step is important because a well-pressed crust will hold the bars together nicely once baked.
Step 4: Add Toppings
Now comes the fun part! Sprinkle the chocolate chips and mini marshmallows evenly over the crust. Feel free to get creative here—add as much or as little as you like. The more chocolate and marshmallows, the better, right?
Step 5: Mix Flour and Salt
In a separate bowl, mix together the all-purpose flour and salt. This step is simple but essential. Once combined, sprinkle this mixture over the chocolate and marshmallows. It helps to bind everything together and adds a nice texture to your bars.
Step 6: Bake the Bars
Pop your baking pan into the preheated oven and bake for 20-25 minutes. Keep an eye on them! You’ll know they’re done when the top is golden brown and the marshmallows are slightly toasted. A toothpick inserted in the center should come out clean.
Step 7: Cool and Cut
Once baked, remove the pan from the oven and let it cool completely. This is a crucial step! If you cut them too soon, they might fall apart. Once cooled, slice into bars and enjoy the deliciousness of your homemade S’more Bars!
Tips for Success
- Use fresh ingredients for the best flavor—especially the chocolate and marshmallows.
- Don’t skip the cooling step; it helps the bars set properly.
- For a fun twist, try adding crushed nuts or a sprinkle of sea salt on top before baking.
- Store leftovers in an airtight container to keep them fresh and chewy.
- Feel free to experiment with different types of chocolate for unique flavors!
Equipment Needed
- Baking pan: A 9×9 inch pan works perfectly. If you don’t have one, a similar-sized dish will do.
- Mixing bowls: Use any size you have on hand. Just make sure they’re big enough to hold your ingredients.
- Measuring cups: Essential for accuracy. If you’re in a pinch, use a regular coffee mug for rough estimates.
- Spatula: Great for mixing and spreading. A wooden spoon can also do the trick!
Variations of S’more Bars
- Nutty Delight: Add chopped nuts like walnuts or pecans for a crunchy texture that complements the gooeyness.
- Peanut Butter Swirl: Drizzle melted peanut butter over the chocolate and marshmallows before baking for a rich, nutty flavor.
- Gluten-Free Option: Substitute graham cracker crumbs with gluten-free graham crackers or almond flour for a gluten-free treat.
- Fruit Infusion: Toss in some sliced strawberries or bananas for a fruity twist that adds freshness to the bars.
- Minty Fresh: Use mint chocolate chips instead of regular chocolate for a refreshing minty flavor that’s perfect for the holidays.
Serving Suggestions for S’more Bars
- Pair with Ice Cream: Serve warm S’more Bars with a scoop of vanilla or chocolate ice cream for a delightful contrast.
- Drizzle with Chocolate: A drizzle of melted chocolate on top adds an extra touch of indulgence.
- Fresh Berries: Fresh strawberries or raspberries on the side brighten up the plate and add a fruity note.
- Hot Cocoa: Enjoy with a steaming cup of hot cocoa for a cozy dessert experience.
- Presentation: Cut into fun shapes using cookie cutters for a playful twist that kids will love!
FAQs about S’more Bars
As you embark on your S’more Bars adventure, you might have a few questions. Here are some common queries I’ve encountered, along with helpful answers to guide you along the way!
Can I make S’more Bars ahead of time?
Absolutely! These bars can be made a day in advance. Just store them in an airtight container at room temperature. They’ll stay delicious and chewy, ready for you to enjoy whenever you like!
What can I substitute for graham cracker crumbs?
If you don’t have graham cracker crumbs, crushed digestive biscuits or vanilla wafers work well too. You can even use crushed pretzels for a salty twist!
How do I store leftover S’more Bars?
To keep your S’more Bars fresh, store them in an airtight container. They’ll last up to a week, but I doubt they’ll last that long with how tasty they are!
Can I freeze S’more Bars?
Yes, you can freeze them! Just wrap individual bars in plastic wrap and place them in a freezer-safe container. They’ll be good for up to three months. Just thaw them at room temperature before enjoying!
What’s the best way to reheat S’more Bars?
If you want to enjoy them warm, pop them in the microwave for about 10-15 seconds. This will make the chocolate gooey and the marshmallows soft again. Pure bliss!
Final Thoughts
Making S’more Bars is more than just baking; it’s about creating sweet memories with your loved ones. The joy of pulling these gooey, chocolatey treats from the oven fills the kitchen with warmth and nostalgia. Each bite transports you back to carefree summer nights by the campfire, surrounded by laughter and love. Whether you’re sharing them with family or indulging solo after a long day, these bars are sure to bring a smile to your face. So, roll up your sleeves, gather your ingredients, and let the magic of S’more Bars brighten your day!
Print
S’more Bars That Will Delight Your Sweet Tooth Today!
- Total Time: 40 minutes
- Yield: 12 bars 1x
- Diet: Vegetarian
Description
Delicious S’more Bars that combine the flavors of graham crackers, chocolate, and marshmallows in a convenient bar form.
Ingredients
- 1 cup graham cracker crumbs
- 1/2 cup unsalted butter, melted
- 1/2 cup brown sugar
- 1 cup mini marshmallows
- 1 cup chocolate chips
- 1/2 cup all-purpose flour
- 1/4 teaspoon salt
Instructions
- Preheat the oven to 350°F (175°C).
- In a bowl, mix graham cracker crumbs, melted butter, and brown sugar until well combined.
- Press the mixture into the bottom of a greased baking pan.
- Sprinkle chocolate chips and mini marshmallows evenly over the crust.
- In another bowl, mix flour and salt, then sprinkle over the chocolate and marshmallows.
- Bake for 20-25 minutes or until golden brown.
- Allow to cool before cutting into bars.
Notes
- For a richer flavor, use dark chocolate chips.
- Store leftovers in an airtight container for up to a week.
- Feel free to add nuts for extra crunch.
- Prep Time: 15 minutes
- Cook Time: 25 minutes
- Category: Dessert
- Method: Baking
- Cuisine: American
Nutrition
- Serving Size: 1 bar
- Calories: 180
- Sugar: 12g
- Sodium: 150mg
- Fat: 8g
- Saturated Fat: 5g
- Unsaturated Fat: 2g
- Trans Fat: 0g
- Carbohydrates: 24g
- Fiber: 1g
- Protein: 2g
- Cholesterol: 15mg

